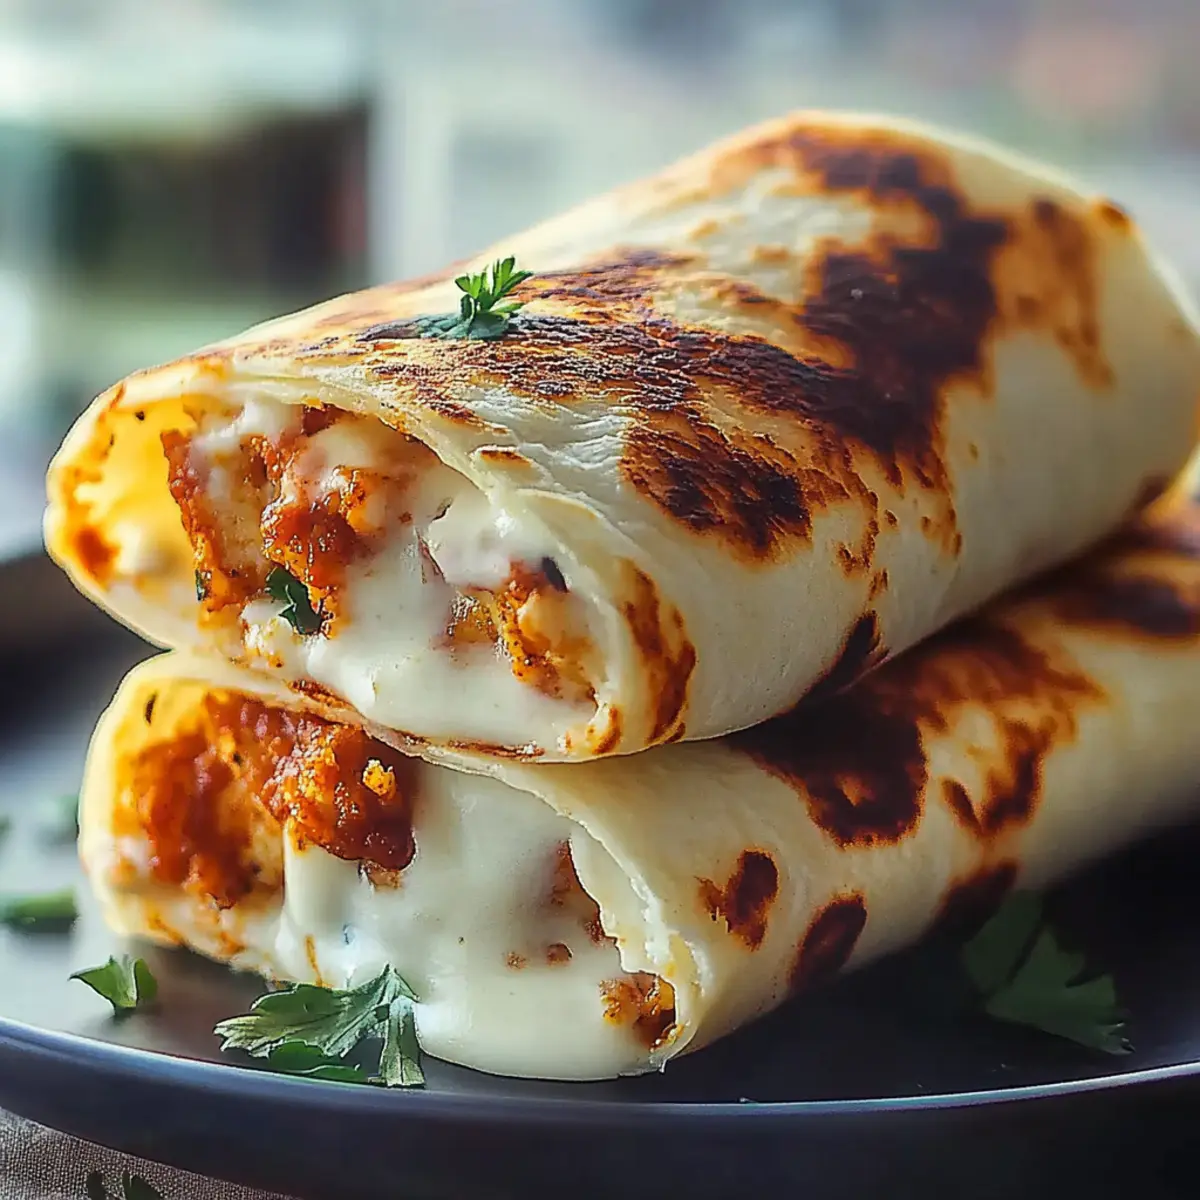
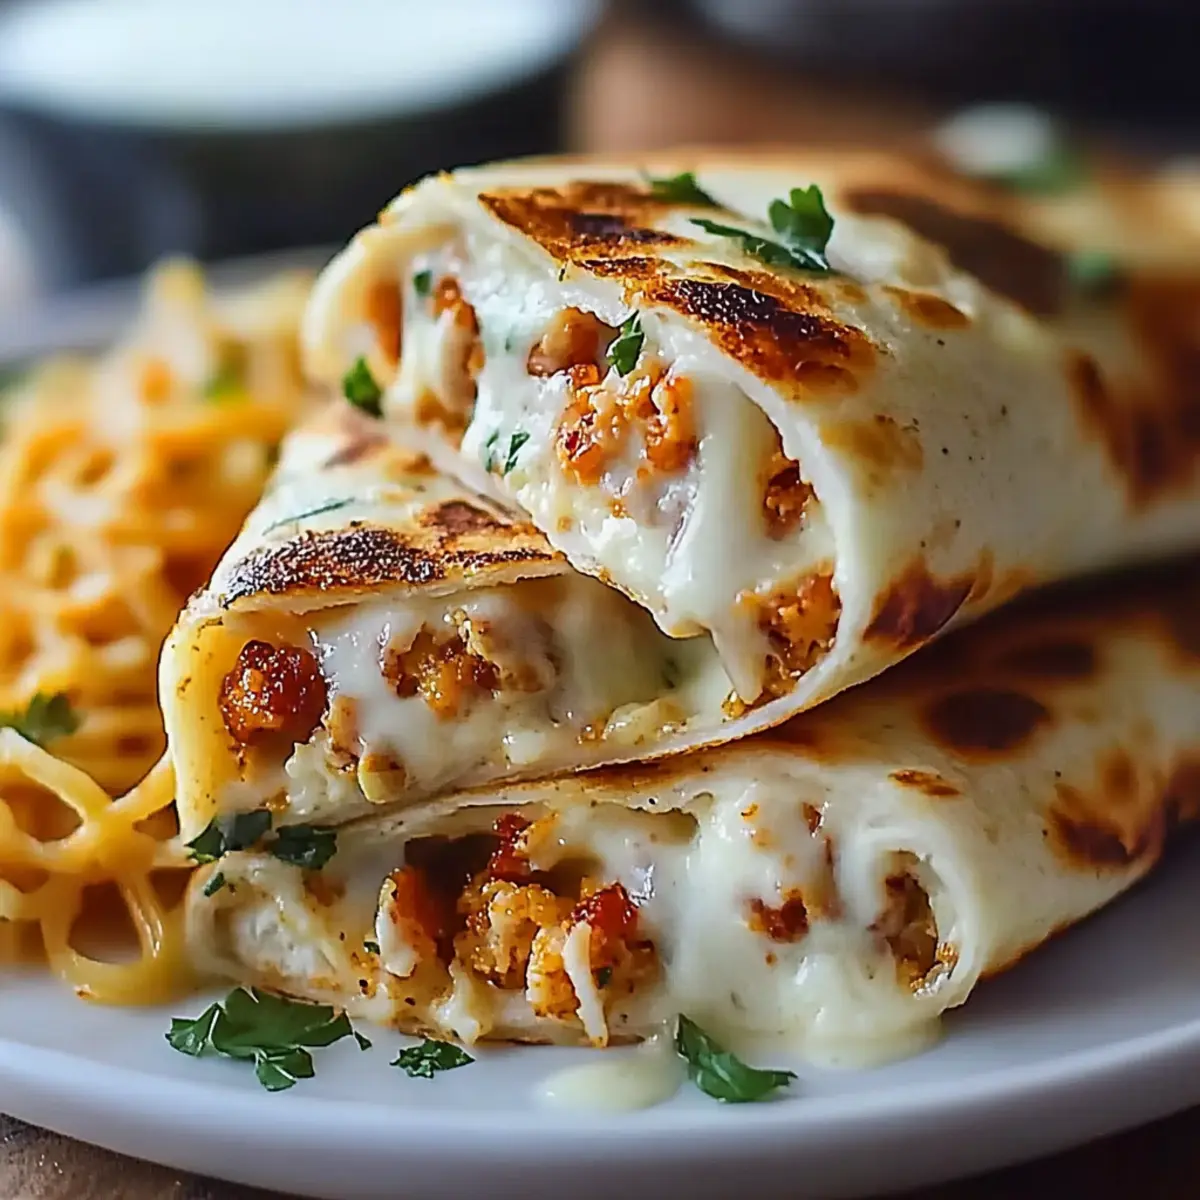
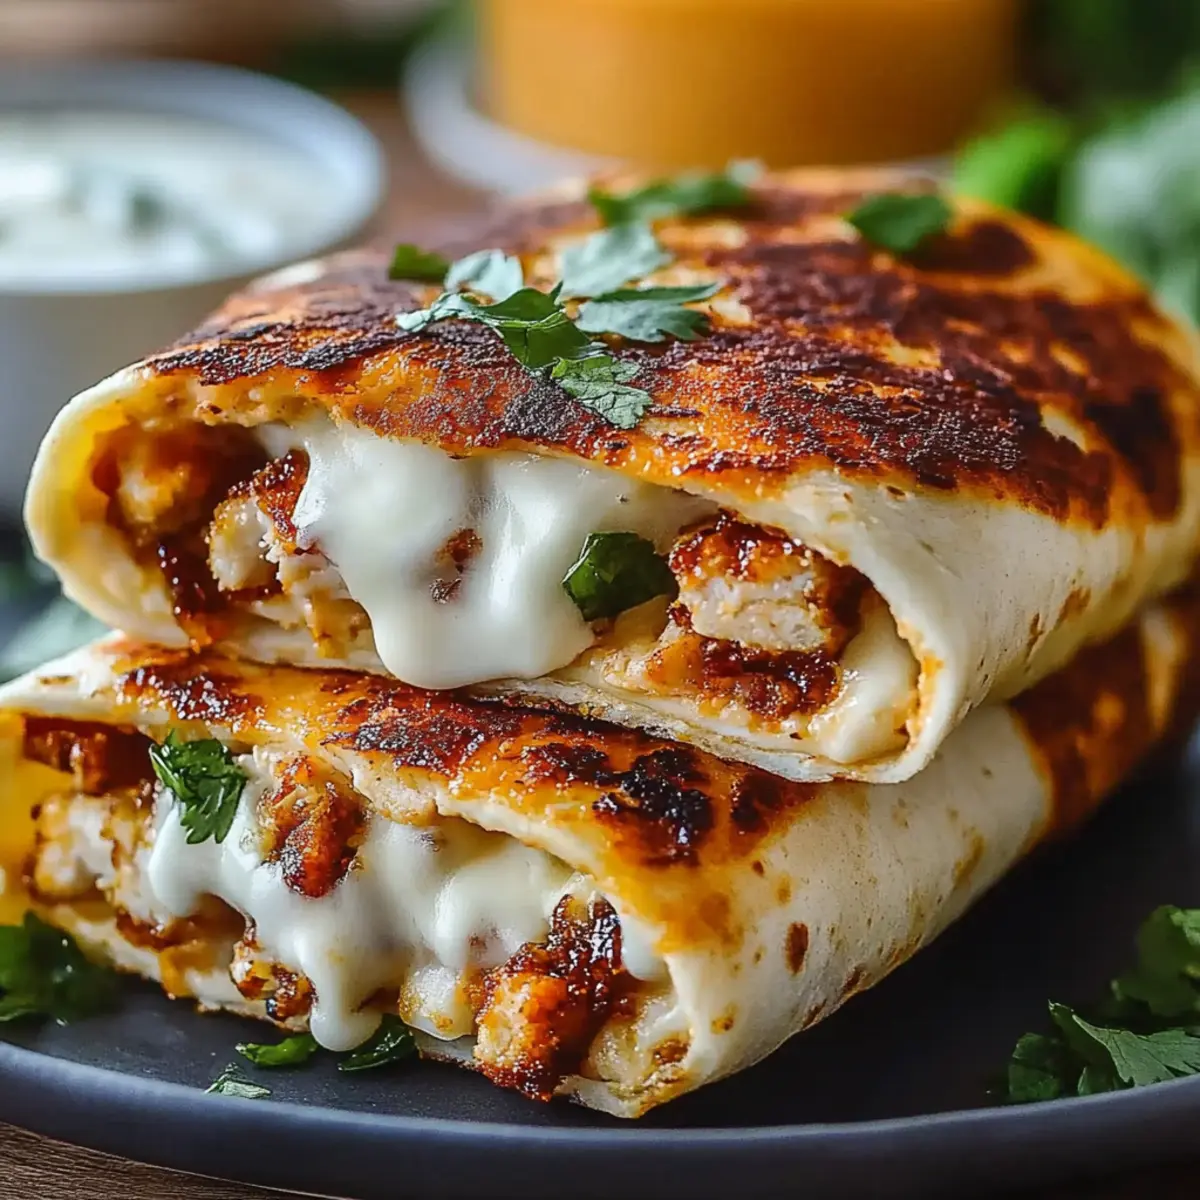
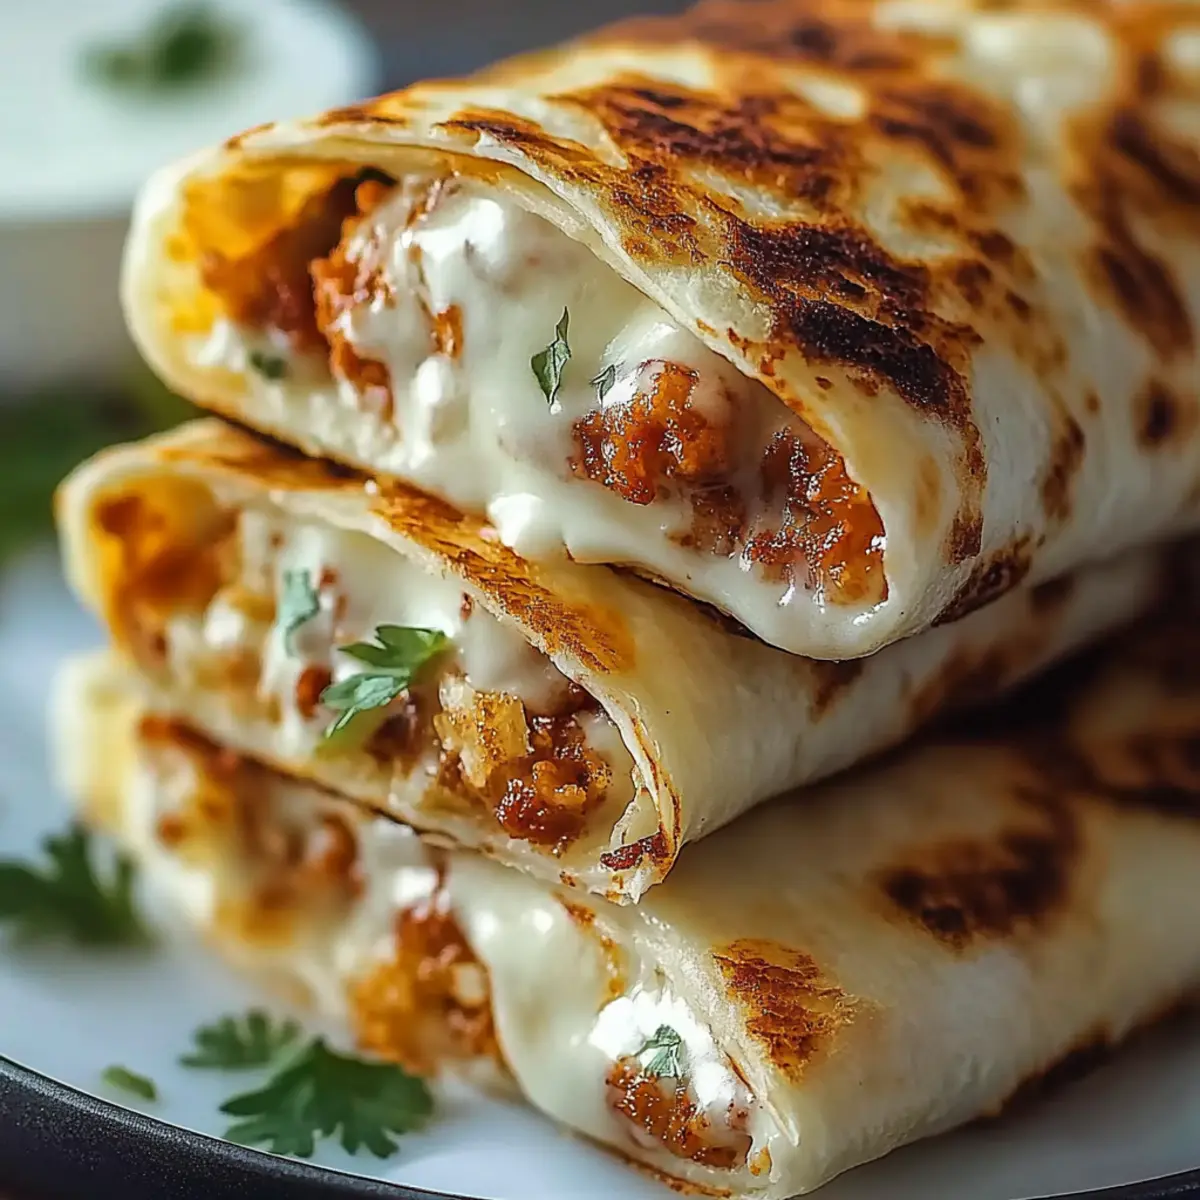
The moment you take a bite of these Low Carb Cheesy Garlic Chicken Wraps, you're transported to a cozy kitchen filled with the delightful aroma of melting cheese and garlic. I love how quickly these wraps come together—just 25 minutes from prep to plate! Not only are they a scrumptious way to use leftover chicken, but they're also a fantastic low-carb solution for anyone craving a satisfying meal without the guilt. Each bite envelops you in creamy, cheesy goodness, making them a perfect choice for a weeknight dinner or a delightful weekend treat. Curious to find out how to whip these up in no time? Let’s dive in!
Why are these wraps a must-try?
Simplicity: With just 25 minutes from start to finish, these wraps are perfect for busy weeknights.
Flavor Explosion: You’ll love the rich combination of mozzarella, cheddar, and garlic that creates an irresistible cheesy experience.
Low-Carb Delight: Each wrap packs only 6g of carbs, making it a delicious guilt-free option for those watching their intake.
Crowd-Pleaser: Whether serving family or friends, these wraps are sure to satisfy even the pickiest eaters!
Versatile: Customize with your favorite veggies or spices to make each wrap uniquely your own!
Cheesy Garlic Chicken Wraps Ingredients
Unlock the flavors of these delectable wraps with this easy ingredient list!
For the Chicken Filling
- Cooked chicken breast – Use leftover chicken for quicker prep time.
- Shredded mozzarella cheese – Melts beautifully, adding that gooey texture we crave.
- Shredded cheddar cheese – The sharpness of cheddar complements the other cheeses perfectly.
- Minced garlic – Fresh garlic elevates the flavor profile, bringing warmth to the dish.
- Cream cheese – Adds creaminess and binds the ingredients together flawlessly.
For the Wraps
- Low-carb tortillas or wraps – Ideal for keeping the carbs low while still delivering on taste.
For Cooking and Garnish
- Olive oil – A light brush helps achieve that golden, crispy exterior.
- Fresh parsley – Sprinkle on top for a hint of freshness and color.
- Salt and pepper – Adjust according to taste for the perfect seasoning.
Now you're all set to make these irresistible Cheesy Garlic Chicken Wraps!
Step‑by‑Step Instructions for Cheesy Garlic Chicken Wraps
Step 1: Prepare Your Chicken
Begin by shredding 2 cups of cooked chicken breast into bite-sized pieces. This can be easily accomplished using two forks, ensuring the chicken is light and fluffy. With the shredded chicken ready, you'll have a beautifully textured filling that serves as the foundation for your Cheesy Garlic Chicken Wraps.
Step 2: Mix the Cheesy Goodness
In a mixing bowl, combine the shredded chicken, 1 cup of shredded mozzarella cheese, and ½ cup of shredded cheddar cheese. Add 2 cloves of minced garlic and ¼ cup of softened cream cheese, then mix everything together thoroughly until the cheeses and chicken are evenly coated. This creamy mixture will deliver an explosion of flavor in every bite of your wraps.
Step 3: Season to Perfection
For optimal flavor in your cheesy filling, add salt and pepper to taste, stirring well to incorporate the seasonings. This step is essential for enhancing the overall flavor profile of your Cheesy Garlic Chicken Wraps, ensuring a balanced taste that complements the richness of the cheeses and the warmth of the garlic.
Step 4: Assemble the Wraps
Lay a large low-carb tortilla flat on a clean surface. Spoon a generous amount of the cheesy chicken mixture onto the center of the tortilla, leaving enough space around the edges for folding. To add a touch of freshness and color, sprinkle some chopped parsley on top of the mixture before proceeding to roll.
Step 5: Roll ‘Em Up
Fold in the sides of the tortilla over the filling, then carefully roll it up tightly from the bottom to secure all the delicious ingredients inside. The goal is to create a compact wrap that holds together well, making it easy to handle and eat, perfect for enjoying your scrumptious Cheesy Garlic Chicken Wraps.
Step 6: Cooking Options
Heat a skillet over medium heat and lightly brush the wrapped tortillas with 1 tablespoon of olive oil. Once the skillet is hot, place the wraps seam side down and cook for about 3-5 minutes until they are golden brown and crisp. Flip them over and cook for an additional 3-5 minutes, achieving a delightful crunchy exterior that complements the creamy filling.
How to Store and Freeze Cheesy Garlic Chicken Wraps
Fridge: Store any leftover wraps in an airtight container for up to 3 days. Reheat in a skillet to restore their crispiness.
Freezer: For longer storage, freeze wrapped Cheesy Garlic Chicken Wraps individually in plastic wrap, then place in a freezer bag. They’ll last up to 2 months!
Reheating: Thaw frozen wraps overnight in the fridge. Reheat in a skillet until golden brown, or microwave for a quick meal, though this may soften the tortillas.
Room Temperature: Avoid keeping cooked wraps at room temperature for more than 2 hours to ensure food safety.
What to Serve with Cheesy Garlic Chicken Wraps
These wraps are not just a meal; they’re the centerpiece around which your dinner conveys warmth and comfort.
-
Creamy Mashed Potatoes: The buttery richness of mashed potatoes provides a velvety contrast to the cheesy wraps, creating a beautifully balanced plate.
-
Fresh Garden Salad: Crisp greens with a tangy vinaigrette offer a refreshing crunch that complements the hearty wraps perfectly.
-
Roasted Vegetables: A colorful medley of roasted veggies enhances the meal with their sweet and savory flavors, bringing out the garlic notes in the wraps.
-
Garlic Bread: Add a side of buttery garlic bread for those who adore extra layers of flavor. It makes for a delightful dipper too!
-
Zesty Coleslaw: The crunchy texture and zesty dressing of coleslaw add a pop of brightness that cuts through the richness of the wrap fillings.
-
Sparkling Lemonade: A refreshing drink like sparkling lemonade provides a light, zesty contrast, making every bite of the Cheesy Garlic Chicken Wrap burst with flavor.
-
Chocolate Mousse: For dessert, indulge in a silky chocolate mousse to satisfy your sweet tooth, rounding out the meal with a touch of decadence.
Expert Tips for Cheesy Garlic Chicken Wraps
-
Perfectly Shredded Chicken: Ensure the chicken is shredded finely for even mixing and a better wrap texture. Use leftovers for a quicker meal!
-
Cheese Choices: Mix different types of cheeses to create custom flavors, but stick to mozzarella and cheddar for the best melt in your Cheesy Garlic Chicken Wraps.
-
Avoid Soggy Wraps: Don’t overstuff your wraps; this prevents them from becoming soggy and helps them hold their shape after cooking.
-
Check Heat Levels: Maintain medium heat while cooking to avoid burning the outside before the filling warms through.
-
Rest Before Serving: Allow the wraps to cool for a minute after cooking. This helps the cheese set slightly, making them easier to slice and serve.
Cheesy Garlic Chicken Wraps Variations
Feel free to let your creativity shine while making these wraps; there are endless ways to customize them!
-
Veggie-Packed: Add sautéed bell peppers and onions for extra flavor and crunch. Vegetables can complement the creamy filling beautifully!
-
Spicy Twist: Mix in some diced jalapeños or a dash of hot sauce to the cheesy filling. This will elevate the flavor profile and add a fun kick!
-
Herbed Bliss: Swap out parsley for fresh basil or cilantro for an aromatic twist. The fresh herbs will add a vibrant and refreshing note.
-
Gluten-Free: Use gluten-free wraps to adapt this dish for those avoiding gluten. It ensures everyone can enjoy these cheesy delights!
-
Different Cheeses: Try substituting goat cheese or pepper jack instead of mozzarella for a unique taste. The creamy tang of goat cheese adds a delightful surprise.
-
Crunchy Topping: Add crushed tortilla chips or breadcrumbs on top before cooking for an extra crunch. It transforms the texture and makes each bite even more satisfying!
-
Protein Power: Incorporate black beans or chickpeas into the filling for added protein and fiber. This heartens the wrap while keeping it deliciously cheesy.
-
Lighter Version: For a lighter twist, use Greek yogurt in place of cream cheese. It still delivers creaminess but with fewer calories!
Make Ahead Options
These Cheesy Garlic Chicken Wraps are perfect for meal prep enthusiasts! You can prepare the cheesy filling (chicken, cheeses, garlic, and cream cheese) and store it in the refrigerator for up to 3 days in advance. Simply mix the ingredients, season them to perfection, and refrigerate in an airtight container to keep everything fresh. When you're ready to enjoy, just assemble your wraps using the prepped filling and roll them up. Lightly brush with olive oil and cook in a skillet, which only takes about 3-5 minutes per side, allowing you to savor delicious homemade wraps in no time—with minimal fuss on busy weeknights!
Cheesy Garlic Chicken Wraps Recipe FAQs
How do I choose ripe ingredients for these wraps?
Absolutely! Freshness is key, especially for the garlic and parsley. Look for firm, unblemished cloves of garlic and vibrant green parsley leaves with no wilting. As for the chicken, using freshly cooked chicken breast will yield the best flavor. If you're using store-bought shredded chicken, ensure it's within its use-by date.
What’s the best way to store leftover wraps?
Very good question! Store any leftover wraps in an airtight container in the fridge, where they'll stay fresh for up to 3 days. If you're reheating them, warm them in a skillet to maintain their crispiness. Avoid using the microwave, as this may make them soggy!
Can I freeze Cheesy Garlic Chicken Wraps?
Absolutely! To freeze, wrap each Cheesy Garlic Chicken Wrap tightly in plastic wrap and then place them in a freezer bag. They’ll keep well for up to 2 months. When you’re ready to enjoy them, thaw them overnight in the fridge. Then heat them in a skillet until golden and warm, or for a quicker option, microwave them for about 1-2 minutes.
What if my wraps are soggy?
Oh no, soggy wraps can happen if they’re overstuffed or if excess moisture is present! To avoid this, ensure you don’t add too much filling and consider patting down any wet ingredients like fresh herbs before mixing. If they are already soggy, simply reheat them in a skillet over medium heat for a few minutes, allowing the exterior to crisp back up!
Are these wraps suitable for pets or allergies?
While the wraps are delicious for humans, it's essential to note that they aren’t safe for pets due to the onions and garlic in the ingredients. If you have food allergies, always check the labels of your cheese and wraps for allergens like dairy or gluten. You can even substitute with plant-based cheese if needed!
Indulgent Cheesy Garlic Chicken Wraps for Easy Weeknight Dinners
Ingredients
Equipment
Method
- Begin by shredding 2 cups of cooked chicken breast into bite-sized pieces using two forks.
- In a mixing bowl, combine the shredded chicken, 1 cup of shredded mozzarella cheese, and ½ cup of shredded cheddar cheese. Add 2 cloves of minced garlic and ¼ cup of softened cream cheese, then mix thoroughly.
- For optimal flavor, add salt and pepper to taste, stirring well to incorporate the seasonings.
- Lay a tortilla flat, spoon a generous amount of the cheesy chicken mixture onto the center, and sprinkle chopped parsley on top.
- Fold in the sides of the tortilla over the filling, then roll it up tightly from the bottom.
- Heat a skillet over medium heat, lightly brush the wrapped tortillas with olive oil, place seam side down, and cook for 3-5 minutes until golden brown. Flip and cook for an additional 3-5 minutes.

Leave a Reply