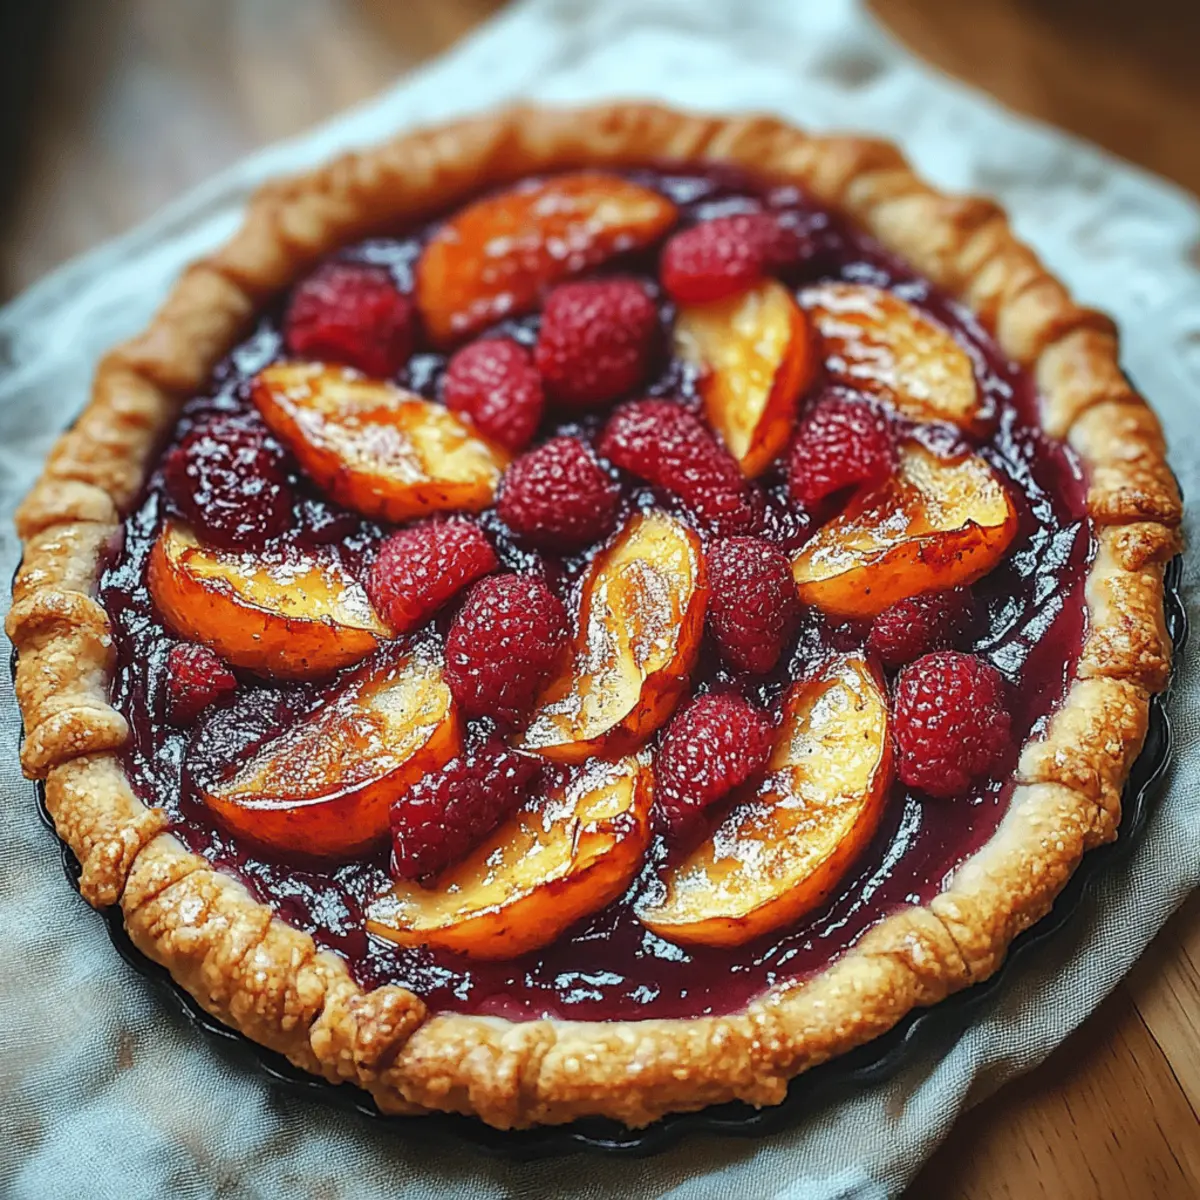
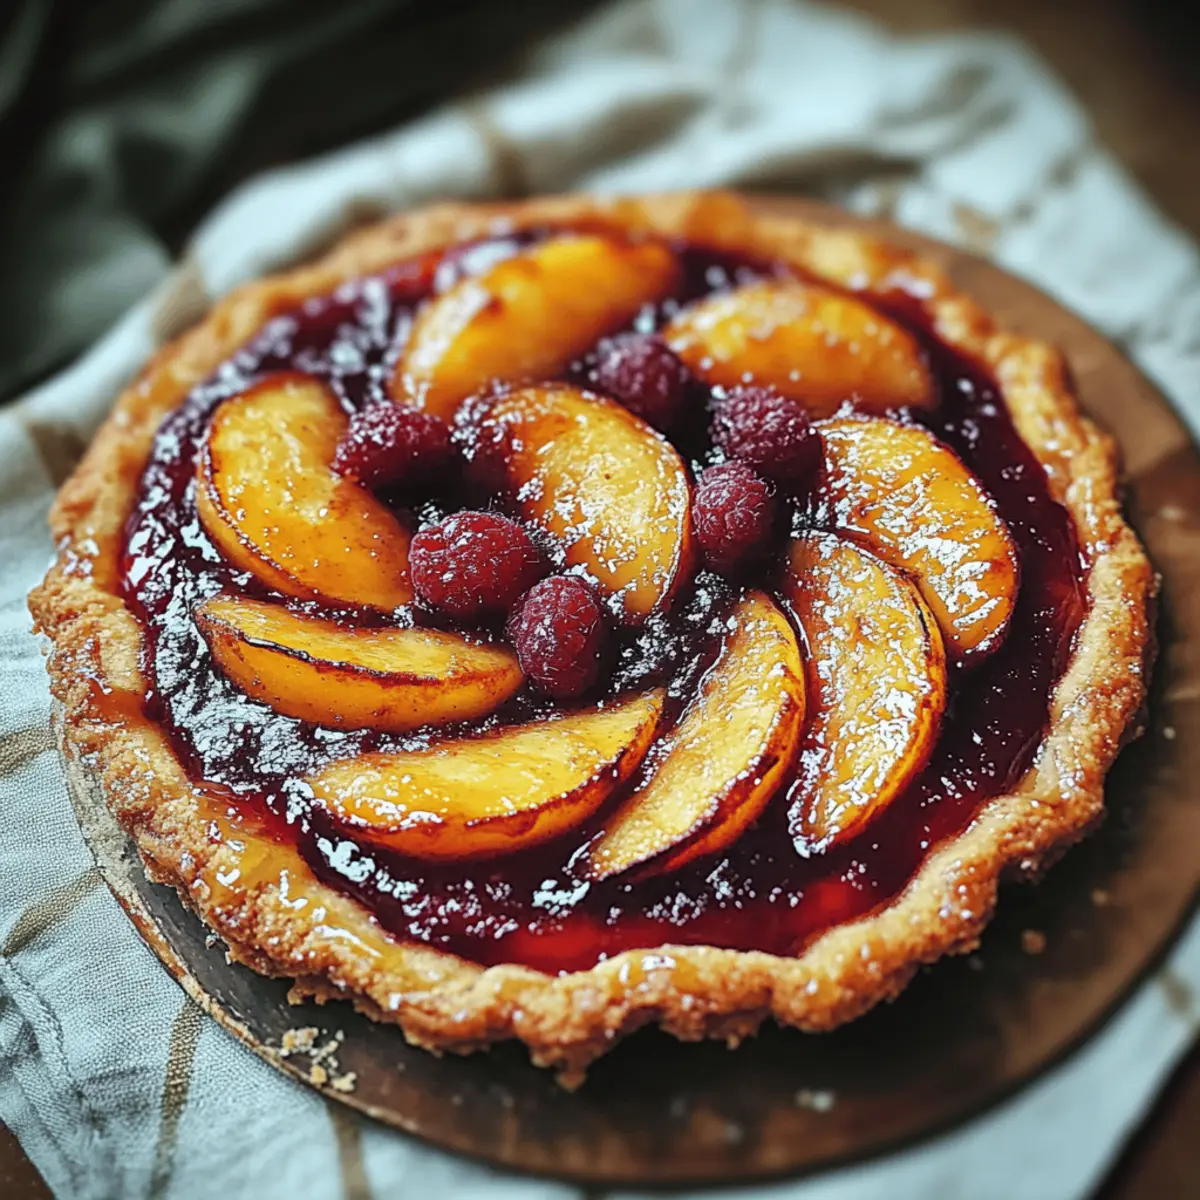
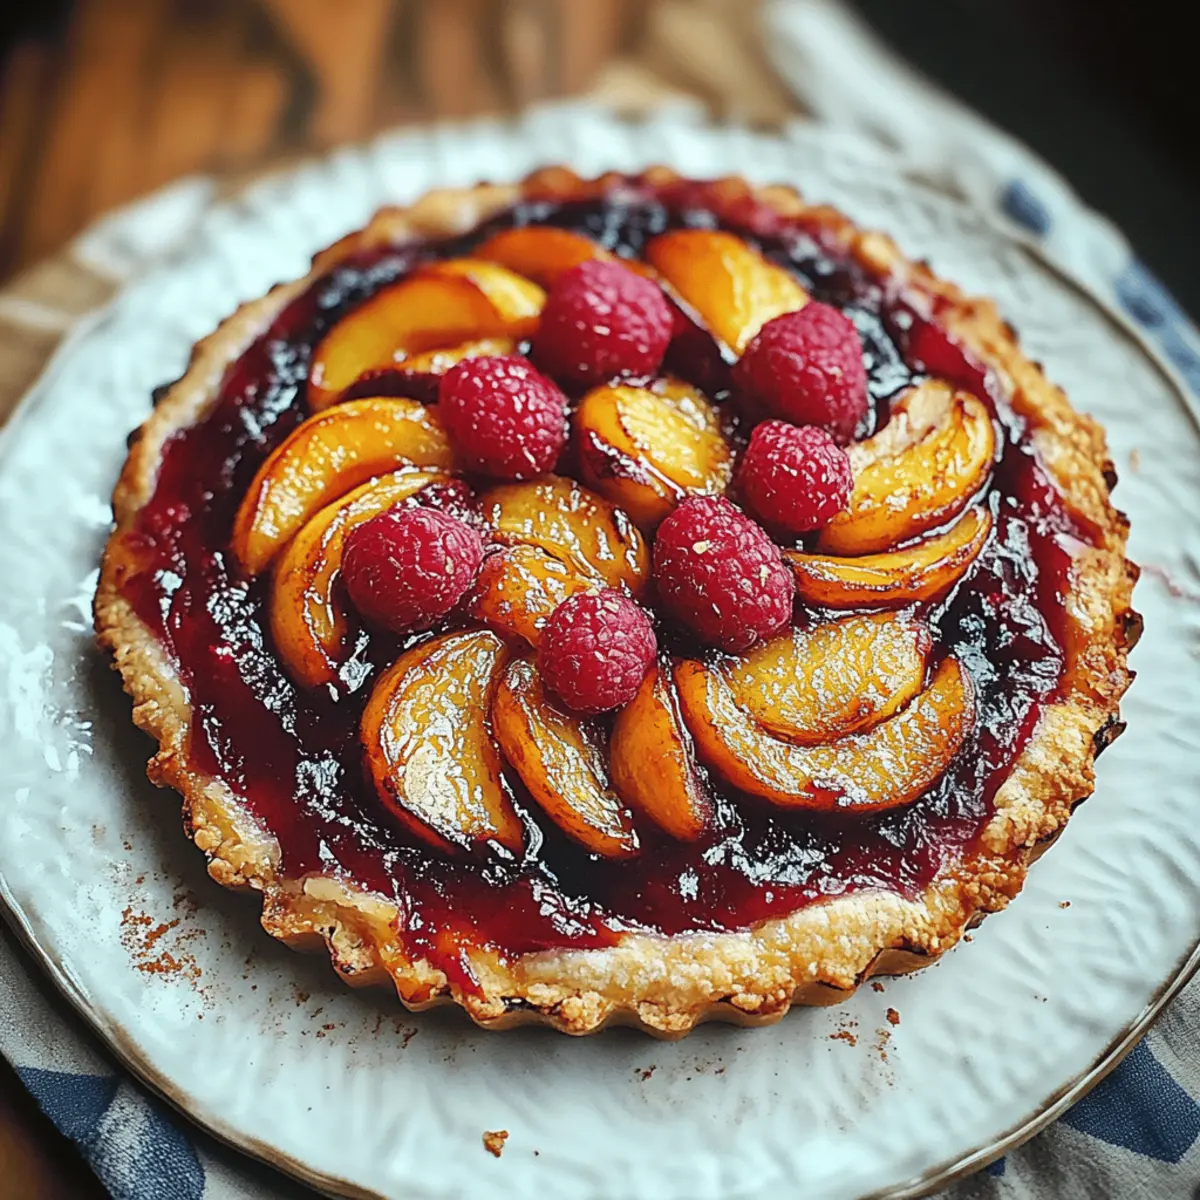
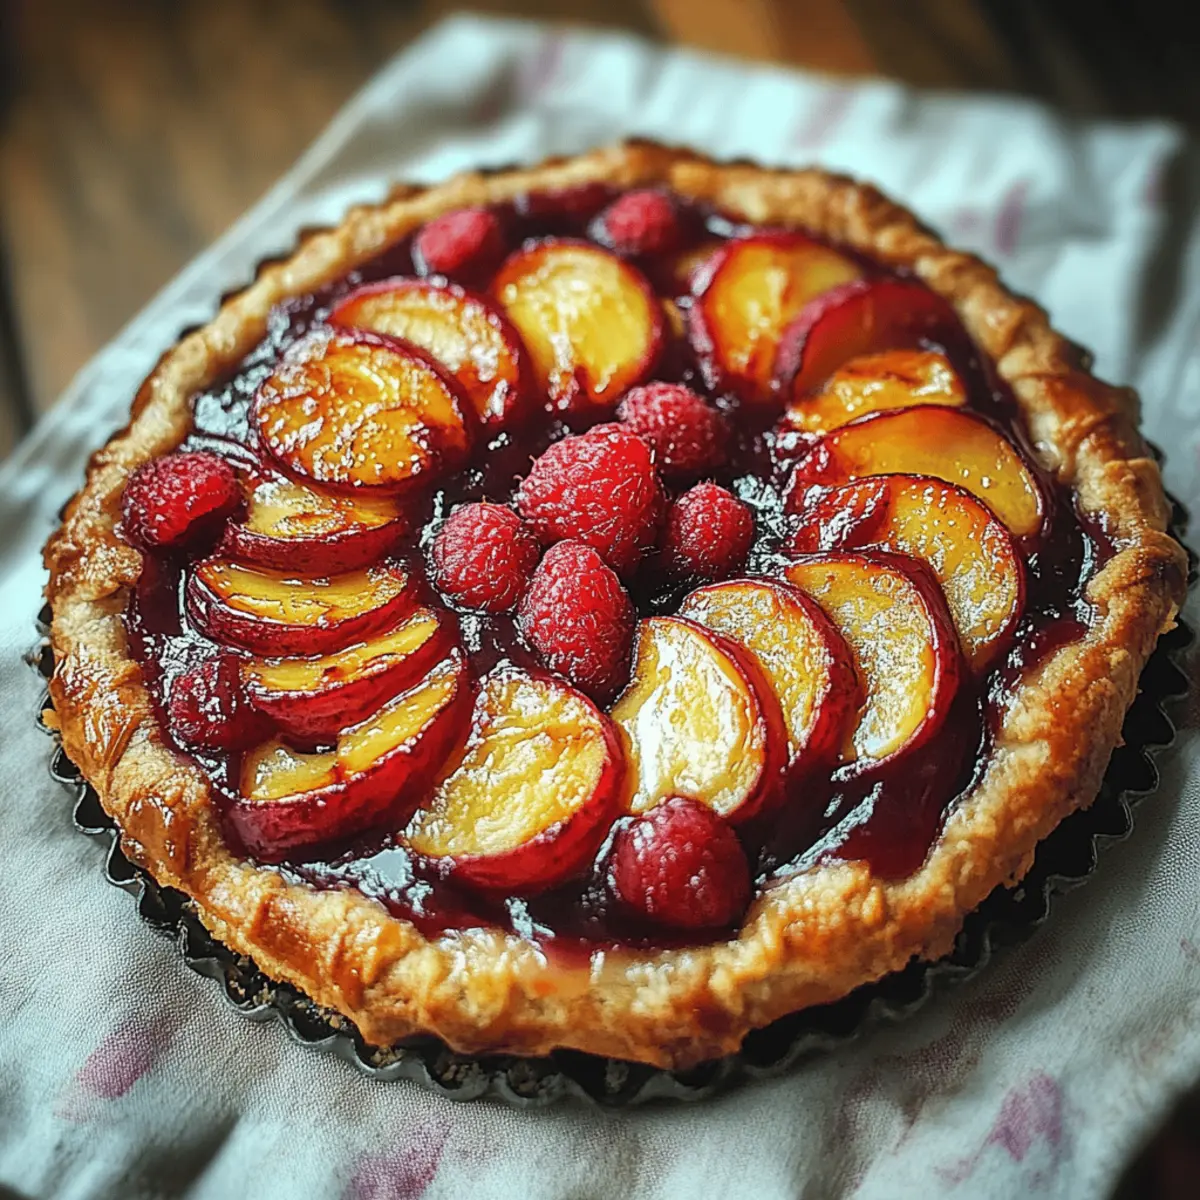
As I savor the taste of late summer, there's nothing more delightful than a warm slice of Plum Tart. This charming dessert captures the vibrant essence of ripe plums, making it the perfect treat for home cooks eager to impress family or friends without spending all day in the kitchen. Not only does this Plum Tart bring a sweet, tangy flavor to the table, but it also offers a satisfying, flaky crust that rivals any bakery's creation. Plus, with its quick prep time and stunning presentation, it's an ideal choice for both seasoned chefs and those new to the baking scene. Curious about how to create this beautiful focal point for your next gathering? Let’s dive into the process!
Why is this Plum Tart a must-try?
Simplicity at Its Best: You won’t need advanced baking skills—just a few steps yield impressive results.
Fresh Ingredients: This tart brings out the best of seasonal plums, highlighting their natural sweetness.
Versatile Options: Substitute ingredients easily, including gluten-free flour or different jams.
Crowd-Pleasing Appeal: This recipe is a showstopper, perfect for gatherings or a cozy family dessert.
Easy Clean-Up: With minimal mess, you’ll spend more time enjoying your creation and less time cleaning up!
Plum Tart Ingredients
• All the essentials for a delicious treat!
For the Crust
- 2 cups all-purpose flour – you can substitute with gluten-free flour for a delightful alternative.
- 1 cup butter – always use cold, unsalted butter for the best flaky texture.
- 2 tablespoons granulated sugar – brown sugar works well for a deeper caramel flavor.
- ½ teaspoon salt – enhances the overall taste of your tart.
- 6 tablespoons ice cold water – the cold water helps keep the dough from getting too warm.
For the Filling
- 4 cups firm plums – choose ripe but firm plums for ideal sweetness and texture.
- 2 tablespoons cornstarch – this thickens the plum juices as they cook.
- 1 teaspoon cinnamon – adds a warm spice note; nutmeg can also be a wonderful alternative.
For the Glazing and Topping
- 1 beaten egg – this creates a beautiful golden glaze on your crust.
- 1 tablespoon cinnamon sugar – an optional touch to enhance the flavor.
- ¼ cup plum jam – use this for a glossy finish; apricot jam is a delightful substitute.
Gather these ingredients, and you’re just a few steps away from impressing everyone with your homemade Plum Tart!
Step‑by‑Step Instructions for Plum Tart
Step 1: Prepare the Crust
Begin by cutting cold, unsalted butter into cubes and mixing it with 2 cups of all-purpose flour, 2 tablespoons of sugar, and ½ teaspoon of salt in a large bowl. Use a pastry cutter or your fingertips to combine until the mixture resembles coarse crumbs. This should take about 5 minutes, ensuring a flaky texture for your Plum Tart.
Step 2: Form the Dough
Gradually add 6 tablespoons of ice-cold water to the crumb mixture while stirring gently. Continue mixing until the dough comes together, being careful not to overwork it. Once formed, shape it into a disc, wrap in plastic wrap, and chill in the refrigerator for at least 30 minutes. This chilling step is crucial for ensuring a tender crust.
Step 3: Prepare the Plum Filling
While the dough chills, slice 4 cups of firm plums into wedges and toss them in a large mixing bowl with 2 tablespoons of cornstarch, a pinch of salt, and 1 teaspoon of cinnamon. Allow the mixture to sit for about 10 minutes, enabling the flavors to meld together while the plums release their juices.
Step 4: Roll Out the Dough
Once chilled, remove the dough from the refrigerator. On a lightly floured surface, roll the dough into a 14-inch round, aiming for a thickness of about ⅛ inch. Carefully transfer it to a parchment-lined baking sheet, setting the stage for your Plum Tart masterpiece.
Step 5: Assemble the Tart
Arrange the plum filling in the center of the rolled-out dough, leaving a 2-inch border. Fold the edges of the dough over the plums, making sure some fruit remains exposed for a rustic look. Drizzle any leftover juices over the filling, then brush the crust with 1 beaten egg to create a golden glaze and enhance the appearance.
Step 6: Bake the Tart
Preheat your oven to 425°F (220°C). Place the assembled Plum Tart in the oven and bake for 15 minutes. Then, lower the temperature to 350°F (175°C) and continue baking for an additional 20–30 minutes until the crust is beautifully golden and the plums have softened, creating a delightful aroma.
Step 7: Finish and Serve
Once baked, remove the Plum Tart from the oven and brush the hot plums with ¼ cup of plum or peach jam for a glossy finish. Allow the tart to cool for 10-15 minutes before slicing. This cooling period helps set the filling while ensuring each slice holds its shape beautifully, perfect for serving to friends and family.
How to Store and Freeze Plum Tart
-
Room Temperature: Keep your Plum Tart at room temperature for up to 2 days, covered loosely with aluminum foil or plastic wrap to maintain its softness.
-
Fridge: For longer storage, place the tart in the fridge, where it will stay fresh for up to 4 days. Cover it securely to prevent drying out.
-
Freezer: If you want to freeze it, wrap the tart in plastic wrap and then in aluminum foil. It can be frozen for up to 3 months. Thaw in the fridge before serving.
-
Reheating: To reheat, place slices in the oven at 350°F (175°C) for about 10 minutes, allowing the crust to regain its lovely crispness while warming the fruit.
Plum Tart Variations to Try
Customize your Plum Tart and make it uniquely yours—let your creativity shine through these delightful twists!
-
Dairy-Free: Swap butter with coconut oil or a plant-based butter alternative for a dairy-free version that’s just as flaky.
-
Brown Sugar Boost: Replace granulated sugar with brown sugar to deepen the flavor and create a rich, caramelized crust.
-
Nutty Crust: Add ½ cup of finely ground nuts like almonds or pecans to the dough for a delightful crunch and flavor boost.
-
Spicy Kick: Include ¼ teaspoon of ground ginger or cloves with your cinnamon to add an exciting, unexpected warmth to your filling.
-
Mixed Fruit Delight: Combine plums with other fruits like pears or peaches for a colorful, fruity medley that enhances the tart's flavor.
-
Herb Infusion: Add a teaspoon of fresh thyme or rosemary to the filling for a sophisticated twist that complements the sweetness of the plums.
-
Extra Crunch: Sprinkle ¼ cup of chopped nuts on top of the plums before baking for an added layer of texture and flavor.
-
Heat It Up: Include a dash of cayenne pepper or red pepper flakes in the plum mix to create a sweet-and-spicy sensation that will surprise your taste buds.
Expert Tips for the Best Plum Tart
-
Chill the Dough: The colder your dough, the flakier your crust will be. Don’t skip the chilling step; it’s key to a tender base for your Plum Tart.
-
Choose the Right Plums: Use firm, ripe plums for the best flavor and texture. Overripe plums can turn mushy in the oven, making your tart less appealing.
-
Don't Overfill: Leave some space around the edges when placing your plum filling. A 2-inch border allows the crust to fold without overflowing, maintaining its beautiful shape.
-
Watch the Baking Time: Keep an eye on your tart as it bakes. Ovens can vary, so look for a golden crust and tender plums for perfect results.
-
Brush with Jam while Hot: Applying jam to the warm plums gives your Plum Tart a delightful glossy finish. This step enhances its visual appeal and adds a touch of sweetness!
What to Serve with Plum Tart
Indulging in a slice of Plum Tart is just the beginning—let's build a delightful meal around it!
- Vanilla Ice Cream: A scoop of creamy vanilla ice cream adds an indulgent contrast to the tart's fruity flavors, making each bite unforgettable.
- Whipped Cream: Light and airy, freshly whipped cream rounds out the tart beautifully, enhancing its sweetness and creating a luxurious texture.
- Fresh Fruit Salad: Bright, seasonal berries and citrus offer a refreshing crunch, balancing the sweet plums while adding a pop of color to your plate.
- Caramel Sauce Drizzle: A warm drizzle of homemade caramel sauce can elevate the tart’s sweetness, offering a rich and decadent addition that your guests will love.
- Sparkling Wine: Serve a chilled glass of sparkling wine or prosecco to complement the sweet-tart flavors, making for a celebratory touch with each bite.
- Cinnamon Tea: A warm cup of cinnamon tea provides a cozy beverage option, its spice harmonizing beautifully with the cinnamon notes in the tart.
- Cheese Board: Pairing with a cheese board featuring creamy brie or tangy goat cheese creates a savory contrast, enhancing the overall dining experience.
- Chocolate Mousse: For those who crave a little extra decadence, a rich chocolate mousse offers a luxurious finish, balancing the fruity flavors perfectly.
- Almond Cookies: These delicate cookies add a lovely crunch, bringing a different texture to the table while their nuttiness complements the tart’s fruitiness.
Make Ahead Options
These Plum Tart preparations are perfect for busy home cooks eager to save time during the week! You can prepare the crust up to 3 days in advance. Simply follow the crust steps, shape it into a disc, wrap in plastic, and refrigerate. For the filling, slice and toss the plums with sugar, cornstarch, and cinnamon, then refrigerate for up to 24 hours. When you’re ready to bake, roll out the crust, assemble the tart, and bake as directed. This method ensures your tart remains just as delicious while allowing you to enjoy the finished product with minimal effort on busy days!
Plum Tart Recipe FAQs
How do I choose ripe plums for my tart?
Absolutely! For the best Plum Tart, look for plums that are firm yet slightly yielding when gently pressed. They should have a vibrant color with smooth skin and no dark spots. Ripe but firm plums ensure the tart holds its shape while baking, providing a delightful sweetness.
How should I store my Plum Tart after baking?
You can keep your Plum Tart at room temperature for up to 2 days, loosely covered with aluminum foil or plastic wrap. For longer storage, move it to the fridge for up to 4 days. Just make sure it’s wrapped well to prevent drying out—nobody wants a stale tart!
Can I freeze the Plum Tart, and how?
Yes, you can definitely freeze your Plum Tart! Wrap it tightly in plastic wrap, followed by a layer of aluminum foil to protect it from freezer burn. It can be frozen for up to 3 months. When you're ready to enjoy it, simply thaw it in the fridge overnight before serving.
What should I do if my crust is too wet or too dry?
Very! If your dough is wet and sticky, you may need to add a little extra flour—about a tablespoon at a time—until it’s manageable. If it’s too dry and crumbly, you can mix in a teaspoon of ice-cold water to bring it together. Always ensure the dough is mixed until just combined for the best results.
Is this recipe suitable for anyone with allergies?
Definitely! You can easily modify this Plum Tart for allergies or dietary restrictions. Substitute the all-purpose flour with a gluten-free blend to make it friendly for gluten sensitivities. The butter can be replaced with dairy-free options, such as coconut oil or vegan butter. Just be aware of any additional ingredients you might use!
How do I reheat leftover Plum Tart?
To reheat your leftovers while keeping the crust crispy, preheat your oven to 350°F (175°C). Place slices on a baking sheet and warm in the oven for about 10 minutes. This method revives the delightful texture of the tart while warming the sweet plums, making it just as enjoyable as the first serving!
Irresistibly Easy Plum Tart That Will Wow Your Guests
Ingredients
Equipment
Method
- Cut cold, unsalted butter into cubes and mix with flour, sugar, and salt until crumbly.
- Gradually add ice cold water and mix until dough comes together; chill in the refrigerator for at least 30 minutes.
- Slice firm plums into wedges, toss with cornstarch, salt, and cinnamon; let sit for 10 minutes.
- Roll chilled dough into a 14-inch round and transfer to a parchment-lined baking sheet.
- Arrange plum filling in the center of the rolled dough, fold edges over the plums, and brush with beaten egg.
- Preheat oven to 425°F (220°C) and bake for 15 minutes, then reduce temperature to 350°F (175°C) and bake for an additional 20–30 minutes.
- Brush hot plums with plum or peach jam for a glossy finish, and cool for 10-15 minutes before serving.
Nutrition
Notes
Store at room temperature for up to 2 days, in the fridge for up to 4 days, or freeze wrapped for up to 3 months.
Leave a Reply