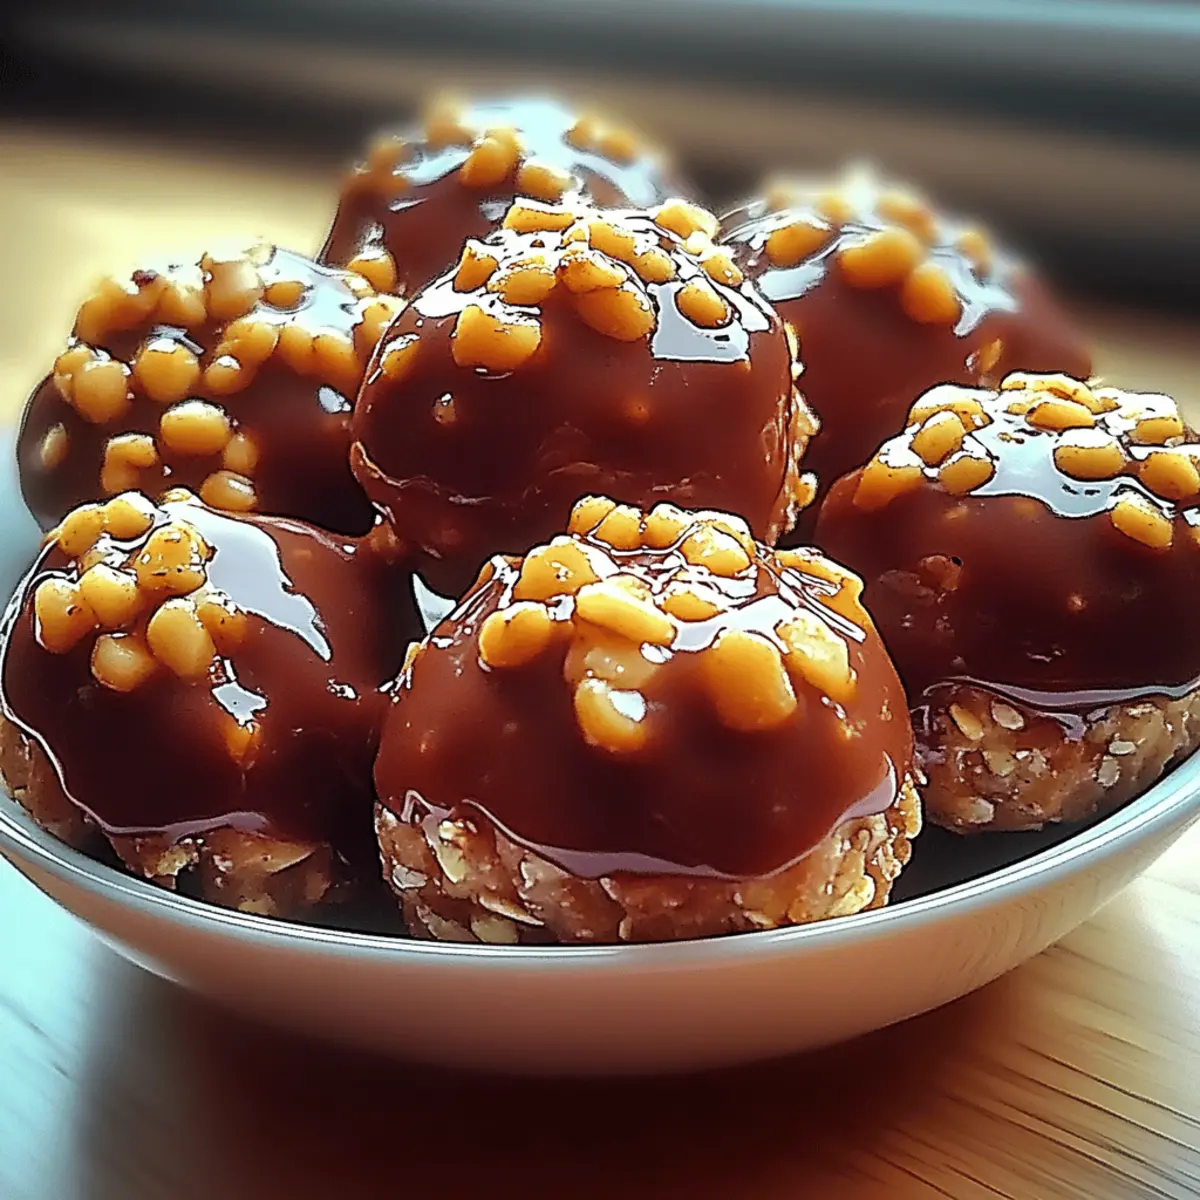
As I sorted through my snack bin, a familiar crinkle caught my eye—a forgotten stash of Butterfinger bars waiting to be transformed into something delightful. This simple moment sparked the creation of my indulgent Butterfinger Balls, a nostalgic treat that combines the creamy goodness of peanut butter with the crunchy sweetness of crushed Butterfingers. Not only are these little bites of joy a quick 15-minute prep, but they also make a perfect crowd-pleaser for parties or a sweet pick-me-up for those moments when you crave something special. Whether you’re a seasoned home chef or just stepping into the kitchen, these no-bake treats are sure to impress. Curious about how to whip up a batch? Let’s dive into the recipe!
Why are Butterfinger Balls so irresistible?
Decadent flavor: The rich peanut butter and chocolate coating blends perfectly with the crunchy Butterfinger bits, delivering a satisfyingly sweet experience.
Quick and easy: In just 15 minutes of prep, you’ll create these delightful treats, making them a hassle-free option for any occasion.
No-bake convenience: Enjoy the ease of whipping up a delicious dessert without turning on the oven—perfect for warm days!
Shares beautifully: Great for gatherings, these bite-sized beauties are sure to charm your friends and family, bringing smiles all around.
Versatile treat: Enjoy them straight from the fridge, share them at potlucks, or package them as sweet gifts—they’ll always be a hit!
Dive into these Butterfinger Balls and savor a nostalgic bite that everyone will love!
Butterfinger Balls Ingredients
Discover the magic behind these delightful treats!
For the Batter
- ½ cup unsalted butter – Use room temperature butter for easy mixing and a smooth texture.
- 1 cup creamy peanut butter – Choose a creamy variety for optimal consistency; crunchy can be a fun twist!
- 2 cups powdered sugar – This adds sweetness and helps bind the mixture together beautifully.
- 1 cup crushed Butterfinger bars – The star ingredient, giving the balls that signature crunch and flavor.
For the Coating
- 1 cup semi-sweet chocolate chips – Melting these creates a luscious coating that pairs perfectly with the sweet filling.
Step‑by‑Step Instructions for Butterfinger Balls
Step 1: Prepare Your Workspace
Start by clearing off your counter and gathering all the ingredients for the Butterfinger Balls. You'll need a large mixing bowl, a spoon, a baking sheet lined with parchment paper, and a microwave-safe bowl or double boiler for melting chocolate. Make sure you have your Butterfinger bars crushed and ready to go—this will help you mix everything smoothly.
Step 2: Mix Butters Together
In your large mixing bowl, combine the softened unsalted butter and creamy peanut butter. Using a sturdy spoon or electric mixer, blend them together until the mixture is smooth and creamy, which should take about 2-3 minutes. The goal is to achieve a uniform consistency that will make your Butterfinger Balls delightful.
Step 3: Add Powdered Sugar
Gradually mix in the powdered sugar, about a cup at a time, until it's fully incorporated. This step can get a little messy, so make sure to mix slowly at first. You want to create a thick dough-like mixture, which should come together nicely in about 3-4 minutes of mixing.
Step 4: Fold in Crushed Butterfinger Bars
Gently fold in the crushed Butterfinger bars, ensuring they are evenly distributed throughout the mixture. This will bring the signature crunchy texture to your Butterfinger Balls. Use a spatula for this step to preserve some of the airiness in your mixture, and continue folding until no dry powder remains visible.
Step 5: Shape the Dough
Scoop out portions of the dough using a tablespoon or a melon baller, and roll them into one-inch balls using your hands. Place each ball on the parchment-lined baking sheet, spacing them about an inch apart. You should fill the entire sheet; this recipe yields approximately 20 Balls, so make sure to have enough space.
Step 6: Melt Chocolate Chips
In a microwave-safe bowl, melt the semi-sweet chocolate chips in 30-second intervals, stirring after each cycle until the chocolate is smooth and fully melted. Alternatively, you can use a double boiler for a more controlled melting process. Once melted, the chocolate should be glossy and fluid, perfect for coating your Butterfinger Balls.
Step 7: Dip and Coat the Balls
With a fork, dip each Butterfinger ball into the melted chocolate, ensuring each one is fully coated. Gently shake off any excess chocolate before returning them to the parchment-lined baking sheet. Aim for a smooth and even layer, giving them a beautiful finish, and continue until all the balls are coated.
Step 8: Refrigerate to Set
Once all your Butterfinger Balls have been coated in chocolate, place the baking sheet in the refrigerator. Chill for about an hour to allow the chocolate to set properly. When finished, the chocolate should be firm, and the treats will be ready to enjoy or store for later.
What to Serve with Butterfinger Balls
Indulging in Butterfinger Balls opens a world of delightful pairings to enhance your treat experience.
- Cold Milk: Nothing beats a classic. The creaminess of milk balances the rich flavor and delivers a nostalgic munching experience.
- Vanilla Ice Cream: A decadent scoop alongside these treats creates a gourmet dessert combo that’s utterly satisfying.
- Chocolate Drizzle: Elevate the look and flavor by drizzling extra melted chocolate over the top for an elegant touch.
- Fresh Berries: Bright, juicy strawberries or raspberries offer a refreshing contrast that cuts through the sweetness beautifully.
- Coffee: A warm cup of your favorite brew complements the chocolate and peanut butter nicely, adding a sophisticated twist.
- Nutty Granola: Serve with crunchy granola on the side for a surprising texture that pairs well with the smoothness of the Butterfinger Balls.
- Caramel Sauce: Drizzling warm caramel over your plate adds a touch of luxury and extra sweetness that enhances every bite.
- Sparkling Water: Refreshing bubbles cleanse your palate and make each bite feel like a special occasion.
Expert Tips for Butterfinger Balls
Use Soft Butter: Ensure your unsalted butter is at room temperature for a smooth mix. Cold butter can lead to a gritty texture.
Perfect Coating: Dip each ball quickly in the melted chocolate to avoid sticking. Shake off excess to keep a clean look!
Chill for Texture: Letting your Butterfinger Balls chill for an hour is key—this sets the chocolate coating and enhances flavor.
Storage Matters: Keep your treats in an airtight container in the fridge for up to two weeks; they’re sure to stay delicious!
Crush Wisely: For even distribution, crush Butterfinger bars into smaller pieces, but leave some chunks for that delightful crunch!
Make Ahead Options
These Butterfinger Balls are a fantastic choice for meal prep enthusiasts! You can prepare the dough (steps 1-4) up to 24 hours in advance by following the instructions and then storing the shaped balls in an airtight container in the fridge. If you want even more convenience, you can coat them in chocolate and freeze the finished balls, where they’ll stay fresh for up to 3 months. To enjoy them later, simply thaw them at room temperature for about 30 minutes before serving; they'll be just as delightful! This way, you can have a sweet treat ready whenever the craving strikes, making your busy weeknights a little sweeter.
Butterfinger Balls Variations & Substitutions
Feel free to explore exciting twists and adjustments to make these delightful treats even more special!
- Dairy-Free: Substitute dairy-free chocolate chips for the coating; your vegan friends will love these too!
- Nut-Free: Use sun butter instead of peanut butter for a nut-free version that still delivers on flavor.
- Crunchy Twist: Add chopped nuts like peanuts or almonds for an extra crunchy texture alongside the Butterfinger bars.
- Flavor Boost: Mix in a teaspoon of vanilla extract for a warm, aromatic flavor that complements the sweetness.
- Caramel Drizzle: Drizzle melted caramel over the cooled chocolate coating for an indulgent twist that enhances the sweetness.
- Spicy Kick: Sprinkle a pinch of cayenne pepper in the chocolate coating for a surprising spicy kick that will surprise your senses!
- Mini-Bite Version: Roll the dough into mini-balls for bite-sized treats, perfect for sweet tables and gatherings.
- Coconut Flake Coating: After dipping in chocolate, roll the balls in toasted coconut flakes for an exotic finish and delightful texture.
How to Store and Freeze Butterfinger Balls
Fridge: Store your Butterfinger Balls in an airtight container in the refrigerator for up to 2 weeks. This keeps them fresh and maintains their delightful texture.
Freezer: For longer storage, place the Butterfinger Balls in a single layer on a baking sheet to freeze for about 1 hour. Once firm, transfer them to a freezer-safe container for up to 3 months.
Thawing: To enjoy frozen Butterfinger Balls, simply remove them from the freezer and let them thaw at room temperature for about 15-20 minutes before serving.
Reheating: If desired, you can gently re-melt the chocolate coating by placing the Butterfinger Balls back into a microwave for a few seconds, ensuring not to overheat them.
Butterfinger Balls Recipe FAQs
How do I select the best Butterfinger bars for this recipe?
Absolutely! Look for Butterfinger bars that are fresh, without any visible dark spots or signs of damage on the wrappers. A fresh bar will have that signature crunch, providing the perfect texture for your Butterfinger Balls.
How should I store my Butterfinger Balls?
To keep your Butterfinger Balls fresh, store them in an airtight container in the refrigerator for up to 2 weeks. This will maintain their delightful texture and flavor. If you’re craving a longer shelf life, freezer options are available—keep reading!
Can I freeze Butterfinger Balls, and if so, how?
Very! To freeze your Butterfinger Balls, first place them in a single layer on a baking sheet, making sure they don’t touch. Freeze them for about 1 hour until firm, then transfer them to a freezer-safe container or a zip-top bag. They can be kept in the freezer for up to 3 months. When you’re ready to enjoy, simply thaw them at room temperature for 15-20 minutes before serving.
What should I do if my chocolate coating is not smooth?
If your chocolate isn’t melting well, it might be due to overheating or moisture. Always melt chocolate chips in short intervals—30 seconds for the microwave or a gentle simmer in a double boiler. If your chocolate is too thick for coating, you can add a teaspoon of vegetable oil or shortening to help achieve that luscious, smooth texture ideal for your Butterfinger Balls!
Are there any allergy considerations I should be aware of?
Absolutely! This recipe contains peanuts, gluten (from the Butterfinger bars), and dairy. If anyone has allergies, consider substituting with allergy-friendly chocolate options or using a different candy base that accommodates their dietary needs. It’s wonderful to adapt this treat for everyone to enjoy!
Can pets eat Butterfinger Balls?
Oh, it's best to keep these treats away from pets! The ingredients, especially chocolate and sugar, can be harmful to dogs and other pets. Always make sure these delicious treats are kept out of reach of your furry friends for their safety!
Indulgent Butterfinger Balls That Will Satisfy Your Sweet Cravings
Ingredients
Equipment
Method
- Prepare Your Workspace by clearing off your counter and gathering all the ingredients.
- Mix Butters Together: Combine the softened butter and peanut butter until smooth.
- Add Powdered Sugar gradually until fully incorporated and a thick dough is formed.
- Fold in Crushed Butterfinger Bars evenly throughout the mixture.
- Shape the Dough into one-inch balls and place them on a parchment-lined baking sheet.
- Melt Chocolate Chips in a microwave-safe bowl until smooth.
- Dip and Coat the Balls in melted chocolate, shaking off excess chocolate.
- Refrigerate to Set the chocolate until firm, about one hour.
Leave a Reply