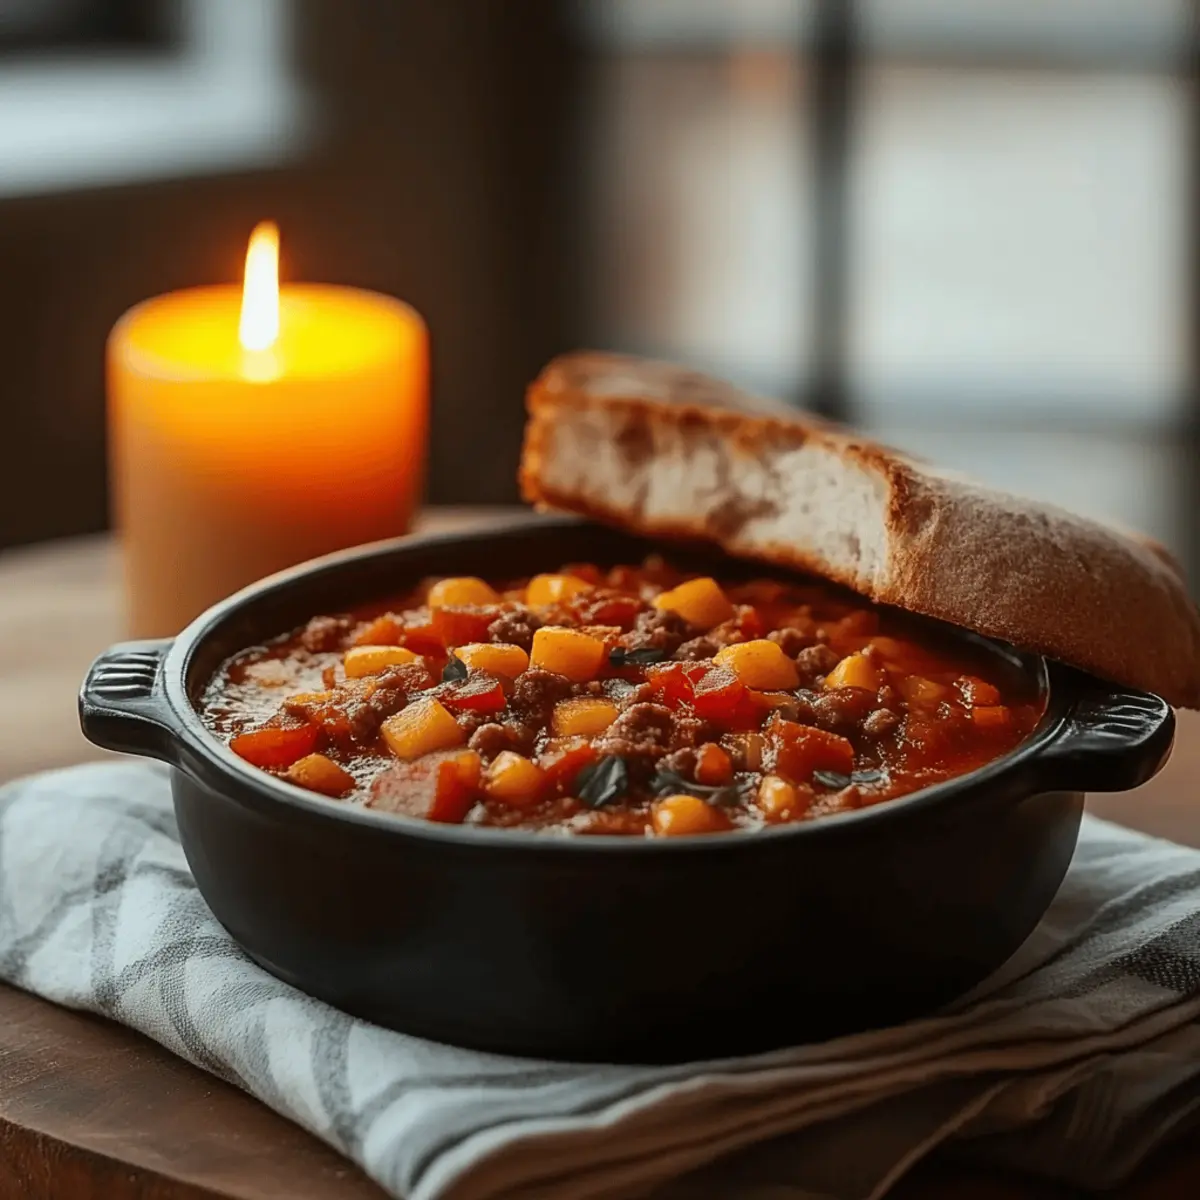
As the wind howls outside and the temperatures drop, I find myself craving the kind of warmth that only a hearty bowl of chili can provide. This Quick Chili recipe is not just a meal; it's a cozy embrace for your soul, perfect for busy weeknights when you need something delicious without spending hours in the kitchen. With just 10 minutes of prep time, you can have this comforting dish simmering on your stove, filling your home with inviting aromas. Packed with protein from ground beef and nutritious beans, it’s as satisfying as it is simple. Plus, this chili is a crowd-pleaser—great for family dinners or casual gatherings with friends. So, are you ready to transform your evening with a bowl of chili that’s both easy to make and delightful to eat?
Why is this chili a must-try?
Simplicity at Its Best: With just 10 minutes of prep, you’re only a quick chopping session away from a delicious dinner.
Irresistible Aroma: Your kitchen will be filled with the enticing scents of spices and simmering tomatoes, making it impossible not to salivate.
Flavor Explosion: The combination of chili powder, cumin, and a hint of cayenne creates layers of flavor that warm you from the inside out.
Hearty and Filling: Packed with protein from beef and kidney beans, this chili is both satisfying and nutritious, making it a great choice for varying diets.
Customizable Goodness: Add your favorite toppings—be it cheese, sour cream, or jalapeños—for a personalized touch.
Crowd-Pleasing Delight: Perfect for family gatherings or casual dinners with friends, this dish is sure to make everyone smile!
Chili Ingredients
For the Base
- Olive oil – Adds richness and helps to sauté the vegetables evenly.
- Ground beef – The heart of this chili, providing a hearty protein boost.
For the Vegetables
- Onion – Use a medium onion for natural sweetness and depth of flavor.
- Green bell pepper – Adds a fresh crunch; feel free to substitute with red or yellow for a sweeter taste.
- Garlic – Fresh minced garlic brings an aromatic kick that elevates the dish.
For the Spices
- Chili powder – The star of the show, delivering that classic chili flavor!
- Cumin – Offers a warm, earthy note that blends perfectly with the other spices.
- Smoked paprika – Adds a smokiness that enhances the overall flavor profile.
- Cayenne pepper – Just a pinch for a gentle heat that can be adjusted to your liking.
- Salt – Essential for enhancing all the flavors in your chili.
- Black pepper – Freshly cracked adds a touch of spice without overpowering.
For the Liquid
- Crushed tomatoes – Create a rich, tangy base for the chili.
- Tomato sauce – Provides additional moisture and depth of flavor.
- Diced green chiles – Bring a mild heat and extra flavor, so don’t skip them!
- Beef broth – Adds a savory depth; use vegetable broth for a lighter option.
For the Beans
- Kidney beans – Packed with protein and fiber, adding texture and nutrition; rinse and drain for best results.
With these chili ingredients, you're all set to whip up a warm, comforting bowl that will surely spice up your dinner routine!
Step‑by‑Step Instructions for Chili
Step 1: Brown the Beef
In a large, heavy-bottomed pot or Dutch oven, heat 1 tablespoon of olive oil over medium-high heat. Add 1 ½ pounds of ground beef and cook for 6-8 minutes, breaking it up with a wooden spoon until it's evenly browned. Once cooked through, drain any excess fat to avoid a greasy chili.
Step 2: Sauté the Vegetables
Reduce the heat to medium and stir in one chopped medium onion and one chopped green bell pepper. Sauté for about 5-7 minutes until the vegetables soften and the onion turns translucent. Add in 3 minced garlic cloves, cooking for an additional 1 minute until fragrant, allowing the aroma to fill your kitchen.
Step 3: Toast the Spices
Sprinkle in 2 tablespoons of chili powder, 1 teaspoon of cumin, 1 teaspoon of smoked paprika, ½ teaspoon of cayenne pepper, 1 teaspoon of salt, and ½ teaspoon of black pepper. Stir constantly for 1-2 minutes to toast the spices, which enhances their flavors and brings out the essence of this chili.
Step 4: Add the Liquids
Pour in a can of 28 ounces crushed tomatoes, a 15-ounce can of tomato sauce, a 4-ounce can of undrained diced green chiles, and 1 cup of beef broth. Stir well to combine all these ingredients, creating a rich and inviting base for your chili, ensuring even distribution of flavors.
Step 5: Let it Simmer
Bring the mixture to a gentle simmer over medium heat. Once it starts bubbling lightly, reduce the heat to low. Cover the pot with a lid and let it cook for at least 30 minutes, stirring occasionally to prevent sticking, and allowing those wonderful chili flavors to meld beautifully.
Step 6: Incorporate the Beans
After simmering, gently stir in one can of rinsed and drained kidney beans. Continue to simmer for another 5-10 minutes until the beans are heated through. At this point, taste your chili and adjust the seasonings if needed, adding more spices or salt to achieve your desired flavor.
Expert Tips for Quick Chili
-
Use Fresh Ingredients: Fresh vegetables and garlic enhance the flavor of your chili, offering a vibrant taste that canned options can’t match.
-
Don’t Rush the Browning: Properly browning the ground beef develops rich flavors; avoid skipping this step for a deeper taste profile.
-
Adjust the Spice: The heat level can be tailored by adjusting the cayenne pepper; remember, it's easier to add more later than to take it out!
-
Let It Rest: For the best flavor, let your chili sit for 10-15 minutes after cooking; this allows the spices to settle and intensify.
-
Top Creatively: Experiment with toppings like sour cream, shredded cheese, or avocado to add a creamy texture and elevate the overall chili experience.
-
Store & Reheat: Chili often tastes even better the next day; prepare a larger batch and store leftovers for an easy meal later on.
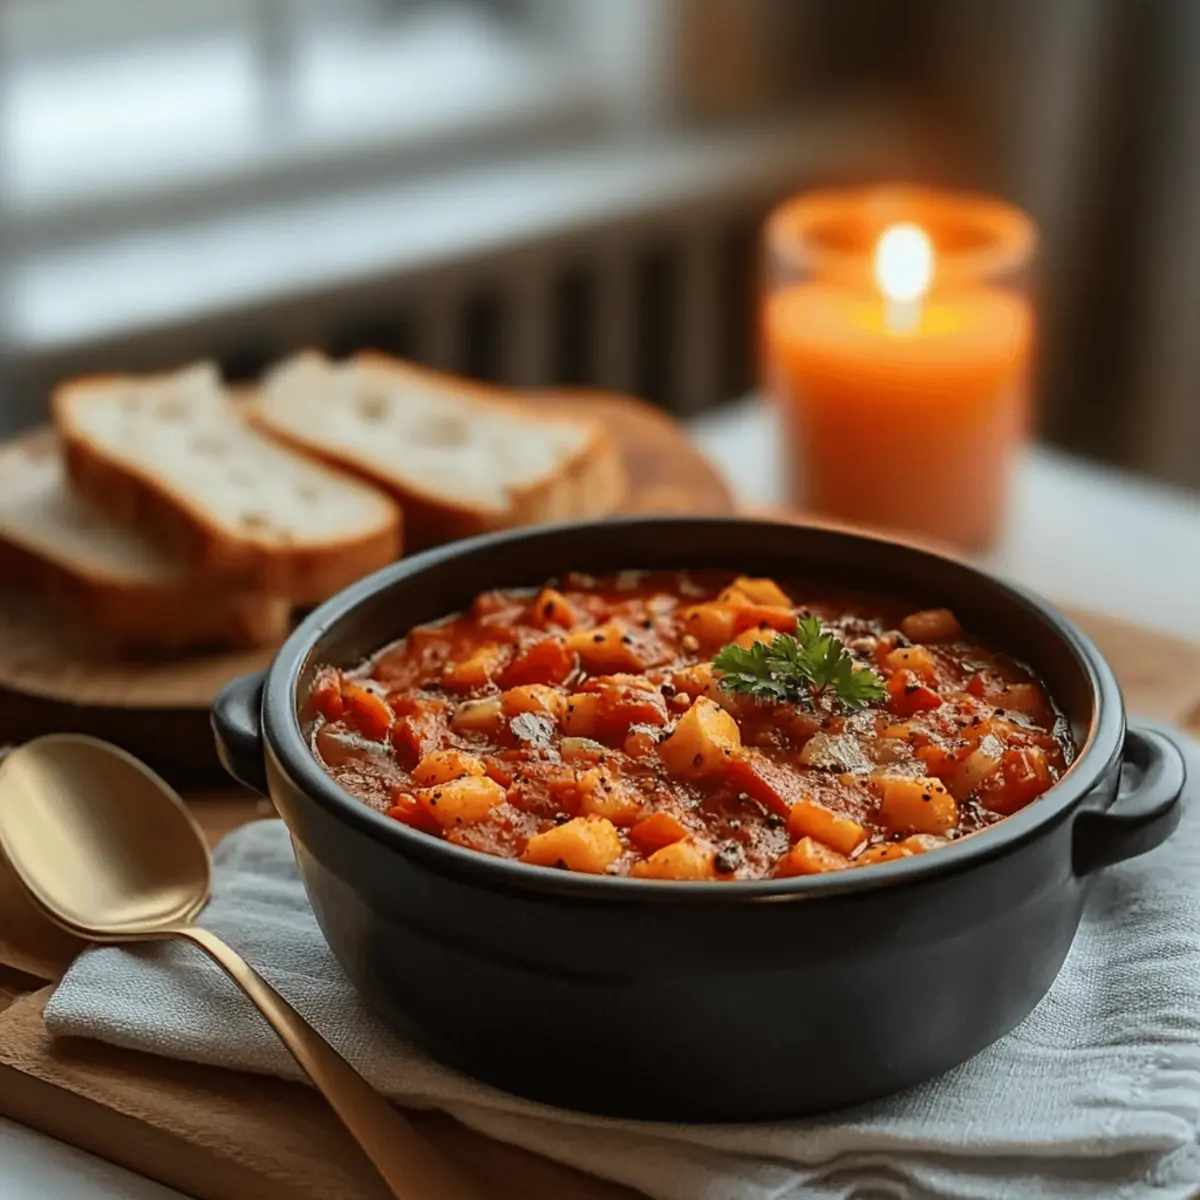
What to Serve with Quick Chili?
Looking to create a heartwarming feast around your chili? Let’s explore some delightful pairings that will elevate your meal!
- Cornbread: The sweet, fluffy texture of fresh cornbread perfectly balances the spicy notes of chili, making each bite a delight.
- Guacamole: Creamy and cool, guacamole adds a refreshing contrast that complements the warmth of the chili beautifully.
- Cilantro-Lime Rice: Fluffy rice with a hint of lime enhances the flavors and provides a bright, zesty base for your chili.
- Nachos with Cheese: Crispy tortilla chips slathered in melted cheese make for a fun and delicious side to scoop up the chili.
- Sour Cream: A dollop on top works wonders, cutting through the heat while adding a cool, creamy richness that guests will love.
- Pickled Jalapeños: For those who crave extra heat, these tangy bites add a delightful zing that makes the chili even more exciting.
- Fresh Garden Salad: A light, crunchy salad brings a refreshing contrast to the rich chili, balancing the meal while adding vibrant colors.
- Beer or Wine: A chilled, light lager or a smooth red wine can enhance the dining experience, deepening the flavors and enjoyment.
- Chocolate Ice Cream: For dessert, this indulgent treat delivers a rich, creamy finish after the bold flavors of chili, delighting your taste buds!
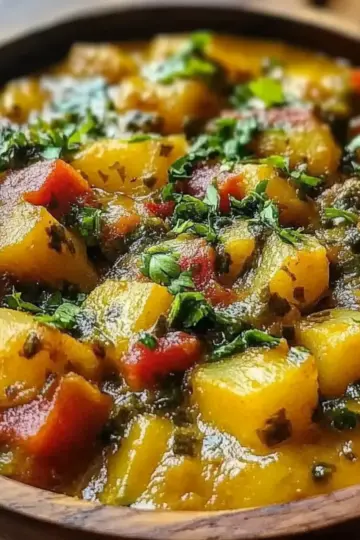
Chili Variations & Substitutions
Discover delightful ways to personalize your chili and make it uniquely yours!
- Vegetarian: Substitute ground beef with lentils or plant-based meat for a hearty meat-free option.
- Spicy Twist: Add diced jalapeños or chipotle in adobo sauce for an extra kick that will awaken your taste buds.
- Beans Galore: Mix in black beans or pinto beans for added texture and flavor complexity.
- Smoky Flavor: Incorporate a splash of liquid smoke to elevate that rich, smoky taste without needing additional ingredients.
- Creamy Delight: Stir in a dollop of cream cheese or sour cream at the end for a rich creaminess that smoothens the heat.
- Herb Infusion: Fresh cilantro or parsley sprinkled on top before serving adds a fresh burst of flavor that beautifully contrasts the chili's richness.
- Gluten-Free: Ensure your broth and sauces are gluten-free to easily make this a safe option for those avoiding gluten.
- Sweet Note: A spoonful of brown sugar or honey balances the heat, enhancing the overall flavor profile in unexpectedly delicious ways.
With these variations and substitutions, your chili can take on new dimensions while still delivering the comforting warmth we all love!
How to Store and Freeze Chili
Fridge: Store leftover chili in an airtight container in the fridge for up to 3 days. Allow it to cool completely before sealing to maintain freshness.
Freezer: Chili can be frozen for up to 3 months. Portion it into freezer-safe bags or containers, ensuring to remove excess air before sealing.
Reheating: To reheat, thaw overnight in the fridge and warm on the stove over medium heat, stirring occasionally. Add a splash of beef broth if it appears too thick.
Quick Tip: This chili not only makes a delicious warm meal today, but its flavor often intensifies after a night in the fridge, making it even more delightful the next day!
Make Ahead Options
These Quick Chili options are ideal for busy weeknights, allowing you to enjoy a delicious meal without the last-minute rush. You can prepare the chili base—browning the beef and sautéing the vegetables—up to 24 hours in advance. Simply refrigerate the mixture in an airtight container after cooking. If you want to take it a step further, you can fully cook the chili and store it in the fridge for up to 3 days. When you’re ready to serve, reheat on the stove until warmed through, stirring to maintain its texture and flavor. This way, you’ll have a hearty bowl of chili ready to warm your soul with minimal effort!

Quick Chili Recipe FAQs
How do I select the best ingredients for chili?
Absolutely! When choosing your ingredients, look for ground beef with a good fat content (80/20 is perfect for flavor), and make sure the vegetables are fresh with no dark spots or wilting. For chili powder, a blend of different spices can enhance complexity, and pick canned items with no added preservatives for a cleaner taste.
How should I store leftover chili?
Very simple! Place leftover chili in an airtight container and store it in the fridge for up to 3 days. Make sure the chili is cooled completely before sealing to keep it fresh and prevent condensation inside the container.
Can I freeze chili, and what’s the best method?
Absolutely! Chili freezes beautifully and can last up to 3 months. To freeze, allow the chili to cool completely, then portion it into freezer-safe bags or containers. Remove as much air as possible before sealing to prevent freezer burn. When you're ready to enjoy, just thaw it overnight in the fridge and reheat on the stove!
What if my chili turns out too spicy?
No worries! If your chili has turned out spicier than you like, add some sour cream or heavy cream to balance the heat, or incorporate a bit of sugar to cut through the spice. You can also add more beans or tomatoes to dilute the flavor. Just remember, adjust gradually until you achieve that perfect balance!
Can I make this chili vegetarian-friendly?
Definitely! You can easily swap the ground beef for textured vegetable protein (TVP), lentils, or your favorite meat substitute. Similarly, replace beef broth with vegetable broth to maintain flavor without the meat. Just be sure to adjust cooking times depending on what substitutes you choose!
How can I add even more flavor to my chili?
For an extra flavor boost, consider toasting the spices a bit longer during Step 3 or adding a splash of Worcestershire sauce or hot sauce before serving. Additionally, introducing beans of different colors or types like black beans or pinto beans can enhance both flavor and texture, making your chili an even more delightful experience!

Hearty Chili That Will Spice Up Your Dinner Routine
Ingredients
Equipment
Method
- Brown the beef in a pot with olive oil for 6-8 minutes until evenly browned.
- Sauté chopped onion and green bell pepper for 5-7 minutes until softened.
- Toast spices for 1-2 minutes, enhancing their flavors.
- Add crushed tomatoes, tomato sauce, diced green chiles, and beef broth; stir well.
- Let the chili simmer for at least 30 minutes.
- Incorporate kidney beans and heat for another 5-10 minutes; adjust seasoning as needed.


Leave a Reply