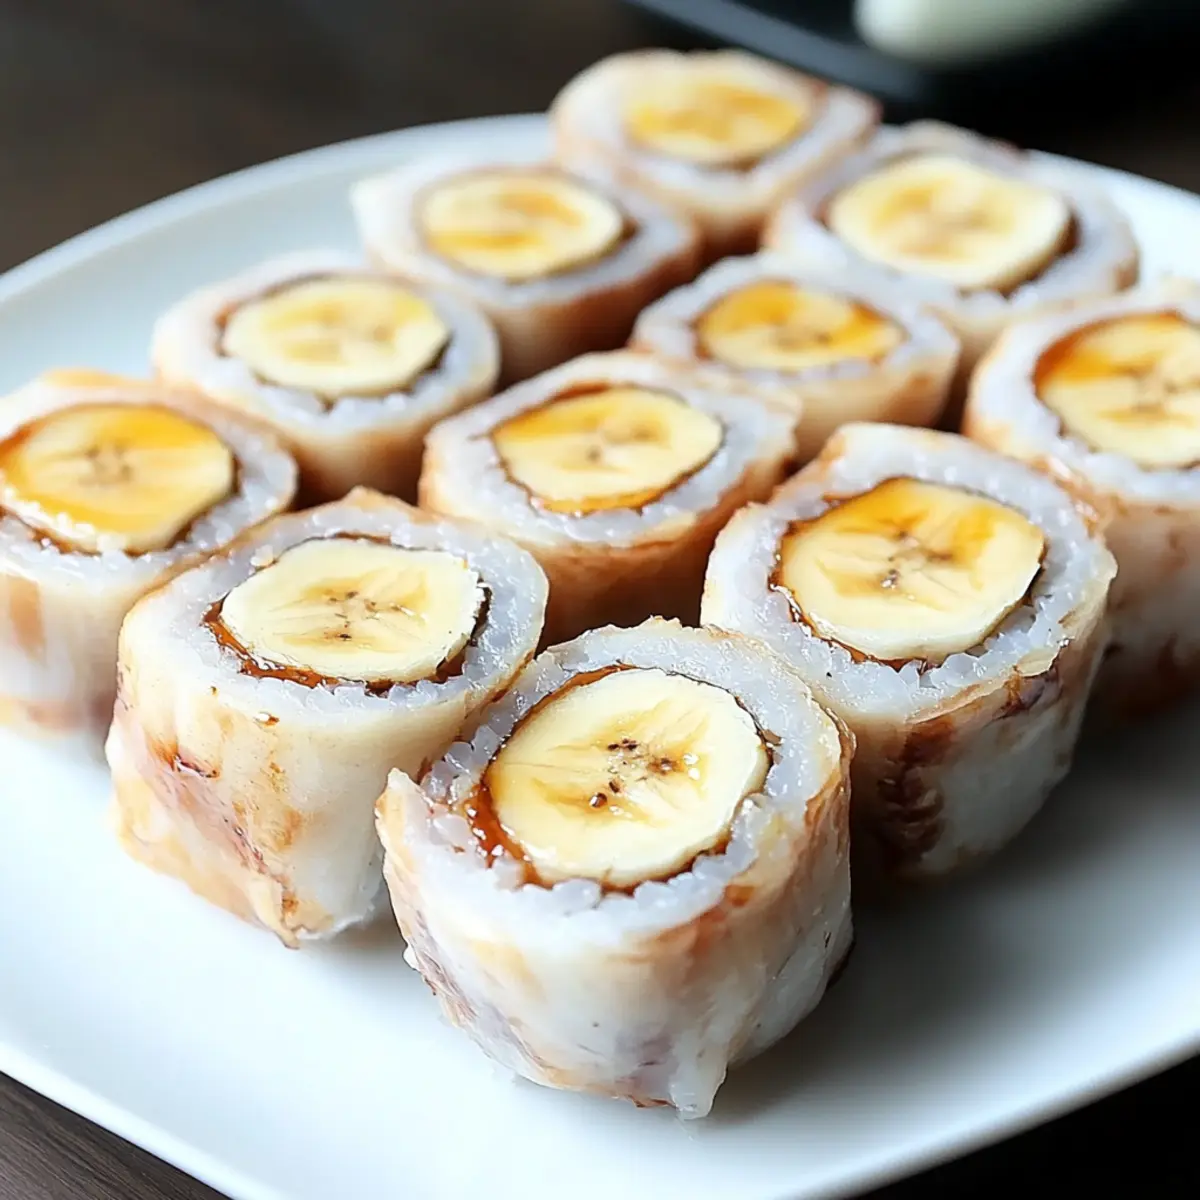
As I stood in my kitchen pondering what to whip up for a quick yet satisfying snack, a lightbulb moment transformed a simple banana into something extraordinary: Banana Sushi! This delightful twist on traditional sushi not only takes mere minutes to prepare but also promises a fun experience for both kids and adults alike. With just a flour tortilla, creamy peanut butter, and Nutella enveloping a fresh banana, you're in for a delightful treat that feels indulgent without the guilt. Plus, it's the perfect way to satisfy your sweet cravings without a trip to the drive-thru. Are you ready to take your snack game to a whole new level? Let’s dive in and roll out some Banana Sushi!
Why Is Banana Sushi So Irresistible?
Simplicity shines with this delightful treat! With just three ingredients, you can whip up a unique snack in minutes. Sweet and savory flavors meld beautifully, thanks to the combination of peanut butter and Nutella. This recipe is family-friendly — kids will love helping roll and slice! Plus, it’s versatile; feel free to customize with your favorite spreads or toppings. Perfect for any time of day, Banana Sushi is sure to wow your taste buds and impress friends!
Banana Sushi Ingredients
For the Wrap
• Flour Tortilla – A soft base that holds everything together; feel free to use whole wheat for added fiber.
For the Filling
• Large Banana – The star ingredient that provides natural sweetness and delightful texture; ripe bananas are best for a creamy bite.
• Peanut Butter – Adds richness and protein; swap for almond or sunflower seed butter for a nut-free alternative.
• Nutella – A luscious chocolate-hazelnut spread that enhances the flavor; can be replaced with a dairy-free chocolate spread for a vegan option.
Banana Sushi is a quick and delicious way to indulge your sweet cravings!
Step‑by‑Step Instructions for Banana Sushi
Step 1: Prepare the Tortilla
Start by laying a large flour tortilla flat on a clean cutting board or plate. If you prefer a softer wrap, warm it in the microwave for about 10-15 seconds until it becomes pliable and slightly steamy. This extra step will make rolling your Banana Sushi easier and more enjoyable.
Step 2: Spread the Peanut Butter
Using a butter knife or spatula, spread a generous layer of peanut butter evenly across one side of the tortilla, making sure to leave about an inch of space around the edges. The smooth and creamy texture of the peanut butter will not only add flavor but will also help hold everything together in your delightful banana sushi rolls.
Step 3: Add the Nutella
Now, take a small amount of Nutella and lightly smear it in a line right above the peanut butter, adding a touch of chocolatey sweetness. Ensure that the Nutella line is not too thick, as we want to keep the balance between flavors in our Banana Sushi while still providing that decadent hint of chocolate.
Step 4: Position the Banana
Peel the banana and gently place it at one end of the tortilla, aligning it closely with the edge. Visualize it as the centerpiece of your roll. This step is crucial for ensuring a tight, uniform roll when you wrap your Banana Sushi, so position it nicely to create a delightful treat.
Step 5: Roll It Up
Carefully start rolling the tortilla tightly around the filling from the edge with the banana. Make sure to keep the roll as snug as possible while sealing the edge with the peanut butter. This will help keep your Banana Sushi intact and prevent any fillings from spilling out during slicing.
Step 6: Slice into Rounds
Using a sharp knife, cut the rolled tortilla into ½ to 1-inch rounds. As you slice, enjoy watching the colorful fillings of your Banana Sushi reveal themselves. This step transforms your roll into bite-sized pieces that are perfect for serving and sharing, making them visually appealing, too.
Step 7: Serve and Enjoy
Arrange the delightful pieces of your Banana Sushi on a plate for an inviting presentation. Serve them immediately to enjoy the fresh flavors and textures at their best. This fun and creative snack will surely please both kids and adults alike, satisfying those sweet cravings with every delicious bite!
How to Store and Freeze Banana Sushi
Fridge: Store leftover Banana Sushi in an airtight container in the refrigerator for up to 2 days. Enjoy chilled bites or bring to room temperature before serving for the best flavor.
Freezer: For longer storage, wrap individual pieces of Banana Sushi tightly in plastic wrap and place them in a freezer-safe bag. They can be frozen for up to 1 month.
Reheating: To enjoy frozen Banana Sushi, allow it to thaw overnight in the fridge. Enjoy cold, or let it warm to room temperature, maintaining its delightful taste and texture.
What to Serve with Banana Sushi
Create the perfect spread for this fun and delightful treat, making snack time even more enjoyable.
-
Fresh Fruit Salad: Bright and juicy fruits like strawberries and kiwi balance the richness of the sushi, adding a refreshing touch to your plate. The colors alone make for a stunning presentation!
-
Yogurt Parfait: Layer creamy yogurt with granola and seasonal fruits. This adds a delightful contrast in texture and offers a wholesome balance to the sweetness of Banana Sushi.
-
Chocolate Milkshake: A rich, indulgent shake pairs magnificently with the sweet sushi, creating a nostalgia-inducing experience for both kids and adults alike. It's a dream come true for chocoholics!
-
Nutty Trail Mix: Combine nuts, seeds, and dried fruit for a crunchy side that brings additional nutrients and textures to your snack session. This is a great choice if you crave something salty!
-
Herbal Tea: A calming cup of chamomile or mint tea can cleanse your palate and keep things light, making it a perfect companion for your sweet roll.
-
Dark Chocolate Dipping Sauce: Elevate your Banana Sushi with a warm bowl of melted dark chocolate for dipping. This luscious addition turns your treat into an irresistible dessert moment.
-
Coconut Chips: Crisp, toasty coconut flakes add a tropical flair that enhances the flavors of the banana without overwhelming them. A delightful crunch is always a welcome texture!
Make Ahead Options
These Banana Sushi rolls are perfect for meal prep enthusiasts! You can prepare the flour tortilla and spread the peanut butter and Nutella up to 24 hours in advance, wrapping it tightly in plastic wrap to keep it fresh. Slice the banana just before serving to prevent browning; however, if you're short on time, you can slice it a couple of hours ahead as well. When you're ready to enjoy your Banana Sushi, simply assemble by placing the banana in the tortilla and rolling it up. This way, you can have a fun and delicious snack ready in no time, all while saving yourself precious minutes on busy days!
Banana Sushi Variations & Substitutions
Feel free to personalize your Banana Sushi with these delightful twists that will tantalize your taste buds!
-
Nut-Free: Swap peanut butter for sunflower seed butter to make it suitable for those with nut allergies. It still delivers a rich flavor!
-
Vegan Delight: Replace Nutella with a dairy-free chocolate spread or a homemade chocolate almond spread, ensuring everyone can indulge.
-
Protein Boost: Add chia seeds or ground flaxseed to the peanut butter for extra protein and a nutritious crunch. These tiny seeds pack a powerful punch!
-
Fruity Twist: Toss in some sliced strawberries or raspberries alongside the banana for an exciting burst of flavor. This adds a delightful fruity surprise with every bite.
-
Spicy Kick: Sprinkle a pinch of cinnamon or a drizzle of honey before rolling for a hint of warmth to complement the sweetness. It’s a simple way to enhance the flavor profile!
-
Chocolate Lovers: Use Nutella and add chocolate chips for an even more decadent treat. Each slice will bring a delightful chocolate explosion that’s hard to resist.
-
Whole Grain Goodness: Opt for a whole wheat tortilla instead of a regular flour tortilla for added fiber and a nutty flavor. It’s a small swap that has a big impact!
-
Crunch Factor: Include a sprinkle of granola or crushed nuts inside before rolling for an added crunch that contrasts beautifully with the creamy banana and peanut butter. The texture will elevate your sushi experience!
Tips for the Best Banana Sushi
- Wrap Right: Start with a warm tortilla for better flexibility, making rolling your Banana Sushi smoother and easier to handle.
- Spread Evenly: Ensure an even spread of peanut butter and Nutella, leaving space at the edges to prevent spilling during slicing.
- Choose the Right Banana: Use a ripe banana for the perfect sweetness and creamy texture that holds up well in your sushi rolls.
- Cut Carefully: Use a sharp knife to slice your Banana Sushi for clean, appetizing pieces without squishing the filling.
- Get Creative: Experiment with ingredients like honey, chia seeds, or different nut spreads to personalize your Banana Sushi and cater to your taste preferences.
Banana Sushi Recipe FAQs
What type of banana is best for Banana Sushi?
The best bananas for Banana Sushi are ripe ones, which are sweet and creamy, providing that ideal texture. Look for bananas that are slightly speckled with brown spots, as this indicates they are at their peak ripeness. Overripe bananas can become mushy and may not hold their shape well in the roll.
How should I store leftover Banana Sushi?
Absolutely! Leftover Banana Sushi can be stored in an airtight container in the refrigerator for up to 2 days. You can enjoy it chilled or let it come to room temperature before serving. Ensure each piece is covered to maintain its freshness and prevent the tortilla from drying out.
Can I freeze Banana Sushi?
Yes, you can! To freeze Banana Sushi, wrap each piece tightly in plastic wrap and then place them in a freezer-safe bag. This method keeps them fresh for up to 1 month. When you're ready to enjoy them, allow the frozen pieces to thaw overnight in the fridge. They can be eaten cold or left to warm to room temperature for a better texture.
What can I do if my Banana Sushi filling spills out?
If you find that your Banana Sushi filling is spilling out, it could be due to overfilling or not sealing the wrap tightly enough. To fix this, make sure to spread your peanut butter close to the edges and roll it snugly around the banana. If spillage occurs, simply press the filling back in with your fingers, and slice the roll evenly to make it easier to handle.
Are there any allergy considerations for Banana Sushi?
Indeed! If you're preparing Banana Sushi for someone with nut allergies, you can substitute peanut butter with sunbutter (sunflower seed butter) or any nut-free spread. When using Nutella, check for potential allergens, as it contains hazelnuts and may not suit everyone. Always double-check labels for other allergens if sharing with others.
Can I customize the flavors in my Banana Sushi?
Very much so! The more the merrier when it comes to customization! You can add drizzles of honey, sprinkle some chia seeds, or even switch out the spreads for alternatives like almond butter or a dairy-free chocolate spread. Feel free to experiment with your favorite flavors to make Banana Sushi truly your own!
Easy Banana Sushi Rolls That Satisfy Your Sweet Cravings
Ingredients
Equipment
Method
- Start by laying a large flour tortilla flat on a clean cutting board or plate. If you prefer a softer wrap, warm it in the microwave for about 10-15 seconds until it becomes pliable and slightly steamy.
- Using a butter knife or spatula, spread a generous layer of peanut butter evenly across one side of the tortilla, leaving about an inch of space around the edges.
- Take a small amount of Nutella and lightly smear it in a line right above the peanut butter.
- Peel the banana and gently place it at one end of the tortilla, aligning it closely with the edge.
- Carefully start rolling the tortilla tightly around the filling from the edge with the banana, sealing the edge with peanut butter.
- Using a sharp knife, cut the rolled tortilla into ½ to 1-inch rounds.
- Arrange the pieces of your Banana Sushi on a plate for presentation and serve immediately.

Leave a Reply