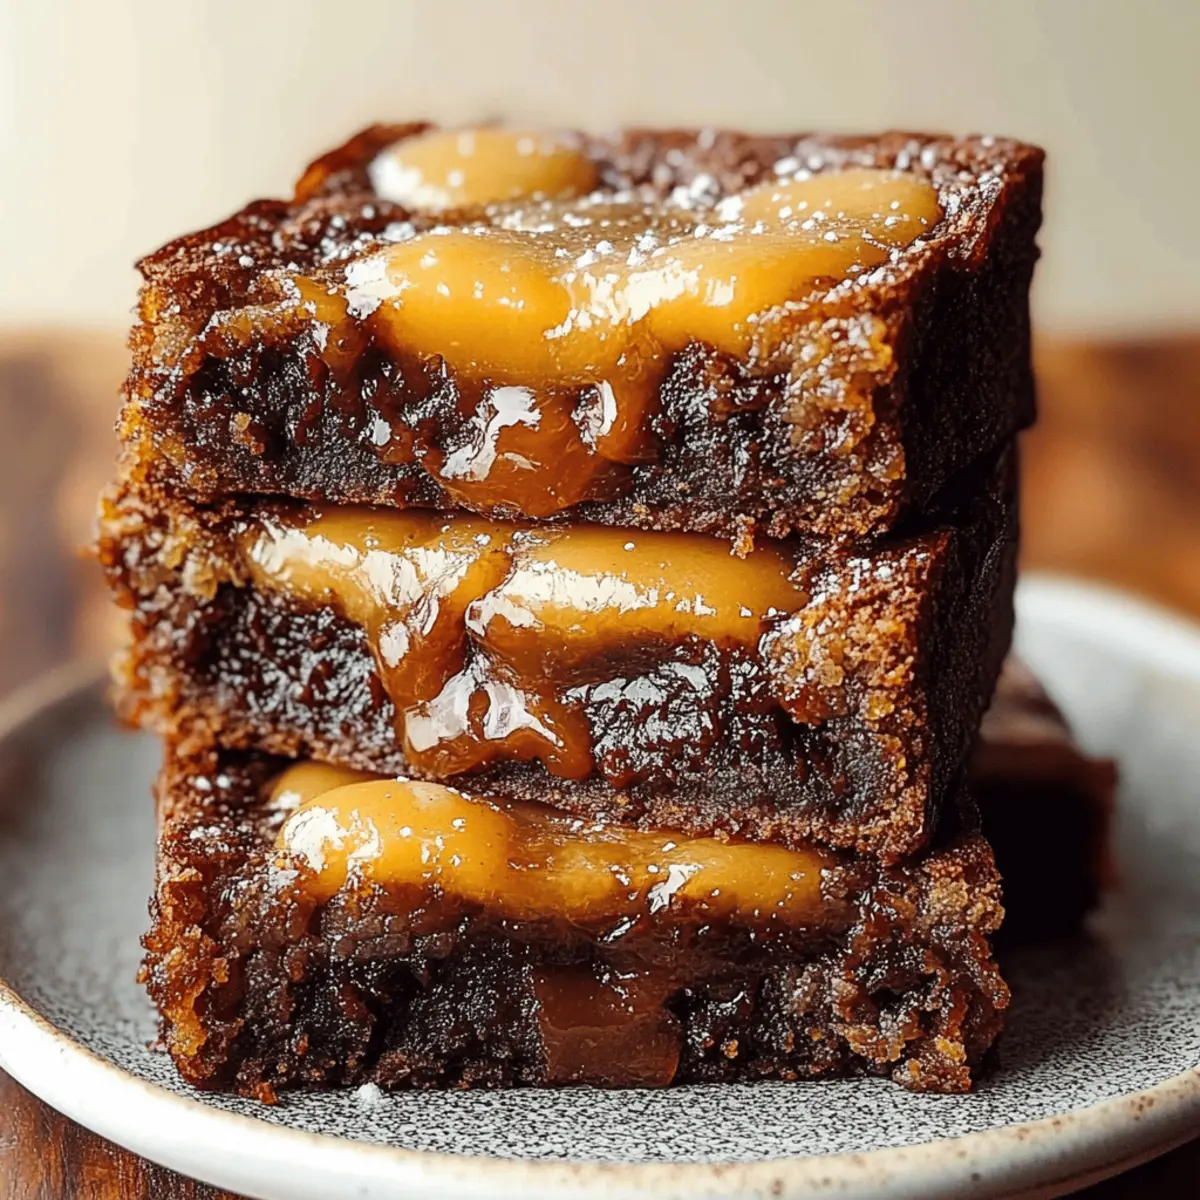
As I stood in my kitchen, the sweet aroma of melting chocolate and buttery caramel enveloped me, whisking me away to a cozy café where time seemed to stand still. Today, I’m excited to share my Caramel Brownies recipe that perfectly combines gooey caramel with rich chocolate flavors, creating a delightful experience that's hard to resist. These brownies are not just easy to whip up in about an hour; they also make a show-stopping dessert that will leave friends and family begging for more. Whether you're indulging after a long day or celebrating a special occasion, these treats are sure to bring joy to any gathering. Curious about how simple ingredients can come together to create such decadent brownies? Let’s dive into the recipe that’s waiting to transform your dessert game!
Why are these Caramel Brownies irresistible?
Decadent, luscious layers: The combination of rich chocolate and gooey caramel creates an indulgent bite you won't forget.
Quick and easy: With just 15 minutes of prep, you’ll have warm brownies ready to enjoy in no time.
Crowd-pleasing favorite: These brownies are sure to impress at any gathering, making you the star baker of the night!
Versatile treat: Perfect for parties, potlucks, or a cozy night in—everyone loves the combination of chocolate and caramel.
Homey comfort: The delightful aroma filling your kitchen will make you feel right at home, bringing back fond memories with each bite.
Caramel Brownies Ingredients
For the Brownie Batter
• Unsalted butter – the base for rich, fudgy brownies.
• Granulated sugar – adds the sweetness that brings balance to the deep chocolate flavor.
• Large eggs – provide moisture and help the brownies rise with a soft texture.
• Vanilla extract – enhances the overall flavor, making your brownies taste even more indulgent.
• Unsweetened cocoa powder – the star ingredient that gives your brownies their chocolatey goodness.
• All-purpose flour – helps bind the ingredients together for a stable structure.
• Salt – a pinch balances the sweetness and intensifies the chocolate taste.
• Baking powder – contributes to the perfect leavening for a chewy brownie texture.
• Semi-sweet chocolate chips – melt into the brownies for an extra touch of chocolatey heaven.
For the Caramel Layer
• Soft caramels – the key to that gooey, indulgent core that makes these brownies unforgettable.
• Heavy cream – adds a smoothness to the caramel, ensuring it melts beautifully into the brownies.
These Caramel Brownies are a delightful treat that you won’t want to miss out on!
Step‑by‑Step Instructions for Caramel Brownies
Step 1: Preheat and Prepare the Pan
Begin by preheating your oven to 350°F (175°C). While it warms up, grab an 8×8-inch square pan and line it with parchment paper, leaving some overhang for easy removal later. Lightly grease the parchment paper to ensure the brownies don’t stick. You’re creating a warm, inviting foundation for your delicious Caramel Brownies!
Step 2: Melt the Butter and Chocolate
In a microwave-safe bowl or a double boiler, combine the unsalted butter and semi-sweet chocolate chips. Microwave in short intervals of 30 seconds, stirring in between, until the mixture is completely smooth and glossy. Allow it to cool for a few minutes before proceeding, as this will help create the fudgy texture we love in Caramel Brownies.
Step 3: Whisk the Sugar and Eggs
In a large mixing bowl, add granulated sugar and two large eggs. Using a whisk, vigorously mix until the mixture is light, frothy, and slightly thickened—this should take about 2-3 minutes. The goal is to incorporate air to yield a tender brownie. Don’t forget to add the teaspoon of vanilla extract during this step for a lovely aroma and flavor boost!
Step 4: Combine Dry Ingredients
Now, gently stir in the unsweetened cocoa powder until fully blended into the egg mixture. Next, add the all-purpose flour, baking powder, and salt. Mix with a spatula until just combined, taking care not to overmix. You want to maintain that delightful fudginess that makes these Caramel Brownies so appealing.
Step 5: Melt the Caramel Mixture
In a small saucepan or microwave, melt the soft caramels with the heavy cream over low heat. Stir continuously to achieve a silky texture—this should take about 3-5 minutes on the stovetop or about 1-2 minutes in the microwave, checking every 30 seconds. Allow this caramel mixture to cool slightly while you prepare the brownie layers.
Step 6: Layer the Brownie Batter
Pour half of your brownie batter into the prepared pan, using a spatula to spread it into an even layer. Next, drizzle or dollop half of the melted caramel over the brownie base, ensuring an indulgent caramel swirl. This creates a delightful contrast of flavors in your Caramel Brownies that everyone will love.
Step 7: Add More Batter and Caramel
Spoon the remaining brownie batter on top of the caramel layer, smoothing it out gently to cover. Take the remaining caramel and drizzle it over the top; using a knife or toothpick, swirl it lightly to create a marbled effect. This step enhances the indulgence and visual appeal of your Caramel Brownies.
Step 8: Bake the Brownies
Place the assembled pan in the preheated oven and bake for 30-35 minutes. Keep an eye on them; they’re done when a toothpick inserted in the center comes out with moist crumbs, indicating a soft, fudgy texture. The aroma will be heavenly, signaling that your Caramel Brownies are nearly ready to enjoy!
Step 9: Cool and Slice
Once baked, remove the brownies from the oven and allow them to cool in the pan for at least 1 hour. For cleaner slices, chill them in the refrigerator for an additional 30 minutes. This cooling period helps the caramel set, making those decadent layers easier to cut, so your Caramel Brownies will look as good as they taste!
Caramel Brownies Variations & Substitutions
Invite your creative spirit to shine by customizing these brownies with your favorite flavors and ingredients!
-
Dairy-Free: Substitute unsalted butter with vegan butter and use dairy-free chocolate chips for a plant-based delight.
For a rich, creamy texture, a good dairy-free chocolate can elevate this recipe while keeping it indulgent. -
Gluten-Free: Replace all-purpose flour with a 1:1 gluten-free flour blend that includes xanthan gum.
This swap keeps the brownies deliciously fudgy, perfect for gluten-sensitive friends. -
Nutty Twist: Stir in 1 cup of chopped walnuts or pecans into the brownie batter for a delightful crunch.
Nuts add not only texture but also a lovely earthy flavor that complements chocolate beautifully. -
Minty Fresh: Incorporate 1 teaspoon of peppermint extract into the batter for a refreshing minty flavor.
Pairs wonderfully with chocolate, transforming these brownies into a holiday favorite or a cool summer treat! -
Spicy Kick: Add 1 teaspoon of cayenne pepper or chili powder to the brownie batter for an unexpected heat.
This daring twist creates an exciting contrast to the sweet caramel, feeding your adventurous palate. -
Caramel Swirl: Replace half the soft caramels with your favorite flavored caramel candies—like sea salt or apple.
This twist offers an extra layer of flavor, making each bite unique and memorable. -
Cookie Dough Layer: For a decadent surprise, dollop small spoonfuls of edible cookie dough between brownie layers before baking.
Each slice delivers a delightful combo of chewy brownie and soft, scrumptious cookie dough. -
Extra Chocolate: Mix in an additional 0.5 cup of chocolate chips for an even richer chocolate experience.
This simple tweak amplifies the chocolate decadence and adds melted surprises in every mouthful.
What to Serve with Caramel Brownies
Satisfy your sweet tooth and elevate your gathering with these perfect pairings that bring out the best in your brownie experience.
-
Vanilla Ice Cream: A classic choice, its creamy texture perfectly offsets the rich caramel and chocolate, creating a delightful contrast. Serve with a warm brownie for a heavenly dessert combination!
-
Chocolate Sauce: A luscious drizzle adds an extra layer of sweetness and decadence to your brownies, perfect for chocolate lovers craving an indulgent treat.
-
Fresh Berries: Raspberries or strawberries provide a tart burst of flavor that cuts through the sweetness, creating a refreshing balance. Their vibrant color also adds an appealing element to your dessert plate.
-
Whipped Cream: Light and airy, freshly whipped cream pairs beautifully with the fudginess of the brownies, making each bite feel indulgent yet light!
-
Caramel Sauce: Elevate your dessert with an additional drizzle of warm caramel sauce. This enhances the gooey factor and ties all flavors together in a sweet symphony.
-
Coffee or Espresso: A cup of rich coffee or a shot of espresso complements the deep chocolate flavor of the brownies, creating a decadent dessert experience that’s perfect for sharing!
-
Nutty Crème Brûlée: This creamy treat brings texture and a hint of nuttiness that juxtaposes the rich brownies, elevating your after-dinner experience with gourmet flair.
-
Mint Tea: A refreshing herbal option, mint tea cleanses the palate after every chocolaty bite, making it a wonderful pairing that leaves you satisfied but not overwhelmed.
How to Store and Freeze Caramel Brownies
Room Temperature: Store your Caramel Brownies in an airtight container for up to 3 days at room temperature to keep them fresh and fudgy.
Fridge: To extend their shelf life, you can refrigerate them for up to a week. Just ensure they’re sealed well to prevent drying out.
Freezer: For longer storage, freeze the brownies in a single layer, wrapped tightly in plastic wrap and then in aluminum foil, for up to 3 months. Thaw overnight in the fridge before enjoying.
Reheating: If you crave warm brownies, gently heat individual slices in the microwave for about 10-15 seconds until soft and gooey. Enjoy the delightful caramel and chocolate layers!
Make Ahead Options
These delightful Caramel Brownies are perfect for busy home cooks who want to enjoy a homemade treat without the last-minute rush! You can prepare the brownie batter up to 24 hours in advance—simply mix the ingredients and store it tightly covered in the refrigerator to maintain quality. Additionally, the caramel layer can be melted and prepped ahead of time; just keep it in an airtight container in the fridge for up to 3 days. When you’re ready to bake, pour the chilled batter into the prepared pan, drizzle with the prepped caramel, and swirl together before baking. With these make-ahead strategies, you’ll have restaurant-quality brownies ready with very little effort, all while saving precious time for yourself!
Expert Tips for Caramel Brownies
-
Choose the Right Pan: Use a standard 8×8-inch square pan for even baking. Dark pans may cause the edges to overcook—opt for light-colored pans for best results.
-
Monitor Melting Caramels: When melting caramels with cream, do it over low heat and stir frequently to prevent burning. This ensures your caramel layer is silky smooth.
-
Don't Overmix: When combining dry ingredients into the wet mixture, mix until just combined. Overmixing can lead to tough brownies instead of that fudgy texture we love.
-
Cool Properly: Allow brownies to cool completely in the pan before slicing. Chilling for 30 minutes in the refrigerator yields clean, beautiful slices of your Caramel Brownies.
-
Add Extra Flavor: Consider a pinch of sea salt on top before serving. This enhances the flavors of the chocolate and caramel, creating an irresistible treat.
Caramel Brownies Recipe FAQs
How do I choose the right caramel?
Absolutely! For the best results in your Caramel Brownies, select soft caramels like Kraft or Werther's Originals, as they melt beautifully. Avoid hard caramels, as they won't blend well with the heavy cream.
How should I store leftover Caramel Brownies?
To keep your Caramel Brownies fresh and fudgy, store them in an airtight container at room temperature for up to 3 days. If you want to extend their lifespan, refrigerate them for up to a week—just make sure they’re well-sealed. This ensures you can enjoy that sweet, gooey goodness longer!
Can I freeze Caramel Brownies?
Yes! Freezing is a great option for preserving those indulgent layers. Wrap the brownies tightly in plastic wrap and then in aluminum foil to prevent freezer burn. They can last up to 3 months in the freezer. When you're ready to indulge, simply thaw them overnight in the refrigerator, and they’ll be just as decadent as the day you made them.
What if my brownies turn out too dry?
If your Caramel Brownies come out too dry, it might be due to over-baking or not measuring the ingredients accurately. Baking them for just 30-35 minutes is key—check with a toothpick for moist crumbs rather than a clean pick. If you find yourself needing a quick fix, drizzle a bit of melted chocolate or caramel on top right before serving for added moisture and flavor!
Are Caramel Brownies safe for my pet?
No, it’s important to keep Caramel Brownies away from pets, particularly dogs. The chocolate content can be toxic, and the sugar can upset their stomachs. If your furry friend is looking longingly, maybe consider a dog-friendly treat instead!
What can I substitute for unsalted butter?
If you need a dairy-free option, coconut oil works wonderfully in place of unsalted butter in your Caramel Brownies. Use the same amount (0.5 cup), and it will help achieve that rich, fudgy texture. You can also use applesauce for a lighter option—just replace half of the butter with applesauce for an interesting twist!
Indulgent Caramel Brownies You'll Want to Make Tonight
Ingredients
Equipment
Method
- Preheat your oven to 350°F (175°C) and prepare an 8x8-inch pan lined with parchment paper.
- Melt unsalted butter and chocolate chips in a microwave-safe bowl until smooth.
- In a large bowl, whisk together granulated sugar and eggs until light and frothy.
- Stir in unsweetened cocoa powder and mix in flour, baking powder, and salt until combined.
- Melt soft caramels with heavy cream over low heat until silky smooth.
- Pour half of the brownie batter into the pan and drizzle half of the melted caramel on top.
- Spread the remaining brownie batter over the caramel, then drizzle with the rest of the caramel and swirl together.
- Bake in the preheated oven for 30-35 minutes or until a toothpick comes out with moist crumbs.
- Let cool in the pan for at least 1 hour before slicing for clean cuts.
Leave a Reply