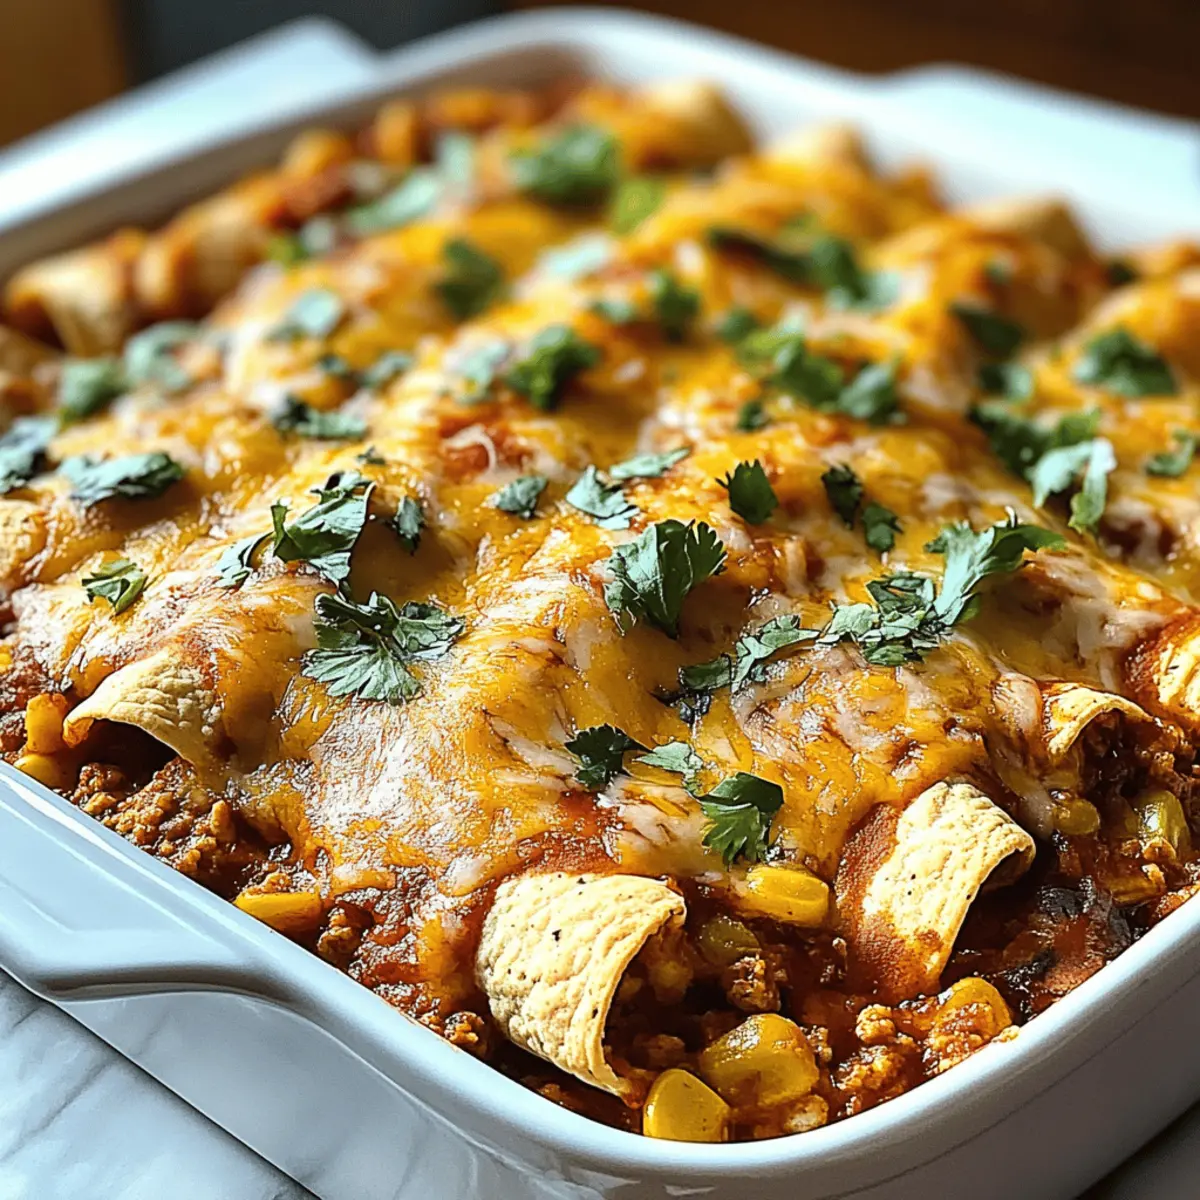
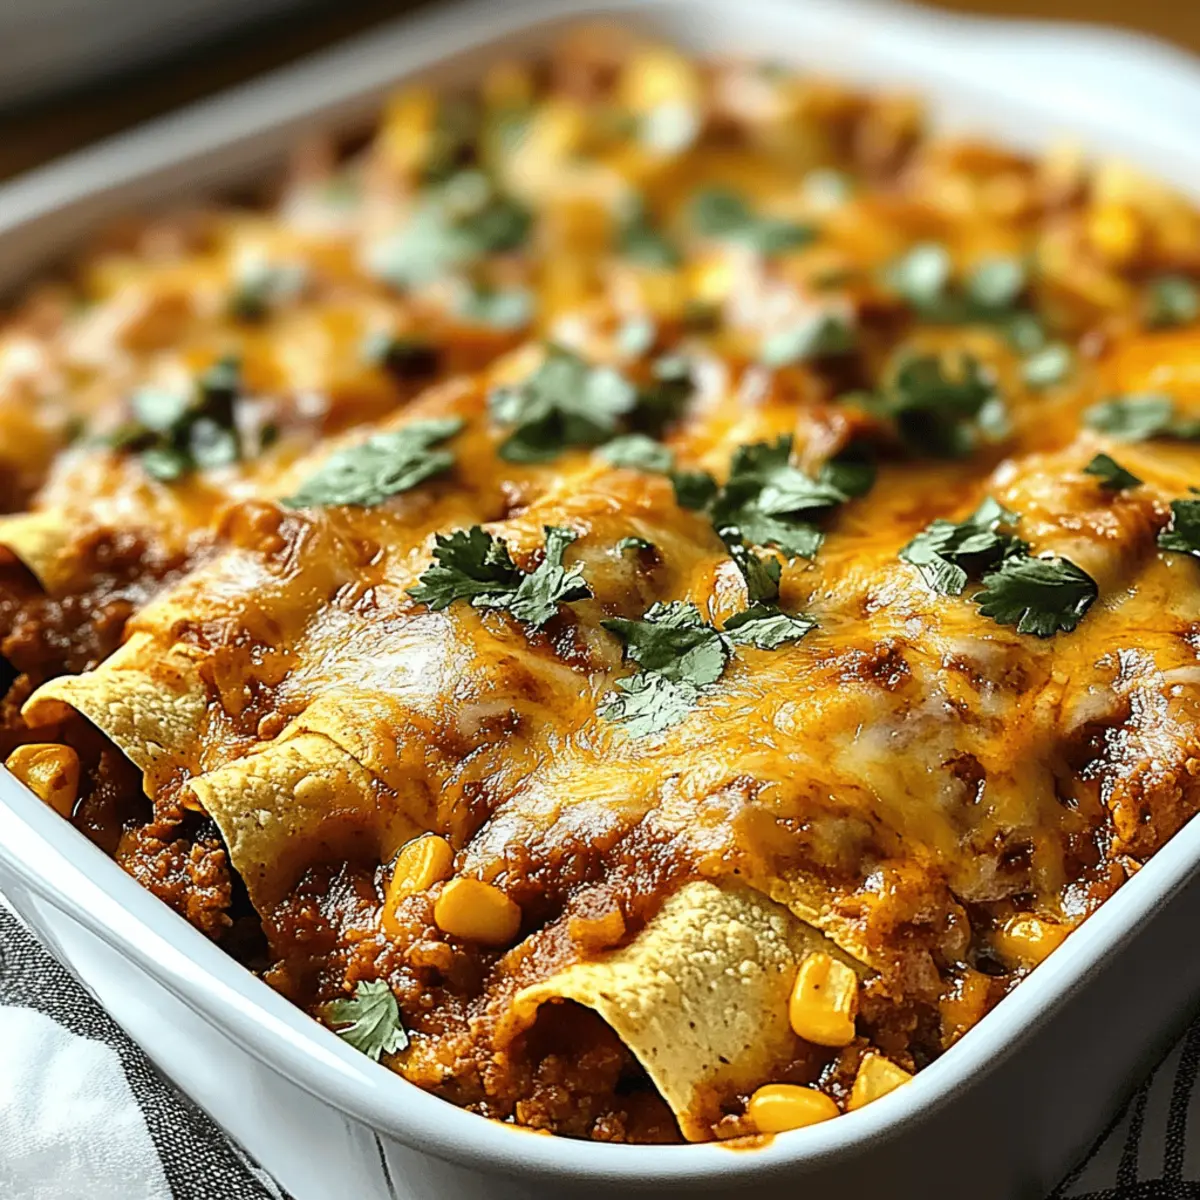
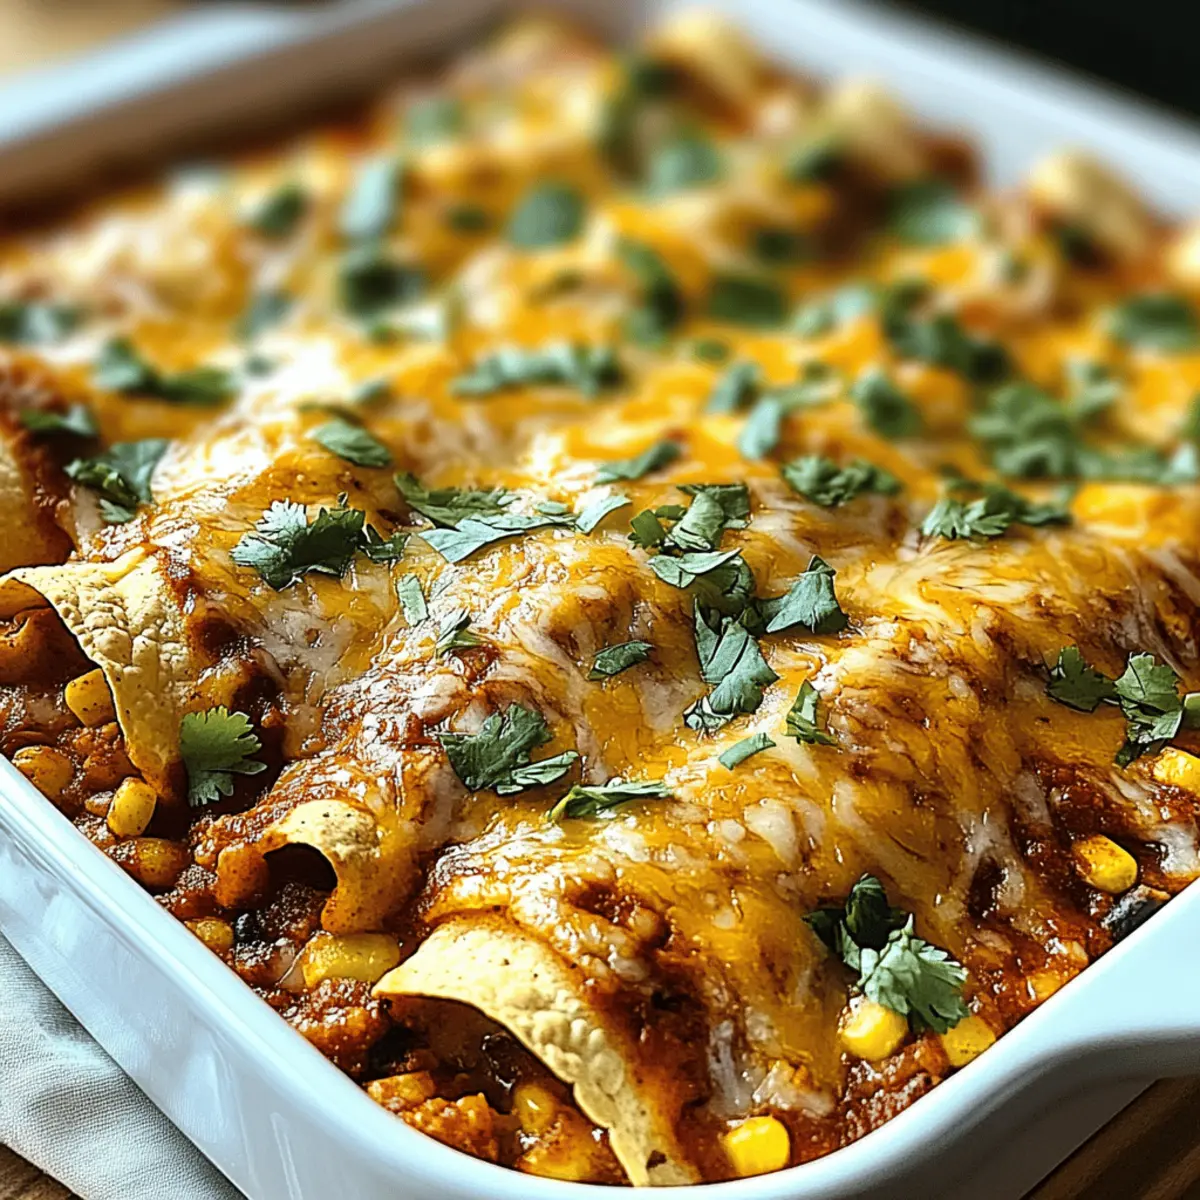
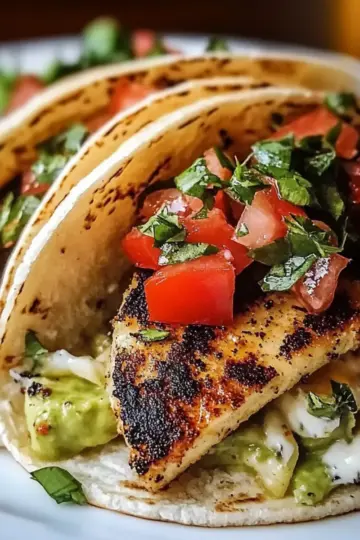
Crunch! There’s nothing quite like the satisfying sound of tortilla chips giving way to layers of deliciousness in a comforting dish. My go-to recipe for Tortilla Chip Enchiladas strikes the perfect balance between indulgence and ease, making it ideal for busy weeknights or casual gatherings. With just 15 minutes of prep time, this crowd-pleaser uses everyday ingredients and is packed with flavors that make everyone feel at home. Plus, the cheesy, bubbly goodness topped with creamy sour cream elevates your classic enchiladas to a whole new level. Ready to dive into a comforting, homemade meal that’s big on taste but low on stress? Let’s get cooking!
Why Are Tortilla Chip Enchiladas Amazing?
Simplicity at its finest: This recipe requires minimal ingredients and just 15 minutes of prep, perfect for a hassle-free dinner.
Bubbly, Cheesy Goodness: The melted cheese creates a tantalizing crust that will have everyone coming back for seconds.
Crowd Favorite: Guaranteed to impress your family and friends, these enchiladas are a hit for gatherings and cozy nights in.
Versatile: Feel free to customize with your favorite proteins or veggies—you'll always achieve delicious results!
Comfort Food Reinvented: Enjoy the crunch of tortilla chips layered with tender chicken and rich sauce for a unique twist on a classic dish.
Tortilla Chip Enchiladas Ingredients
Get ready to whip up these tasty Tortilla Chip Enchiladas!
For the Base
• 6 oz tortilla chips – Perfect for creating that delightful crunch you love.
• 2 cups shredded cooked chicken – This adds a hearty protein boost to your dish.
• 1 cup enchilada sauce – Choose your favorite brand or homemade version for extra flavor.
For the Cheesy Layer
• 1 ½ cups shredded cheese – A mix of half cheddar and half Monterey Jack gives ultimate creaminess and flavor.
For Toppings
• ½ cup sour cream – Add a cool and creamy finish to every bite.
• 2 green onions, chopped – These provide a pop of color and a fresh crunch.
Step‑by‑Step Instructions for Tortilla Chip Enchiladas
Step 1: Preheat the Oven
Begin by preheating your oven to 375°F (190°C). While it's warming up, lightly spray a baking dish with nonstick cooking spray to ensure nothing sticks as your Tortilla Chip Enchiladas bake. This step sets the stage for a bubbly filling, so make sure your oven is nice and hot before moving on to the next step.
Step 2: Layer the Tortilla Chips
Spread half of the tortilla chips evenly across the bottom of the prepared baking dish. Make sure they cover the base completely for maximum crunch in every bite. This first layer is crucial for creating that delightful texture when you load it with the savory ingredients that will follow.
Step 3: Combine Chicken and Sauce
In a mixing bowl, toss the shredded cooked chicken with half of the enchilada sauce until well coated. This will infuse the chicken with rich flavor, ensuring each bite of your Tortilla Chip Enchiladas is packed with deliciousness. Spoon this flavorful mixture generously over the layer of tortilla chips, covering them evenly.
Step 4: Sprinkle the Cheese
Now, sprinkle half of the shredded cheese over the chicken mixture, allowing it to cascade down and cover every inch. This will create a gooey, cheesy layer that melts beautifully during baking. The blend of cheddar and Monterey Jack will be magnificent, melding into your flavors perfectly.
Step 5: Repeat the Layers
Add another layer of tortilla chips on top of the cheese, creating a hearty foundation for the next round of flavor. Follow this with the remaining chicken mixture and pour over the rest of the enchilada sauce, ensuring every corner is doused. Finally, top everything with the remaining cheese for that irresistible cheesy crust.
Step 6: Bake the Enchiladas
Cover the baking dish with foil and place it in the preheated oven for 20 minutes. This initial baking time helps the ingredients meld together beautifully. After 20 minutes, remove the foil and continue baking for an additional 10–15 minutes, or until the cheese is melted, bubbly, and golden brown, signaling that your Tortilla Chip Enchiladas are ready to enjoy.
Step 7: Serve with Toppings
Once baked, remove your enchiladas from the oven and let them cool for a couple of minutes. Serve hot, drizzling creamy sour cream over the top and garnishing with chopped green onions for that perfect finishing touch. These simple toppings elevate your cozy dish, making it a delightful meal for family or friends.
How to Store and Freeze Tortilla Chip Enchiladas
Fridge: Keep your Tortilla Chip Enchiladas in an airtight container in the fridge for up to 3 days, allowing the flavors to meld together even more.
Freezer: To freeze, wrap portions tightly in plastic wrap or aluminum foil, then place them in a freezer-safe bag. They can be stored for up to 2 months.
Reheating: When ready to enjoy again, thaw overnight in the fridge if frozen. Reheat in the oven at 350°F (175°C) for about 20 minutes, covered with foil to retain moisture.
Leftovers: If you have extra enchiladas, don’t hesitate to mix in a little splash of enchilada sauce before reheating to keep them from drying out.
What to Serve with Tortilla Chip Enchiladas
Create a symphony of flavors when pairing your favorite sides with the cheesy, crunchy goodness of this comforting dish!
-
Creamy Mexican Rice: This fluffy, flavorful rice is a perfect base that complements the enchiladas' rich sauce and texture.
-
Refried Beans: These hearty beans add a creamy, protein-rich element that balances the crunchiness of the tortilla chips.
-
Fresh Guacamole: The cool, creamy avocado offers a refreshing contrast and adds vibrant flavor to your dinner spread.
-
Crisp Salad: A light salad with mixed greens, tomatoes, and a zesty lime vinaigrette balances the dish’s richness while adding freshness.
-
Sautéed Zucchini: Quick and easy to make, sautéed zucchini provides a tender, slightly sweet addition that pairs beautifully with the hearty enchiladas.
-
Spicy Pickled Jalapeños: For those who enjoy a kick, serving pickled jalapeños alongside adds a zesty pop that enhances every bite.
-
Chilled Horchata: This sweet, cinnamon-spiced beverage refreshes the palate and pairs wonderfully with the flavors of the dish.
-
Chocolate Flan: For dessert, this rich, creamy dessert with a hint of chocolate rounds out the meal with indulgent sweetness.
-
Mango Salsa: A fruity, tangy salsa brings an unexpected twist, enhancing each bite with sweetness and acidity.
Make Ahead Options
These Tortilla Chip Enchiladas are a fantastic option for hectic weeknights or meal prep enthusiasts! You can assemble the entire dish up to 24 hours in advance, storing it covered in the refrigerator. For best results, prepare the layers without baking—simply follow the layering instructions and cover tightly with foil. This ensures your chips won’t become soggy. When you’re ready to enjoy, simply preheat your oven and bake straight from the fridge, adding an extra 5 minutes to the initial baking time to ensure they are heated through. With this make-ahead strategy, you’ll have delicious, homemade comfort food ready to serve in no time!
Expert Tips for Tortilla Chip Enchiladas
• Quality Chips Matter: Use sturdy tortilla chips to prevent sogginess, ensuring a satisfying crunch in every bite of your Tortilla Chip Enchiladas.
• Layering Technique: Don’t skimp on layers! Proper layering with ingredients ensures even distribution of flavors and prevents the dish from becoming overly dry in some spots.
• Cheese Choice: Opt for a combination of sharp cheddar and Monterey Jack for the perfect melt. Avoid pre-shredded cheese, as it can contain anti-caking agents that prevent optimal melting.
• Spice It Up: Feel free to add diced jalapeños or a sprinkle of chili powder into the chicken mixture for an extra kick of flavor.
• Let it Rest: Allow the enchiladas to cool for a few minutes before serving to help set the layers, making it easier to cut and serve without falling apart.
Tortilla Chip Enchiladas Variations
Feel free to let your creativity run wild and customize these enchiladas to suit your taste!
-
Vegetarian: Swap the shredded chicken for black beans or lentils. This hearty option is rich in protein and perfect for a meatless meal.
-
Spicy Kick: Add diced jalapeños or a sprinkle of cayenne pepper to the chicken mixture. This will give your enchiladas a fiery twist that spice lovers will adore!
-
Gluten-Free: Use gluten-free tortilla chips and ensure your enchilada sauce is also gluten-free. Enjoy a delicious dish without compromising on taste or texture.
-
Cheesy Delight: Increase the cheese for an extra gooey experience. Try adding cream cheese into the mix for a luscious, decadent layer.
-
Slow Cooker Version: Layer everything in a slow cooker instead of baking. Cook on low for 4-5 hours, perfect for busy days when you want a warm meal waiting for you.
-
Mediterranean Flair: Replace the chicken with cooked ground lamb or beef and add olives, feta, and sun-dried tomatoes. This will give your enchiladas a delightful Mediterranean vibe that’s sure to impress.
-
Seasonal Veggies: Toss in seasonal vegetables like zucchini, corn, or bell peppers between layers for a pop of color and nutrition.
-
BBQ Twist: Mix BBQ sauce into the chicken mixture instead of enchilada sauce. The smoky flavor will transform your dish into a sweet and tangy delight.

Tortilla Chip Enchiladas Recipe FAQs
How do I choose the best tortilla chips for my enchiladas?
Absolutely! When selecting tortilla chips, look for sturdy, thicker options, as they hold up better under the weight of the toppings and sauce. Avoid thin chips, which can become soggy quickly. A good visual cue is to choose chips that look golden and have minimal air bubbles, ensuring they have the crunch you crave.
How long can I store leftover Tortilla Chip Enchiladas in the fridge?
Very! You can store your Tortilla Chip Enchiladas in an airtight container in the fridge for up to 3 days. This allows the flavors to continue melding, enhancing the overall taste. Just make sure to let them cool before placing them in the container to keep from trapping moisture.
What’s the best way to freeze Tortilla Chip Enchiladas?
Certainly! To freeze your enchiladas, wrap each portion tightly in plastic wrap or aluminum foil, ensuring there are no air pockets. Then, place the wrapped portions in a freezer-safe bag. They can last for up to 2 months in the freezer. When you’re ready to enjoy them, simply thaw them overnight in the fridge, and reheat in the oven for the best texture.
How can I prevent my enchiladas from getting too dry while baking?
Great question! To avoid dryness, ensure you're layering your ingredients properly, using enough enchilada sauce, and covering the baking dish with foil during the first part of the baking process. The foil traps steam, keeping things moist. If you find they seem dry after baking, you can always drizzle a little extra sauce over them just before serving to add moisture back in.
Are there any dietary considerations for making Tortilla Chip Enchiladas?
Absolutely! If you’re considering allergies, be mindful of the cheese and tortilla brands you choose, as they may contain dairy or gluten. For a dairy-free option, use plant-based cheese alternatives and gluten-free tortilla chips. Always check labels to ensure they align with any dietary restrictions you or your guests may have.
Can I use other proteins or veggies in my Tortilla Chip Enchiladas?
The more the merrier! Feel free to substitute the shredded chicken with shredded beef, pork, or even beans for a vegetarian version. You can also add sautéed bell peppers, corn, or zucchini for extra flavor and nutrition. Just remember to keep the overall balance of ingredients similar for the best results!
Irresistible Tortilla Chip Enchiladas for Cozy Nights
Ingredients
Equipment
Method
- Preheat your oven to 375°F (190°C) and spray a baking dish with nonstick cooking spray.
- Spread half of the tortilla chips evenly across the bottom of the prepared baking dish.
- In a mixing bowl, toss the shredded cooked chicken with half of the enchilada sauce until well coated.
- Sprinkle half of the shredded cheese over the chicken mixture.
- Add another layer of tortilla chips on top of the cheese, followed by the remaining chicken mixture and enchilada sauce.
- Top everything with the remaining cheese.
- Cover with foil and bake for 20 minutes, then remove foil and bake for an additional 10–15 minutes until the cheese is melted and bubbly.
- Let cool for a couple of minutes, then serve hot with sour cream and chopped green onions.

Leave a Reply