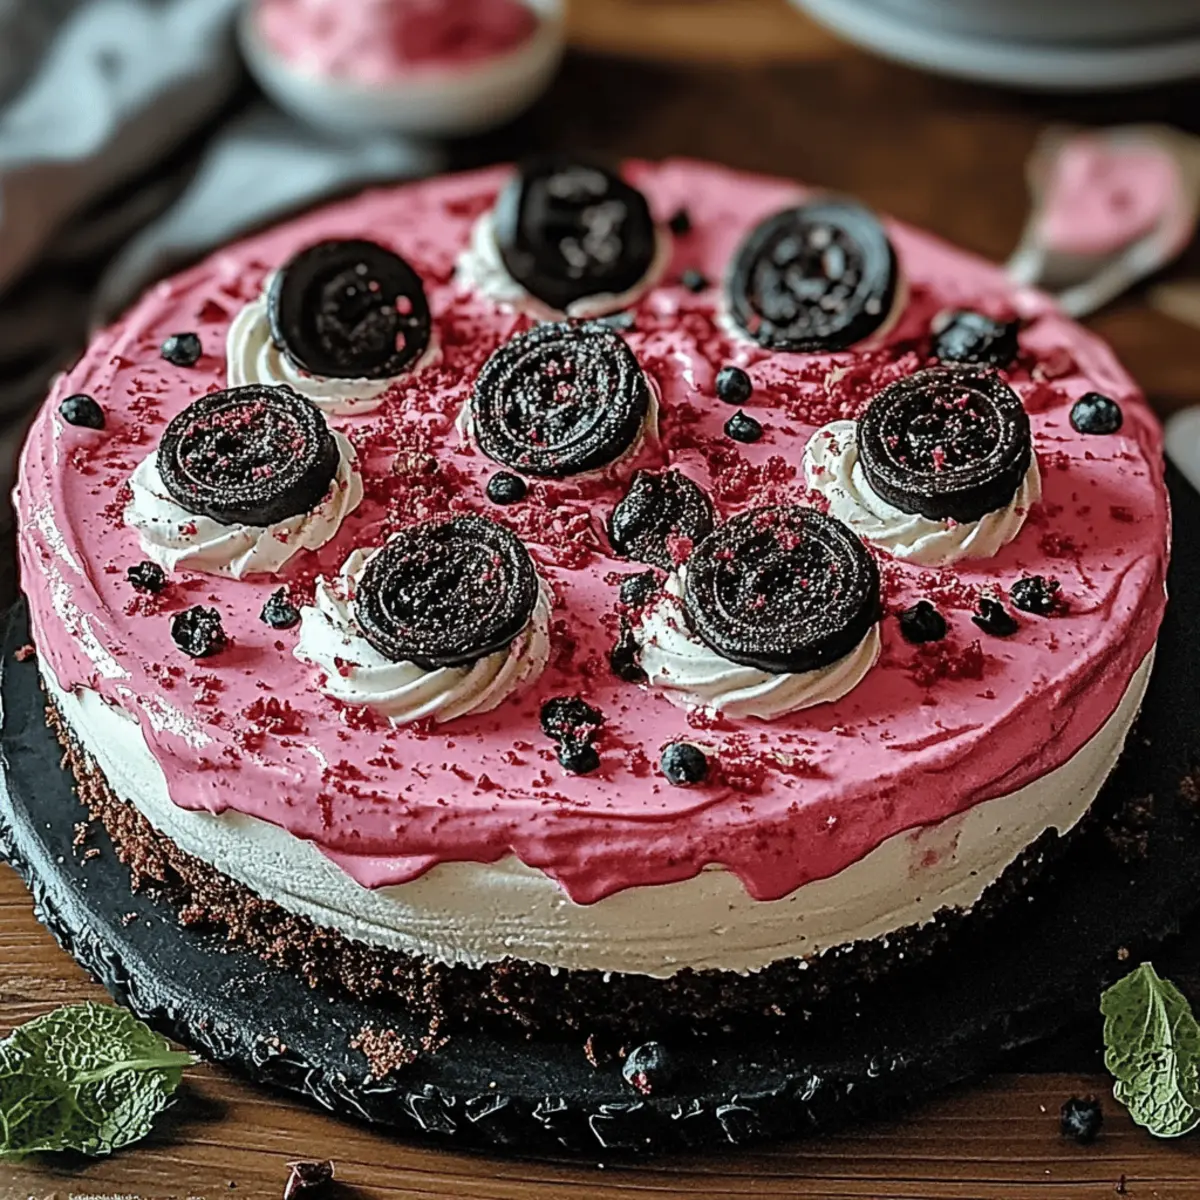
Stepping into my kitchen one sunny afternoon, I found myself enamored with the vibrant hues and delightful aromas swirling around me. That’s when I decided to whip up this gorgeous Pink Oreo Cheesecake—a dessert that is as pleasing to the eye as it is to the palate. This recipe is a delightful no-bake treat, perfect for impressing guests or indulging yourself on a self-care day. You'll love that it requires minimal preparation while offering maximum joy, making it an easy win in my homemade dessert arsenal. Plus, it’s a wonderfully creamy twist on the classic cheesecake, elevated by a playful pop of pink that adds a splash of fun to any gathering. Are you curious to see how easy it is to create this dreamy delight? Let’s dive in!

Why Is Pink Oreo Cheesecake a Must-Try?
Irresistible Appearance: The stunning pink hue is not only eye-catching but also makes this cheesecake a showstopper at any gathering.
Decadent Creaminess: With a rich blend of cream cheese and whipped cream, every slice is a creamy dream come true!
Quick Preparation: This delightful dessert comes together in just 30 minutes of prep, giving you more time to enjoy with loved ones.
Customizable Options: Feel free to swap in your favorite toppings—add fresh berries or extra mini Oreos to make it your own!
Crowd-Pleasing Delight: Kids and adults alike will be enchanted by its fun flavor and vibrant color, ensuring it disappears in no time!
Get ready to impress and enjoy the sweet satisfaction of creating this Pink Oreo Cheesecake!
Pink Oreo Cheesecake Ingredients
For the Crust
• 24 Oreo cookies – crush these to form a crunchy, rich base.
• ½ cup unsalted butter – melted to help bind the crust together perfectly.
For the Cheesecake Filling
• 16 oz cream cheese – ensure it’s softened for a smooth, creamy texture.
• 1 cup powdered sugar – adds sweetness and helps achieve that classic cheesecake flavor.
• 1 teaspoon vanilla extract – infuses a lovely warmth into this Pink Oreo Cheesecake.
• 1 cup heavy whipping cream – whip until stiff peaks form for an airy filling.
• 2 tablespoons pink food coloring – use to achieve the vibrant, playful pink hue.
For the Toppings (optional)
• 1 cup mini Oreo cookies – sprinkle these on top for extra crunch and fun!
• Fresh berries – garnish with these for a refreshing contrast and a pop of color.
Step‑by‑Step Instructions for Pink Oreo Cheesecake
Step 1: Prepare the Pan
Begin by greasing a 9-inch springform pan with cooking spray, ensuring even coverage to prevent sticking. Set the pan aside while you prepare the crust, which will provide a delicious base for your Pink Oreo Cheesecake.
Step 2: Make the Crust
In a mixing bowl, combine the crushed Oreo cookies with the melted unsalted butter, stirring until the mixture resembles wet sand. Firmly press this mixture evenly into the bottom of your prepared springform pan, using the flat bottom of a glass or your fingers to create a compact layer.
Step 3: Beat the Cream Cheese
In a large mixing bowl, beat the softened cream cheese with an electric mixer on medium speed until it is smooth and creamy, which should take about 2-3 minutes. This will create the fluffy base for your Pink Oreo Cheesecake filling, so ensure no lumps remain.
Step 4: Add Sweetness and Flavor
Gradually add in the powdered sugar and vanilla extract to the cream cheese, continuing to mix until everything is fully incorporated and smooth. This should take about 1-2 minutes, and you’ll know it’s ready when the mixture is silky and free of lumps.
Step 5: Whip the Heavy Cream
In a separate chilled bowl, whip the heavy cream using an electric mixer on high speed until stiff peaks form, which usually takes about 3-5 minutes. This will add lightness and airiness to your filling, giving the Pink Oreo Cheesecake its delightful texture.
Step 6: Fold in Whipped Cream
Gently fold the whipped cream into the cream cheese mixture, using a spatula and making sure no streaks remain. This should be done with care to preserve the airiness of the whipped cream; the filling should now be a luscious, creamy pink color.
Step 7: Add Pink Coloring
Slowly drizzle in the pink food coloring, stirring until you achieve your desired hue. Start with a small amount and gradually increase, mixing well to evenly distribute the color throughout the filling for your Pink Oreo Cheesecake.
Step 8: Pour the Filling
Carefully pour the pink cream cheese filling onto the crust in the springform pan. Use a spatula to smooth the top gently, ensuring an even surface. This step is crucial for the presentation of your cheesecake, so take your time with it.
Step 9: Chill the Cheesecake
Cover the cheesecake with plastic wrap and refrigerate for at least 3 hours, or until it’s fully set. The chilling time is essential for the filling to firm up and hold its shape when sliced, promising a delightful experience.
Step 10: Remove from Pan
Once set, carefully release the sides of the springform pan by unbuckling it. Take your time to ensure a clean release; this will help maintain the beautiful shape of your Pink Oreo Cheesecake.
Step 11: Add Toppings
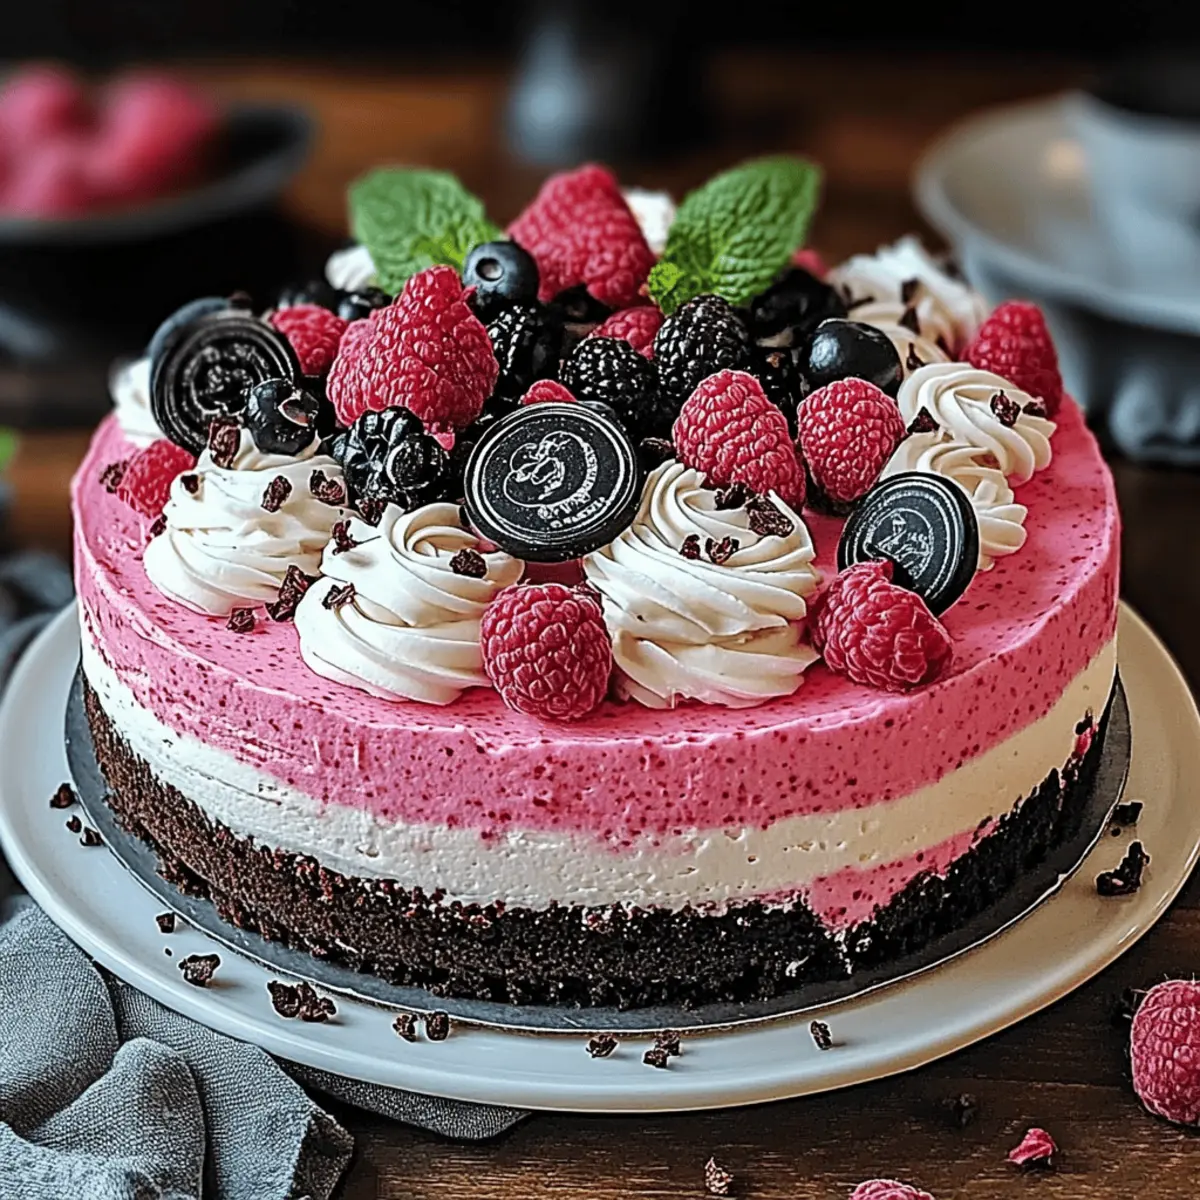
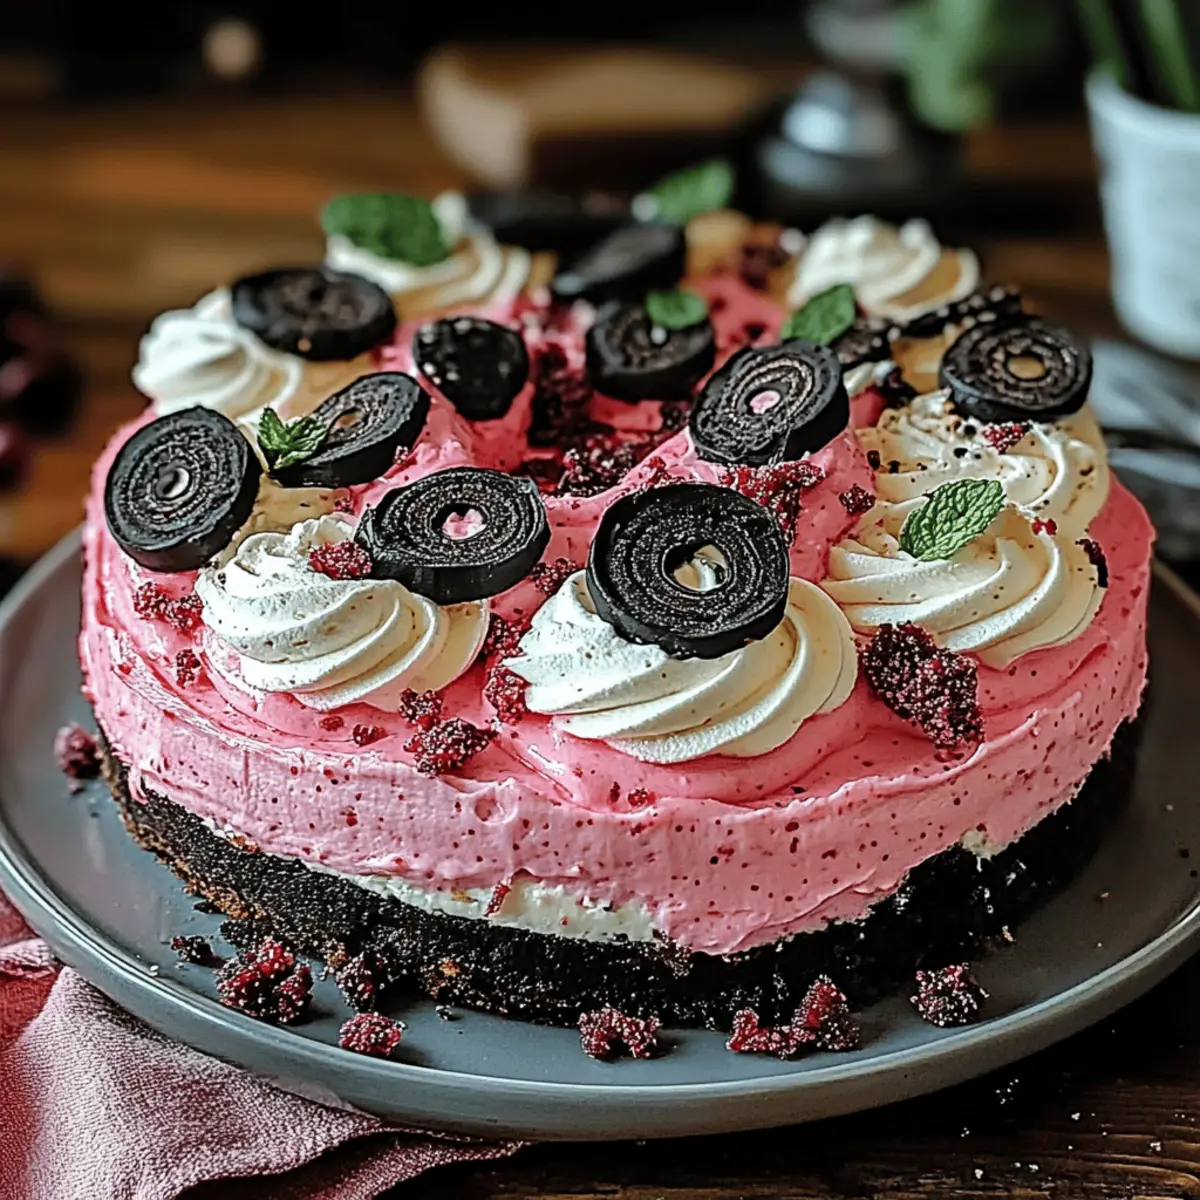
If desired, top your cheesecake with mini Oreo cookies and fresh berries for a joyful finish. These toppings not only add flavor but also enhance the visual appeal, making your Pink Oreo Cheesecake even more enticing for everyone to enjoy.
How to Store and Freeze Pink Oreo Cheesecake
Fridge: Keep your Pink Oreo Cheesecake covered in plastic wrap or in an airtight container to maintain its freshness for up to 5 days.
Freezer: If you want to enjoy this delicious cheesecake later, freeze it wrapped tightly in plastic wrap and aluminum foil for up to 2 months.
Thawing: To serve, transfer the frozen cheesecake to the fridge and allow it to thaw overnight for the best texture.
Serving Tip: Always garnish with fresh toppings just before serving to keep them vibrant and delicious!
What to Serve with Pink Oreo Cheesecake?
When it comes to completing your meal with a delightful dessert, balancing flavors and textures is key.
- Fresh Berry Medley: A mix of strawberries and blueberries offers a refreshing contrast to the creamy cheesecake, enhancing each bite’s experience.
- Chocolate Drizzle: A rich chocolate sauce brings an indulgent, decadent flair that pairs beautifully with the cheesecake's sweetness.
- Whipped Cream Clouds: Light and airy, a dollop of vanilla whipped cream makes every slice of Pink Oreo Cheesecake feel even more luxurious.
- Coffee or Espresso: The boldness of coffee complements the sweet flavors, making it a great beverage choice to unwind after dessert.
- Mint Chocolate Chip Ice Cream: The coolness of mint ice cream provides a nice contrast, creating a delightful combination with the Oreo cheesecake's richness.
- Salty Pretzels: For a crunchy, salty side, pretzels add an unexpected texture that plays nicely against the creamy dessert.
- Lemon Sorbet: This zesty option refreshes your palate between bites and adds a bright, tart note to balance the sweetness of the cheesecake.
- Caramel Sauce: Drizzling caramel over each slice amplifies the sweet flavors and adds another layer of indulgence to your dessert experience.
- Sparkling Water with Citrus: A bubbly, citrus-infused drink cleanses the palate and brightens the dining experience alongside the Pink Oreo Cheesecake.
Pink Oreo Cheesecake Variations & Substitutions
Feel free to make this delightful cheesecake your own with these tempting ideas!
-
Gluten-Free: Use gluten-free Oreo cookies to create a deliciously alternative crust without sacrificing taste.
-
Dairy-Free: Substitute cream cheese with a dairy-free alternative like cashew or almond cream cheese for a plant-based twist.
-
Berries Delight: Fold fresh strawberries or raspberries into the filling for a fruity surprise that enhances the flavor profile beautifully.
-
Minty Fresh: Add a few drops of mint extract to the filling for a refreshing minty twist that makes each bite exhilarating.
-
Nutty Crunch: Incorporate ground nuts like almonds or pecans into the crust for added texture and a nutty flavor that complements the chocolate well.
-
Chocolate Swirl: Before chilling, swirl in some melted dark chocolate to the filling for a rich, decadent touch that chocolate lovers will adore.
-
Spicy Kick: Mix in a pinch of cinnamon or cayenne pepper into the filling to give it an unexpected spice that will intrigue your guests.
-
Layered Delight: Create a multi-layered cheesecake by adding another flavor layer, such as a berry puree or salted caramel, between the cream cheese layer and crust.
Expert Tips for Pink Oreo Cheesecake
• Crust Consistency: Make sure to press the Oreo crust firmly into the springform pan to avoid a crumbly base when serving your Pink Oreo Cheesecake.
• Room Temperature Cream Cheese: Using softened cream cheese ensures a smooth filling. Take it out of the fridge for at least 30 minutes before mixing.
• Whipped Cream Care: Gently fold the whipped cream into the cream cheese mixture to maintain the light texture. Over-mixing can lead to a denser cheesecake.
• Chilling Time Matters: Allow ample chilling time. While 3 hours is the minimum, overnight chilling results in a firmer, creamier Pink Oreo Cheesecake.
• Color Gradation: Start with a small amount of pink food coloring and mix well; you can always add more to achieve your desired shade without going overboard.
Make Ahead Options
These Pink Oreo Cheesecake treats are perfect for meal prep enthusiasts! You can prepare the crust up to 24 hours in advance by mixing crushed Oreo cookies with melted butter and pressing it into the pan. For the filling, it’s best to whip the cream cheese mixture the day before and store it in the refrigerator. Just give it a stir before pouring over the crust. Once assembled, cover the cheesecake and refrigerate for at least 3 hours or overnight for best results. Just before serving, add the mini Oreos and fresh berries for an eye-catching touch. This way, you'll have a fabulous dessert ready with minimal last-minute effort!
Pink Oreo Cheesecake Recipe FAQs
How do I know if my ingredients are ripe or of good quality?
Absolutely! For the best flavor in your Pink Oreo Cheesecake, ensure your cream cheese is softened perfectly at room temperature, which will give your filling a smooth texture. Look for cream cheese without any lumps, and check the expiration date. Use fresh strawberries or berries that are plump, bright, and firm—avoid any with dark spots or wrinkles.
What is the best way to store leftovers of Pink Oreo Cheesecake?
Very! Store leftover slices covered in plastic wrap or in an airtight container in the refrigerator for up to 5 days. This will keep your cheesecake fresh and delicious, and it's great for sweet cravings later in the week! Make sure to separate the toppings if possible, as the berries can be added just before serving to maintain their color and freshness.
Can I freeze Pink Oreo Cheesecake, and how do I do it?
Of course! To freeze your cheesecake, wrap it tightly in plastic wrap first, then cover it with aluminum foil to prevent freezer burn. It can be stored for up to 2 months. When you’re ready to enjoy it again, simply place it in the refrigerator to thaw overnight. This method preserves the taste and texture beautifully, so you'll think it was just made!
What if my whipped cream didn't reach stiff peaks?
Sometimes that happens! If your whipped cream hasn't thickened properly, it's likely due to not chilling your mixing bowl and beaters sufficiently before whipping. I suggest placing them in the fridge for about 15 minutes before use. If it’s too soft, consider adding a tablespoon of cornstarch or instant pudding mix to help stabilize it—this can make a big difference in texture and give your Pink Oreo Cheesecake that perfect creamy fluffiness.
Is Pink Oreo Cheesecake suitable for people with allergies?
Great question! If someone has allergies to dairy, unfortunately, this recipe is not suitable due to the significant amount of cream cheese and heavy cream. However, you can explore dairy-free cream cheese or whipped cream options if they're available in your area, although the consistency might vary. Always double-check the ingredient labels if you're making this treat for guests with specific dietary restrictions.
Indulgent Pink Oreo Cheesecake for Your Sweet Cravings
Ingredients
Equipment
Method
- Grease a 9-inch springform pan with cooking spray and set aside.
- In a mixing bowl, combine crushed Oreo cookies with melted butter. Press evenly into the bottom of the prepared springform pan.
- Beat softened cream cheese in a large mixing bowl until smooth and creamy.
- Gradually add powdered sugar and vanilla extract, mixing until fully incorporated.
- In a separate chilled bowl, whip the heavy cream until stiff peaks form.
- Gently fold the whipped cream into the cream cheese mixture.
- Drizzle in the pink food coloring and mix until evenly distributed.
- Pour the filling onto the crust in the springform pan and smooth the top.
- Cover and refrigerate for at least 3 hours, or until fully set.
- Release the sides of the springform pan carefully.
- Top with mini Oreo cookies and fresh berries before serving.

Leave a Reply