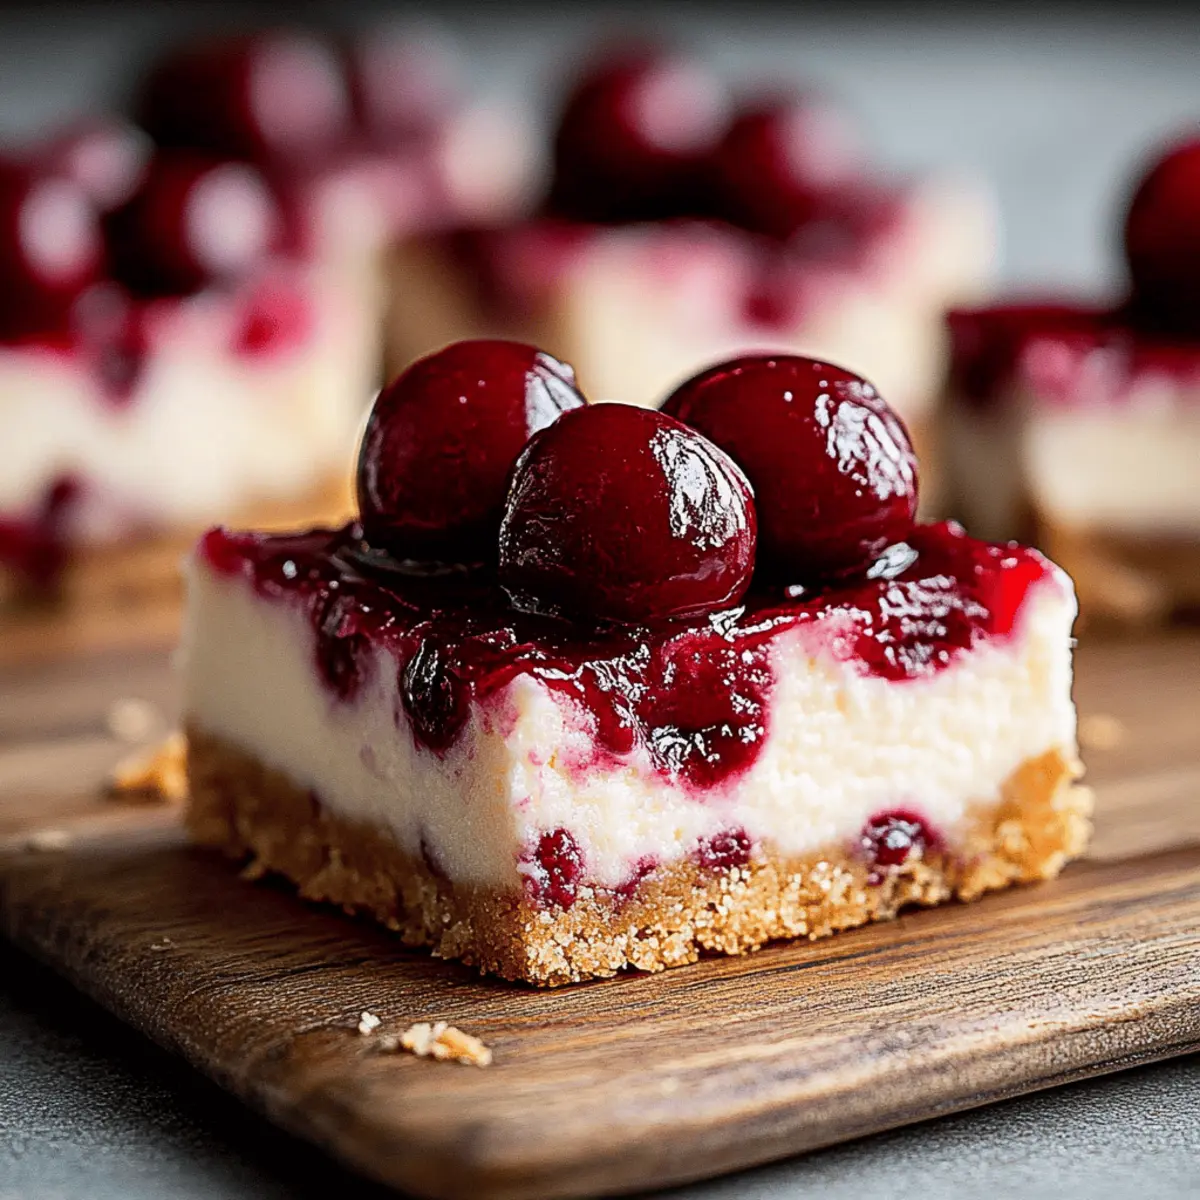
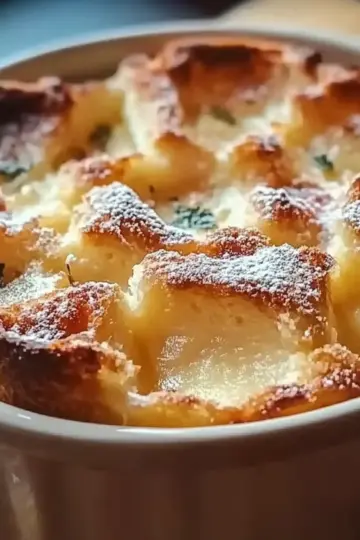
As I stood in my kitchen, the sweet scent of cherries and cream cheese wafting through the air, I couldn’t help but smile. This is the moment when I realized I had struck gold with these Cherry Cheesecake Bars. Perfect for gatherings or a cozy night in, this dessert is not only a pleasant surprise but also incredibly easy to whip up. You’ll love how quickly the graham cracker crust comes together and how the filling offers a delightful balance of creaminess and tart cherry goodness. Plus, these bars are a fantastic make-ahead option; they chill beautifully in the fridge, ready to impress your family or friends. Are you ready to dive into this delicious indulgence? Let’s get started!
Why Are These Cherry Cheesecake Bars Unforgettable?
Easy to Make: You don't need to be a pastry chef to create these delightful bars; they’re incredibly straightforward and perfect for any home cook.
Creamy and Tart: The rich cream cheese filling balances beautifully with the sweet-tart cherry topping, delivering an explosion of flavors in every bite.
Make Ahead: These bars chill beautifully, making them an excellent choice for prepping ahead of time for parties, potlucks, or simply to satisfy your own sweet cravings.
Crowd Favorite: Their vibrant color and delicious taste ensure that these Cherry Cheesecake Bars will be the star of any dessert table, leaving guests asking for seconds!
Versatile Option: Feel free to switch up the fruit topping based on the season or your personal favorites—blueberries or strawberries work wonderfully too!
Grab your ingredients and get ready to indulge in a dessert that's sure to impress!
Cherry Cheesecake Bars Ingredients
For the Crust
• Graham cracker crumbs – gives a sweet and buttery base that perfectly complements the cheesecake filling.
• Unsalted butter – adds richness; ensure it’s melted for easy mixing.
• Granulated sugar – enhances sweetness and helps the crust hold together.
• Salt – balances the flavors and enhances the sweetness of the crust.
For the Filling
• Cream cheese – provides that creamy texture that is essential for traditional cheesecake; make sure it’s softened.
• Granulated sugar – sweetens the filling; be sure it's well combined with the cream cheese for a smooth mixture.
• Sour cream – adds a pleasant tanginess that complements the sweetness of the cheesecake beautifully.
• Vanilla extract – infuses warmth and depth to the flavor profile.
• Large eggs – bind the filling together; add them one at a time to avoid overmixing.
For the Topping
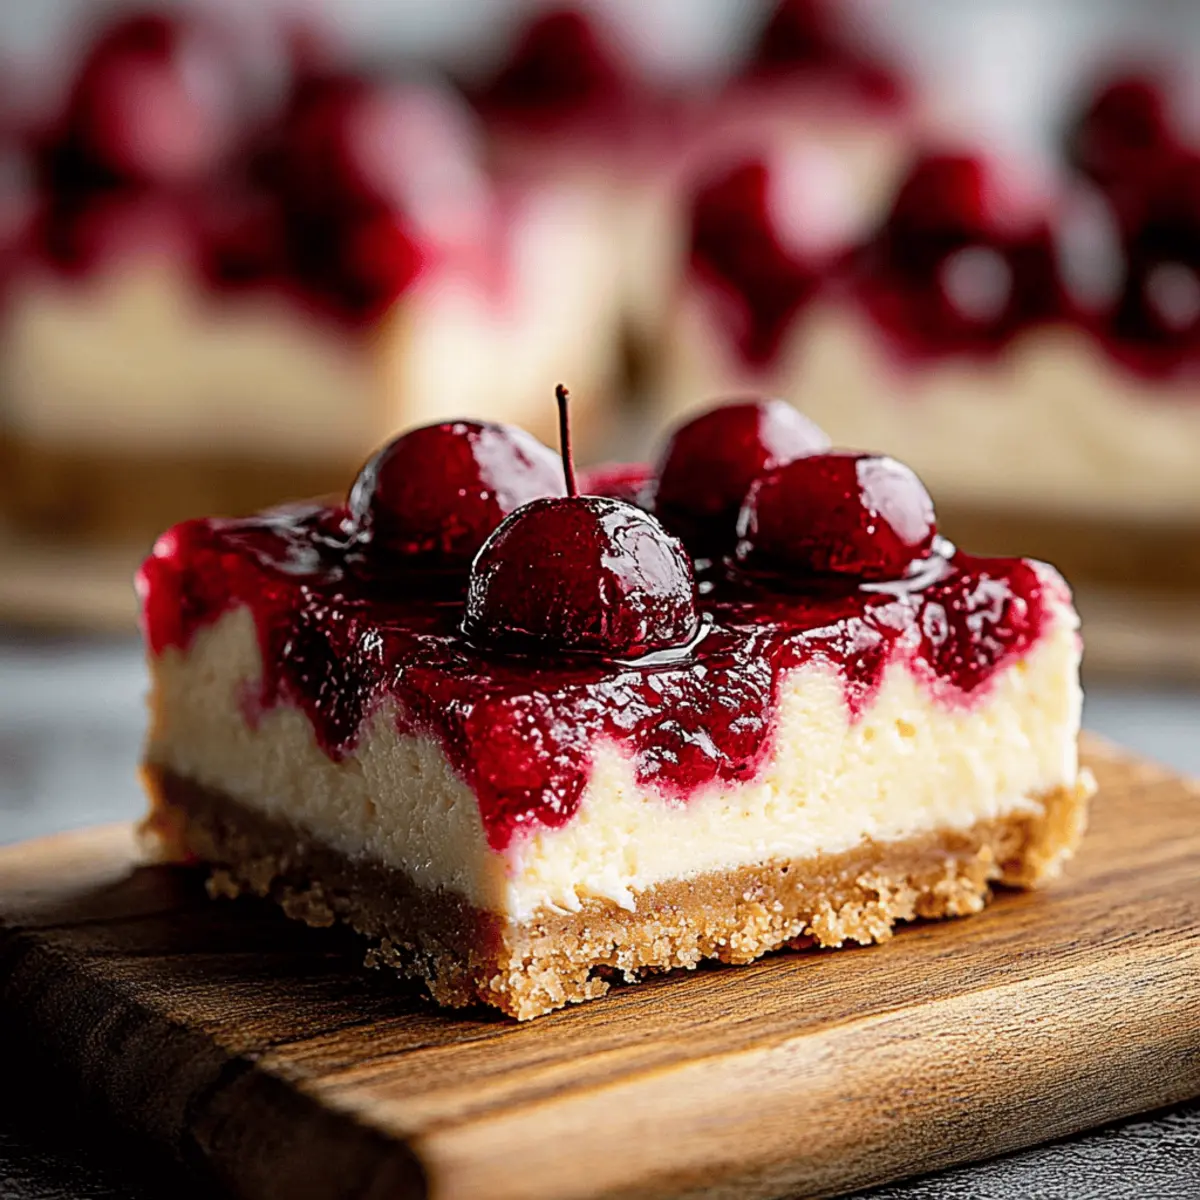
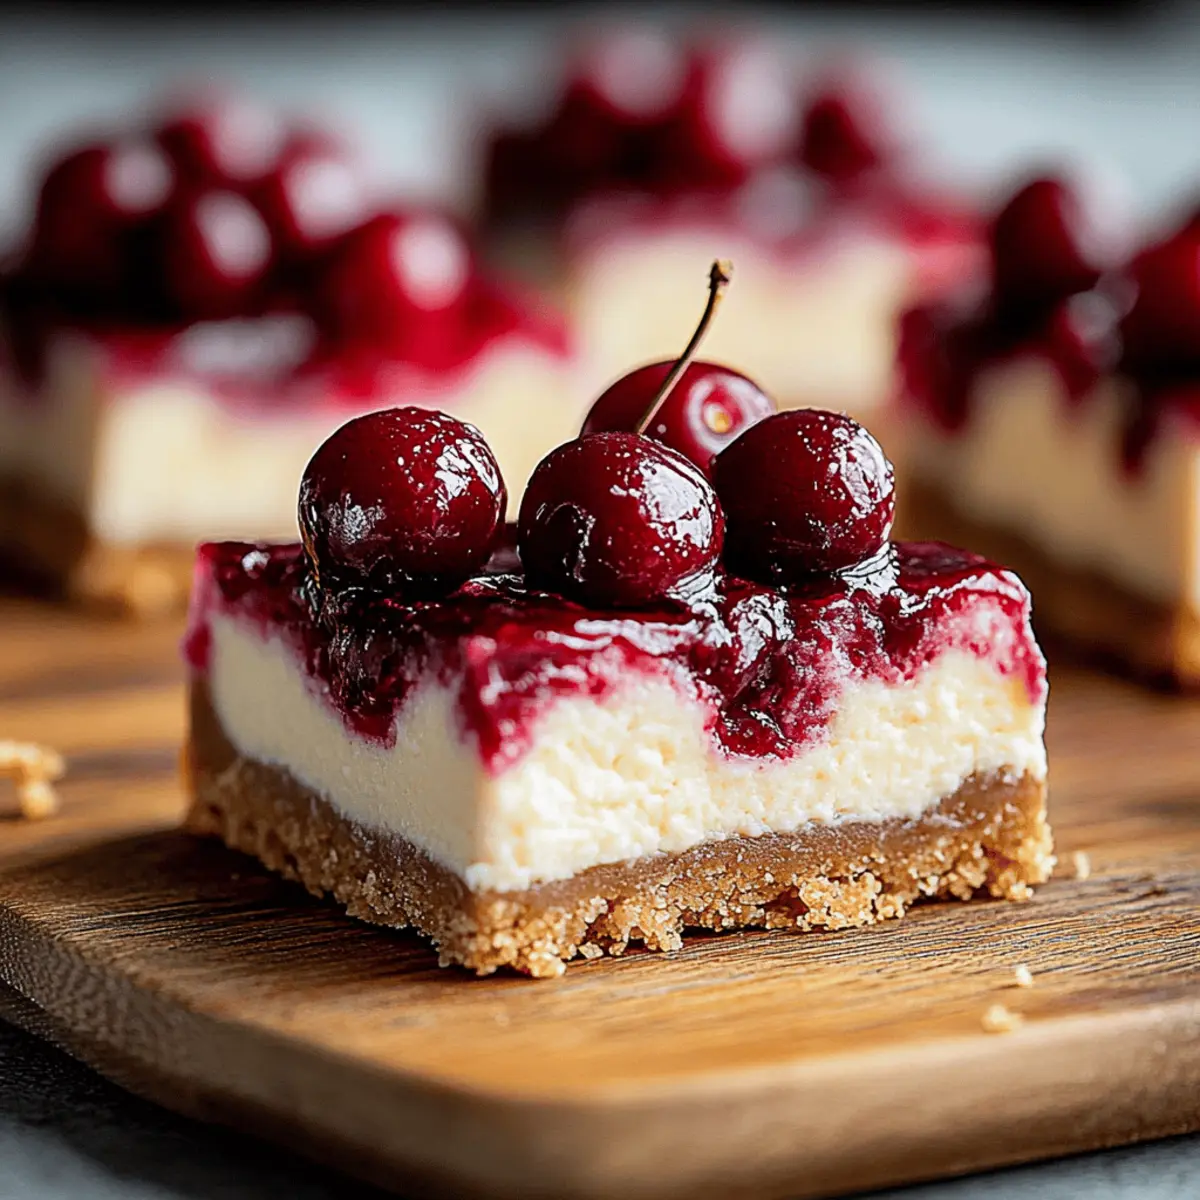
• Cherry pie filling or homemade cherry compote – serves as the crowning glory of these Cherry Cheesecake Bars, delivering delightful fruitiness in every bite!
Step‑by‑Step Instructions for Cherry Cheesecake Bars
Step 1: Preheat and Prepare the Pan
Begin by preheating your oven to 325°F (163°C). While the oven warms up, line a 9×13-inch baking pan with parchment paper, leaving some overhang on the sides to make removal easier later. This will ensure your Cherry Cheesecake Bars come out smoothly without sticking to the pan.
Step 2: Make the Crust Mix
In a medium bowl, combine 2 cups of graham cracker crumbs, 0.5 cup of melted unsalted butter, 0.25 cup of granulated sugar, and a pinch of salt. Mix everything well until the crumbs are completely combined and resemble damp sand. The mixture should hold together when squeezed in your hand, ready to form a delicious crust.
Step 3: Press and Bake the Crust
Firmly press the graham cracker mixture into the bottom of the prepared pan to create an even layer. Bake this crust in your preheated oven for 10 minutes, until it’s lightly golden and fragrant. Once done, remove the crust from the oven and let it cool slightly while you prepare the creamy filling.
Step 4: Beat the Cream Cheese
In a large mixing bowl, beat 24 oz of softened cream cheese with an electric mixer on medium speed for about 2–3 minutes, until it's smooth and creamy. Gradually add 0.75 cup of granulated sugar to the bowl and continue to beat until the mixture is well blended, and there are no lumps remaining in the cream cheese.
Step 5: Incorporate the Remaining Ingredients
Next, mix in 0.25 cup of sour cream and 1 teaspoon of vanilla extract into the cream cheese mixture. Then add the 3 large eggs one at a time, mixing on low speed just until each egg is incorporated. Be careful not to overmix, as you want your filling to remain light and fluffy, perfect for your Cherry Cheesecake Bars.
Step 6: Pour the Filling
Pour the luscious cheesecake filling over the slightly cooled graham cracker crust and use a spatula to smooth the top evenly. This combination of creamy filling and crunchy crust will work together beautifully while baking, eagerly awaiting that cherry topping to crown them later.
Step 7: Bake the Cheesecake Bars
Place the pan in the oven and bake your Cherry Cheesecake Bars for 35 to 40 minutes. Look for the center to be mostly set but still slightly jiggly when you gently shake the pan. This indicates perfect doneness, ensuring your cheesecake remains rich and creamy without being overcooked.
Step 8: Cool and Chill
Once baked, remove the pan from the oven and let your cheesecake bars cool at room temperature for about 1 hour. This step is essential for the flavors to meld beautifully before you transfer them to the refrigerator for at least 4 hours, or ideally overnight, until they are completely chilled and firm.
Step 9: Add the Cherry Topping
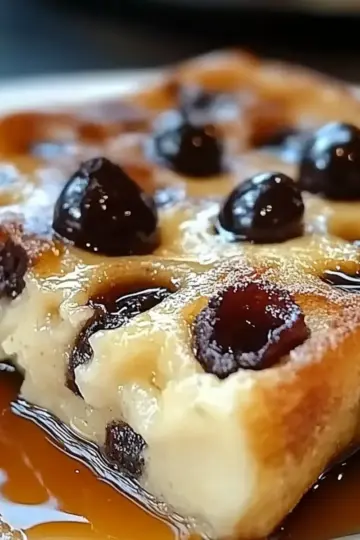
After the cheesecake bars have chilled and set, spread 21 oz of cherry pie filling or your homemade cherry compote evenly over the top. This vibrant topping not only enhances the flavor but also brings a stunning visual appeal to your Cherry Cheesecake Bars, making them truly irresistible.
Step 10: Lift and Cut
Finally, using the parchment overhang, carefully lift the cheesecake out of the pan. Place it on a cutting board and use a warm, clean knife to cut into squares. This will give you neat, beautiful pieces of your Cherry Cheesecake Bars, ready to be served and devoured!

Cherry Cheesecake Bars Variations
Feel free to let your creativity shine with these fun twists and swaps for your Cherry Cheesecake Bars!
- Gluten-Free: Substitute graham cracker crumbs with almond flour or gluten-free cookie crumbs for a delicious alternative.
- Dairy-Free: Use a dairy-free cream cheese alternative and coconut milk yogurt for a creamy filling everyone can enjoy.
- Chocolate Lovers: Swirl in melted dark chocolate into the cheesecake filling for a rich, chocolatey flavor that complements the cherries beautifully.
- Fresh Fruit: Instead of cherry pie filling, top with fresh strawberries, raspberries, or blueberries for a vibrant, fruity twist that brings a refreshing taste.
- Nutty Crunch: Add chopped nuts like pecans or walnuts to the graham cracker crust for added texture and a delightful crunch.
- Zesty Surprise: Incorporate lemon or orange zest into the filling to brighten the flavors and add a fresh citrusy kick.
- Spicy Kick: Stir in a pinch of cinnamon or nutmeg into the filling for a warm spices’ touch that enhances the overall flavor experience.
- Caramel Drizzle: Drizzle caramel sauce over the cherry topping to create a sweet, delectable contrast that will bring these bars to a whole new level of indulgence!
What to Serve with Cherry Cheesecake Bars?
Indulge your senses by planning a delightful meal that beautifully complements these creamy, luscious desserts.
-
Fresh Berries: Juicy strawberries, blueberries, or raspberries add a burst of freshness, balancing the richness of the cheesecake perfectly. Their natural sweetness and tartness enhance each bite of the cheesecake bars.
-
Whipped Cream: Light and airy, a dollop of homemade whipped cream elevates your dessert, adding a creamy silkiness that completes the decadent experience. A sprinkle of vanilla or a dusting of powdered sugar on top will charm your guests.
-
Chocolate Drizzle: For the chocolate lovers, a warm chocolate drizzle provides a rich contrast and decadently enhances the dessert’s flavor profile. It makes a simple yet elegant addition that will have everyone craving more.
-
Iced Tea or Lemonade: Refreshing beverages like iced tea or homemade lemonade perfectly cleanse the palate between bites, adding a zesty, thirst-quenching contrast. Their crisp flavors will harmonize beautifully with the cherry cheesecake bars.
-
Vanilla Ice Cream: A scoop of creamy vanilla ice cream served alongside the bars creates a delightful contrast of temperatures and textures, melting as you take a bite of the rich cheesecake beneath.
-
Coffee or Espresso: A warm cup of coffee or a shot of espresso pairs wonderfully with these cherry cheesecake bars, balancing the sweetness with a slight bitterness. The rich coffee aroma enhances the overall dessert experience, making it feel indulgent and cozy.
Make Ahead Options
These Cherry Cheesecake Bars are a fantastic make-ahead dessert that can truly save you time during busy weeks or special gatherings! You can prepare the crust and filling up to 24 hours in advance: just make the crust, bake it, and let it cool completely before adding the filling. After pouring the filling over the crust, you can bake and chill the bars for at least 4 hours or overnight. To maintain their freshness, cover the cheesecake with plastic wrap or foil once cooled to avoid drying out. When ready to serve, simply top with cherry pie filling and cut into squares for a delightful dessert that tastes just as delicious as when made fresh!
How to Store and Freeze Cherry Cheesecake Bars
Fridge: Store your Cherry Cheesecake Bars in an airtight container for up to 5 days. Make sure they're completely chilled before placing them in to maintain their creamy texture.
Freezer: If you want to enjoy these bars later, freeze them for up to 3 months. Cut the bars into squares, wrap each piece in plastic wrap, and then place them in a freezer-safe bag.
Thawing: To enjoy, simply transfer the bars to the fridge for several hours or overnight to thaw slowly. This helps retain their luscious flavor and texture.
Reheating: These bars are best served chilled, but if you prefer them slightly softened, leave them out at room temperature for about 30 minutes before serving.
Expert Tips for Cherry Cheesecake Bars
Use Room Temperature Ingredients: Start with cream cheese and eggs at room temperature for a smoother filling. Cold ingredients can cause lumpiness.
Avoid Overmixing: When adding eggs, mix on low speed just until combined. Overmixing can lead to cracks in your cheesecake bars.
Chill Thoroughly: Allow at least 4 hours for cooling in the fridge. Cutting too soon can make your Cherry Cheesecake Bars mushy, compromising texture.
Check for Doneness: The center should be slightly jiggly when done baking. Overbaking can result in a dry filling, so keep a close eye on the time.
Alternate Toppings: Get creative! Besides cherries, consider using fresh berries, caramel, or chocolate sauce to change up the flavors of your bars.
Cherry Cheesecake Bars Recipe FAQs
What type of cherries should I use for the topping?
Absolutely! You can use store-bought cherry pie filling for convenience, but I recommend making your own homemade cherry compote for a fresh, vibrant flavor. Just simmer pitted cherries with a bit of sugar and lemon juice until thickened – it's worth the extra effort!
How should I store Cherry Cheesecake Bars?
To keep your Cherry Cheesecake Bars fresh, store them in an airtight container in the refrigerator for up to 5 days. Ensure they are completely chilled before storing to maintain that smooth, creamy texture.
Can I freeze Cherry Cheesecake Bars?
Yes, you can! Cut your Cherry Cheesecake Bars into squares, wrap each piece in plastic wrap, and then place them in a freezer-safe bag. They’ll keep well frozen for up to 3 months. Just remember to label the bag with the date for easy reference!
What should I do if my cheesecake filling is lumpy?
If your filling ends up lumpy, don't worry! This often happens if the cream cheese was too cold. To fix it, simply return the mixture to the mixer and beat it again on medium speed until smooth. You could also try making sure your cream cheese and eggs are at room temperature before starting.
Are Cherry Cheesecake Bars safe for those with gluten allergies?
If you want to make these Cherry Cheesecake Bars gluten-free, simply substitute the graham cracker crumbs with gluten-free alternatives like almond flour or crushed gluten-free cookies. Always check the label to ensure all ingredients are gluten-free and safe for those with allergies.
How can I tell when my cheesecake bars are done baking?
To check for doneness, gently shake the pan: the center should be slightly jiggly while the edges are set. If they still look liquidy in the center, give them another 5 minutes in the oven. Remember, they'll firm up as they cool!
Indulgent Cherry Cheesecake Bars to Satisfy Your Cravings
Ingredients
Equipment
Method
- Preheat your oven to 325°F (163°C). Line a 9×13-inch baking pan with parchment paper, leaving some overhang for easy removal.
- In a medium bowl, combine 2 cups of graham cracker crumbs, 0.5 cup of melted unsalted butter, 0.25 cup of granulated sugar, and a pinch of salt. Mix until the crumbs resemble damp sand.
- Firmly press the graham cracker mixture into the bottom of the prepared pan. Bake for 10 minutes until lightly golden, then let cool slightly.
- In a large mixing bowl, beat 24 oz of softened cream cheese on medium speed for 2–3 minutes until smooth. Gradually add 0.75 cup granulated sugar and beat until well blended.
- Mix in 0.25 cup sour cream and 1 teaspoon vanilla extract. Add eggs one at a time on low speed until each is incorporated, being careful not to overmix.
- Pour the cheesecake filling over the slightly cooled crust. Smooth the top with a spatula.
- Bake for 35 to 40 minutes until the center is mostly set but slightly jiggly when shaken.
- Cool at room temperature for 1 hour, then refrigerate for at least 4 hours until firm.
- Spread 21 oz cherry pie filling over the top of the chilled cheesecake bars.
- Using the parchment overhang, lift the cheesecake out of the pan, place on a cutting board, and cut into squares.
Leave a Reply