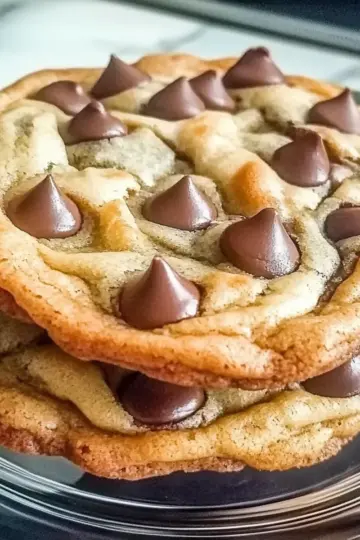
While rummaging through my pantry the other day, I stumbled upon a half-empty bag of cheddar cheese that screamed for a creative outlet. Enter Cheesy Thumbprint Cookies, the unexpected delight your taste buds never knew they needed! These cookies fuse savory and sweet in a way that’s both comforting and utterly indulgent. With just 25 minutes of prep time, they’re perfect for when you crave homemade treats without spending hours in the kitchen. Plus, they’re a delightful crowd-pleaser—whether you share them at a gathering or keep them all to yourself (no judgment here!). Ready to dive into this cheesy goodness? Let's get started!

Why are Cheesy Thumbprint Cookies a must-try?
Unique Flavor Fusion: The combination of sharp cheese and sweet fruit preserves creates a surprisingly delightful taste that will have your taste buds dancing.
Crowd-Pleasing Appeal: These cookies are perfect for gatherings, making them a fun treat to share or enjoy alone!
Easy to Make: With just a few simple steps, you can whip these tasty cookies up in no time.
Versatile Options: Feel free to experiment with different cheeses or preserves, personalizing each batch to suit your preferences.
Quick Prep and Bake: In just over an hour, you can indulge in these delicious cookies, with minimal hands-on time required.
Cheesy Thumbprint Cookies Ingredients
• Delve into the delightful components that make these Cheesy Thumbprint Cookies a savory-sweet sensation!
For the Cookie Dough
- Unsalted butter – buttery richness provides the perfect base for our cookies.
- Shredded cheese – cheddar, gouda, or any cheese you adore creates that delightful savory kick.
- All-purpose flour – forms the structure needed for the cookies, making them perfectly chewy.
- Granulated sugar – balances the savory flavors with a touch of sweetness.
- Salt – a pinch enhances all the flavors in this delicious treat.
- Vanilla extract – adds a warm undertone that complements the sweet preserves beautifully.
- Egg yolk – enriches the dough, helping it achieve that irresistible texture.
For the Topping
- Fruit preserves or jam – your favorite flavor adds a splash of sweetness and vibrancy to each cookie indentation.
Step‑by‑Step Instructions for Cheesy Thumbprint Cookies
Step 1: Preheat the Oven
Preheat your oven to 350°F (175°C) and prepare a baking sheet by lining it with parchment paper. This ensures your cookies bake evenly and don’t stick, creating a perfect base for your Cheesy Thumbprint Cookies. While the oven heats, gather your ingredients to streamline the process.
Step 2: Cream the Butter and Cheese
In a large mixing bowl, combine the softened unsalted butter with the shredded cheese of your choice. Use a hand mixer or a spatula to cream the mixture together until it’s smooth and creamy, which should take about 2–3 minutes. This step creates a rich and flavorful dough that forms the heart of your cookies.
Step 3: Add Sugar and Mix
Gradually add the granulated sugar to the creamed butter and cheese mixture. Mix on medium speed until the sugar is fully incorporated and the mixture is light in color and fluffy, about 1–2 minutes. This will enhance the sweetness of your Cheesy Thumbprint Cookies while keeping a great texture.
Step 4: Incorporate Egg Yolk and Vanilla
Add the egg yolk and vanilla extract into the mixing bowl. Mix everything together until well combined, about 1 minute. This step not only enriches the dough but also infuses the cookies with a warm, inviting flavor that harmonizes beautifully with the cheese.
Step 5: Combine Dry Ingredients
Gradually add the all-purpose flour and salt to the wet mixture. Stir gently until a dough forms; this should take around 2-3 minutes. Be careful not to overmix, as you want your Cheesy Thumbprint Cookies to remain tender and delicious.
Step 6: Chill the Dough
Once your dough is combined, wrap it in plastic wrap or cover it with a kitchen towel and refrigerate for about 15-20 minutes. Chilling the dough makes it easier to handle and ensures perfectly shaped cookies that hold their form during baking.
Step 7: Shape the Cookies
After chilling, roll the dough into small balls, about 1 inch in diameter, and place them on the prepared baking sheet, leaving space between each. This spacing is crucial as the cookies will spread while baking, ensuring they don’t merge into one another.
Step 8: Create Indentations
Use your thumb or the back of a spoon to gently press down in the center of each cookie dough ball, forming a small indentation. This is where the fruit preserves will sit, adding a burst of sweetness to your Cheesy Thumbprint Cookies.
Step 9: Fill with Preserves
Spoon a small amount of your favorite fruit preserves into the indentation of each cookie. Aim for just enough to fill the space without overflowing, as this will keep your cookies looking beautiful once they are baked.
Step 10: Bake the Cookies
Place the baking sheet in the preheated oven and bake your Cheesy Thumbprint Cookies for 10-12 minutes, or until the edges are lightly golden. Keep an eye on them to ensure they don’t overbake, as you want that perfect melt-in-your-mouth texture.
Step 11: Cool the Cookies
Once baked, remove the cookies from the oven and let them cool on the baking sheet for about 5 minutes. This helps the cookies firm up before transferring them to a wire rack, where they will cool completely while retaining their delightful chewy texture.

How to Store and Freeze Cheesy Thumbprint Cookies
Room Temperature: Store your Cheesy Thumbprint Cookies in an airtight container at room temperature for up to one week, keeping them fresh and soft.
Fridge: If you prefer a longer shelf life, you can refrigerate them for up to two weeks in a tightly sealed container, ensuring they retain their delightful taste.
Freezer: For extended storage, freeze the cookies in a freezer-safe container or bag for up to three months. Just remember to separate layers with parchment paper to prevent sticking.
Thawing: When ready to enjoy, simply thaw the cookies at room temperature for about 30 minutes before serving for the best taste and texture.
Helpful Tricks for Cheesy Thumbprint Cookies
-
Chilling is Crucial: Refrigerate the dough for 15-20 minutes before shaping. This prevents the cookies from spreading too much while baking, ensuring a perfect thumbprint.
-
Choose Great Cheese: Select a cheese that balances well with the sweetness of the preserves. Avoid overly soft cheeses, as they may affect the texture of your Cheesy Thumbprint Cookies.
-
Mind the Indentation: Press the thumbprint gently but firmly—too shallow, and the preserves won’t stay put; too deep may cause the cookie to fall apart during baking.
-
Bake to Golden Perfection: Keep an eye on the cookies in the oven. Bake until the edges are lightly golden to achieve that delightful soft texture that melts in your mouth.
-
Experiment with Preserves: Don’t hesitate to try different fruit preserves! Varying flavors can bring new life to your Cheesy Thumbprint Cookies, making them diverse and exciting each time you bake.
What to Serve with Cheesy Thumbprint Cookies
When it comes to enjoying a delightful batch of Cheesy Thumbprint Cookies, the right accompaniments can elevate your experience to new heights.
-
Creamy Tomato Soup: A warm bowl of tomato soup adds a comforting, velvety contrast to the savory cheese in the cookies. The rich flavors harmonize beautifully, making for a cozy pairing.
-
Fresh Green Salad: Crisp, fresh greens tossed with a light vinaigrette offers a refreshing balance to the richness of the cookies. It’s a great way to lighten things up while enjoying every cheesy bite.
-
Herbed Cheese Platter: An assortment of cheeses, crackers, and some fresh herbs creates a delightful appetizer spread. The variety of flavors and textures will have your guests snacking happily alongside the cookies.
-
Decadent Chocolate Brownies: For those with a serious sweet tooth, pairing the cookies with fudgy brownies brings decadent dessert vibes. The contrasting tastes of cheese and chocolate create a unique treat for the adventurous palate.
-
Sparkling Lemonade: The zesty brightness of sparkling lemonade cleanses the palate perfectly between bites. This refreshing drink enhances the sweet and savory notes in the cookies, making it a delightful choice.
-
Coffee or Espresso: A warm cup of coffee or a shot of espresso pairs exquisitely with the cookies, boosting the flavors and providing a cozy pick-me-up after your meal. It’s a classic pairing that never disappoints!
Cheesy Thumbprint Cookies Variations
Embrace your creativity and make these Cheesy Thumbprint Cookies uniquely yours with these delightful twists!
-
Gluten-Free: Substitute all-purpose flour with a gluten-free blend for a tasty alternative that everyone can enjoy. This ensures your cookies maintain their chewy texture while accommodating those with gluten sensitivities.
-
Spicy Kick: Add ¼ teaspoon of cayenne pepper to the dough for a surprising heat that complements the cheese perfectly. This spicy twist will tantalize your taste buds and create a mouthwatering contrast to the sweet preserves!
-
Herb-Infused: Mix in 1 tablespoon of finely chopped fresh herbs like rosemary or thyme for a fragrant twist. This addition elevates the flavors, giving your cookies a gourmet touch that will impress family and friends alike.
-
Nutty Delight: Incorporate ½ cup of finely chopped nuts, like pecans or walnuts, into the dough for an added crunch. These texture twists will provide delightful bites of flavor and enrich the overall experience!
-
Savory Cheese Pairings: Experiment with different cheeses, like pepper jack or feta, for bold flavors. Each variation will bring a unique character to your cookies, allowing you to discover new combinations you love.
-
Jam Varieties: Swap the fruit preserves with chocolate ganache or caramel for a decadent twist. This change will transform your cookies into a rich indulgence that’s perfect for those with a sweet tooth!
-
Vegan Version: Substitute butter with coconut oil and cheese with nutritional yeast or a vegan cheese option. This allows you to enjoy a dairy-free delight without sacrificing flavor!
-
Zest it Up: Add a teaspoon of lemon or orange zest to the dough for a refreshing brightness. This citrusy element will uplift your cookies, making each bite feel like a sunny day!
Make Ahead Options
These Cheesy Thumbprint Cookies are perfect for meal prep enthusiasts! You can prepare the cookie dough up to 24 hours in advance by following the initial steps, then refrigerating it covered in plastic wrap. Additionally, you can roll the dough balls and create the indentations ahead of time, storing them on the baking sheet in the fridge for up to 3 days. When you’re ready to bake, simply fill the indentations with your favorite fruit preserves and pop them in the oven for that fresh-baked aroma. With these make-ahead tips, you can enjoy delicious, homemade cookies anytime, without the hassle!

Cheesy Thumbprint Cookies Recipe FAQs
How do I select the best cheese for my cookies?
Absolutely! Choosing the right cheese is key to achieving balanced flavors. I recommend using cheddar for a sharp kick or gouda for a creamy melt. Avoid overly soft cheeses, as they can affect the texture. When selecting, look for cheese that is fresh and free from dark spots or excessive moisture.
How should I store my Cheesy Thumbprint Cookies?
You can store your Cheesy Thumbprint Cookies in an airtight container at room temperature for up to one week. If you want them to last longer, refrigerate them for up to two weeks in a tightly sealed container. This helps maintain their softness and delicious flavor.
Can I freeze Cheesy Thumbprint Cookies?
Yes, indeed! To freeze your cookies, simply place them in a freezer-safe container or bag for up to three months. Ensure to separate layers with parchment paper to prevent them from sticking together. When you’re ready to enjoy them, thaw the cookies at room temperature for about 30 minutes before serving for the best taste and texture.
What should I do if my cookie dough is too sticky?
Very! If you find your dough is too sticky after mixing, don’t worry. Simply add a little extra flour, about a tablespoon at a time, mixing until the dough reaches a more manageable consistency. Additionally, make sure your butter is softened, not melted, as this can also impact the dough's stickiness.
Are these cookies suitable for people with dietary restrictions?
When it comes to dietary considerations, these Cheesy Thumbprint Cookies contain gluten and dairy. If you have a gluten sensitivity, you could try using a gluten-free all-purpose flour as an alternative. For a dairy-free version, there are vegan cheeses available; just ensure they are firm enough to hold up in baking.
How do I know when my cookies are done baking?
The best way to tell if your Cheesy Thumbprint Cookies are finished is by checking the edges. They should be lightly golden, which indicates they are baked to perfection yet still maintain a soft, tender center. It typically takes about 10-12 minutes in the oven, so keep an eye on them as they approach the end of the baking time!

Indulgent Cheesy Thumbprint Cookies for a Cozy Treat
Ingredients
Equipment
Method
- Preheat your oven to 350°F (175°C) and prepare a baking sheet by lining it with parchment paper.
- In a large mixing bowl, combine the softened unsalted butter with the shredded cheese. Cream until smooth and creamy, about 2-3 minutes.
- Gradually add the granulated sugar and mix on medium speed until fluffy, about 1-2 minutes.
- Add the egg yolk and vanilla extract, mixing until well combined, about 1 minute.
- Gradually add the all-purpose flour and salt, stirring until a dough forms, about 2-3 minutes.
- Wrap the dough in plastic wrap or cover with a kitchen towel and refrigerate for about 15-20 minutes.
- Roll the dough into small balls, about 1 inch in diameter, and place them on the prepared baking sheet.
- Press down in the center of each ball to form a small indentation.
- Spoon a small amount of fruit preserves into each indentation.
- Bake for 10-12 minutes, or until the edges are lightly golden.
- Let the cookies cool on the baking sheet for about 5 minutes before transferring them to a wire rack.

Leave a Reply