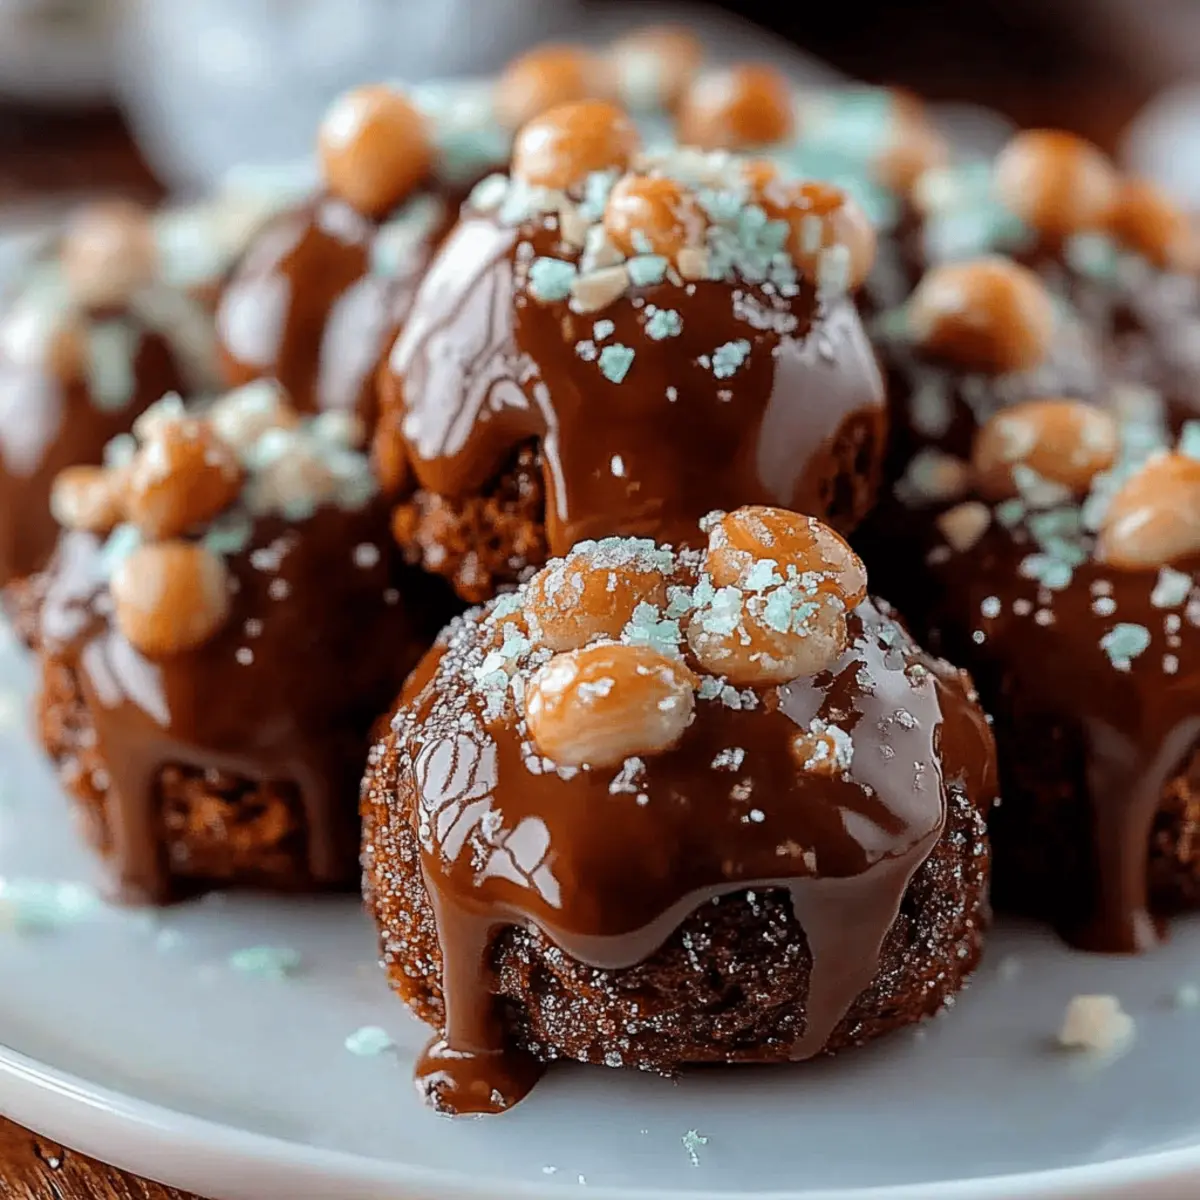
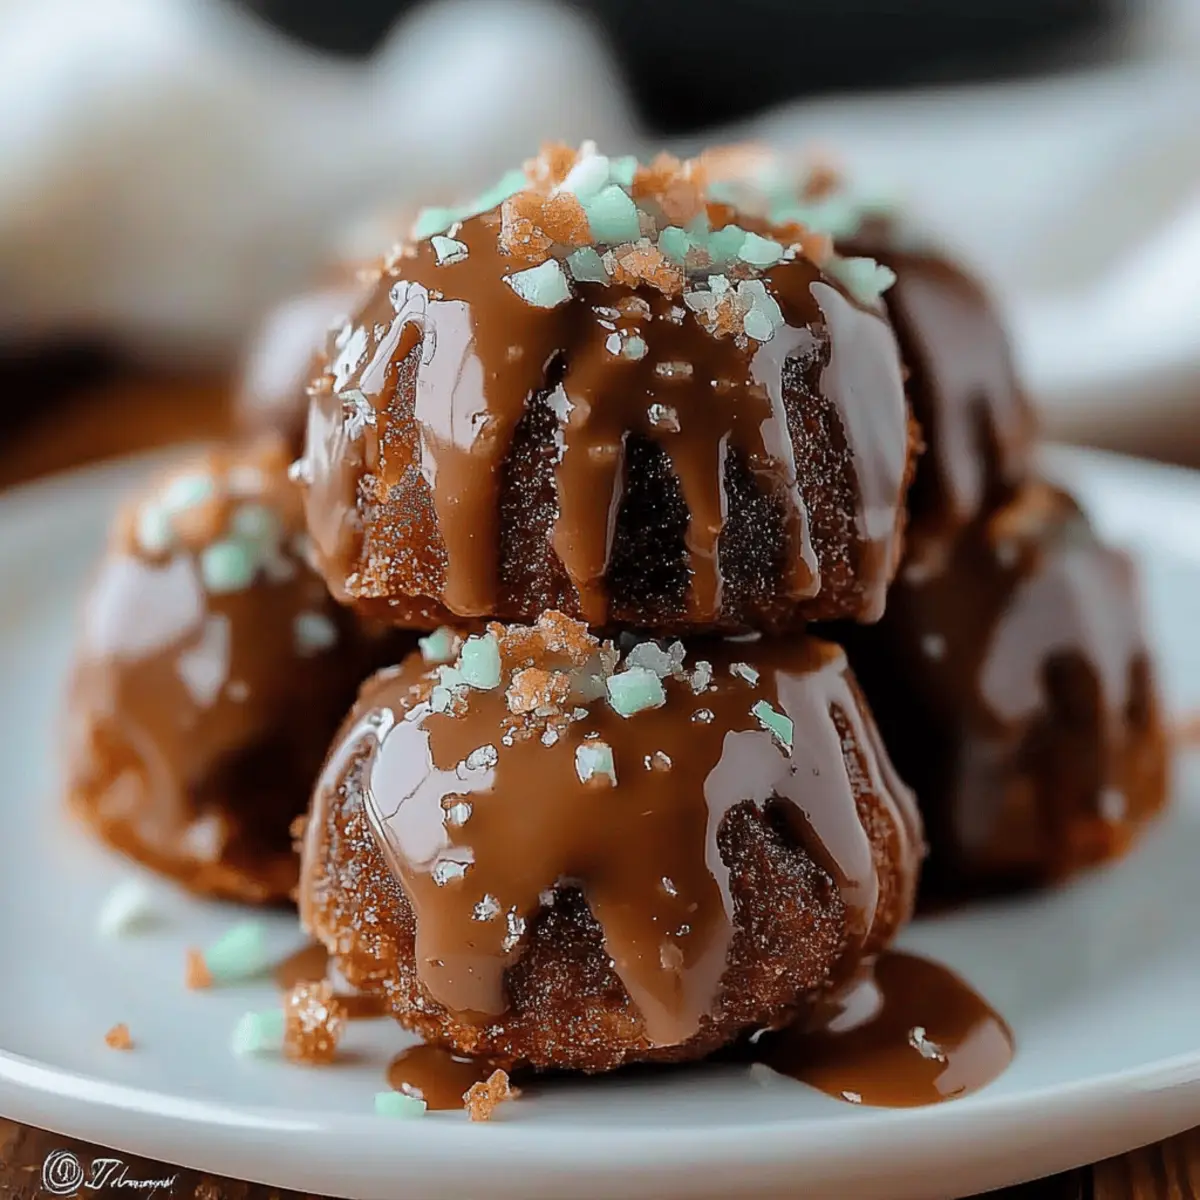
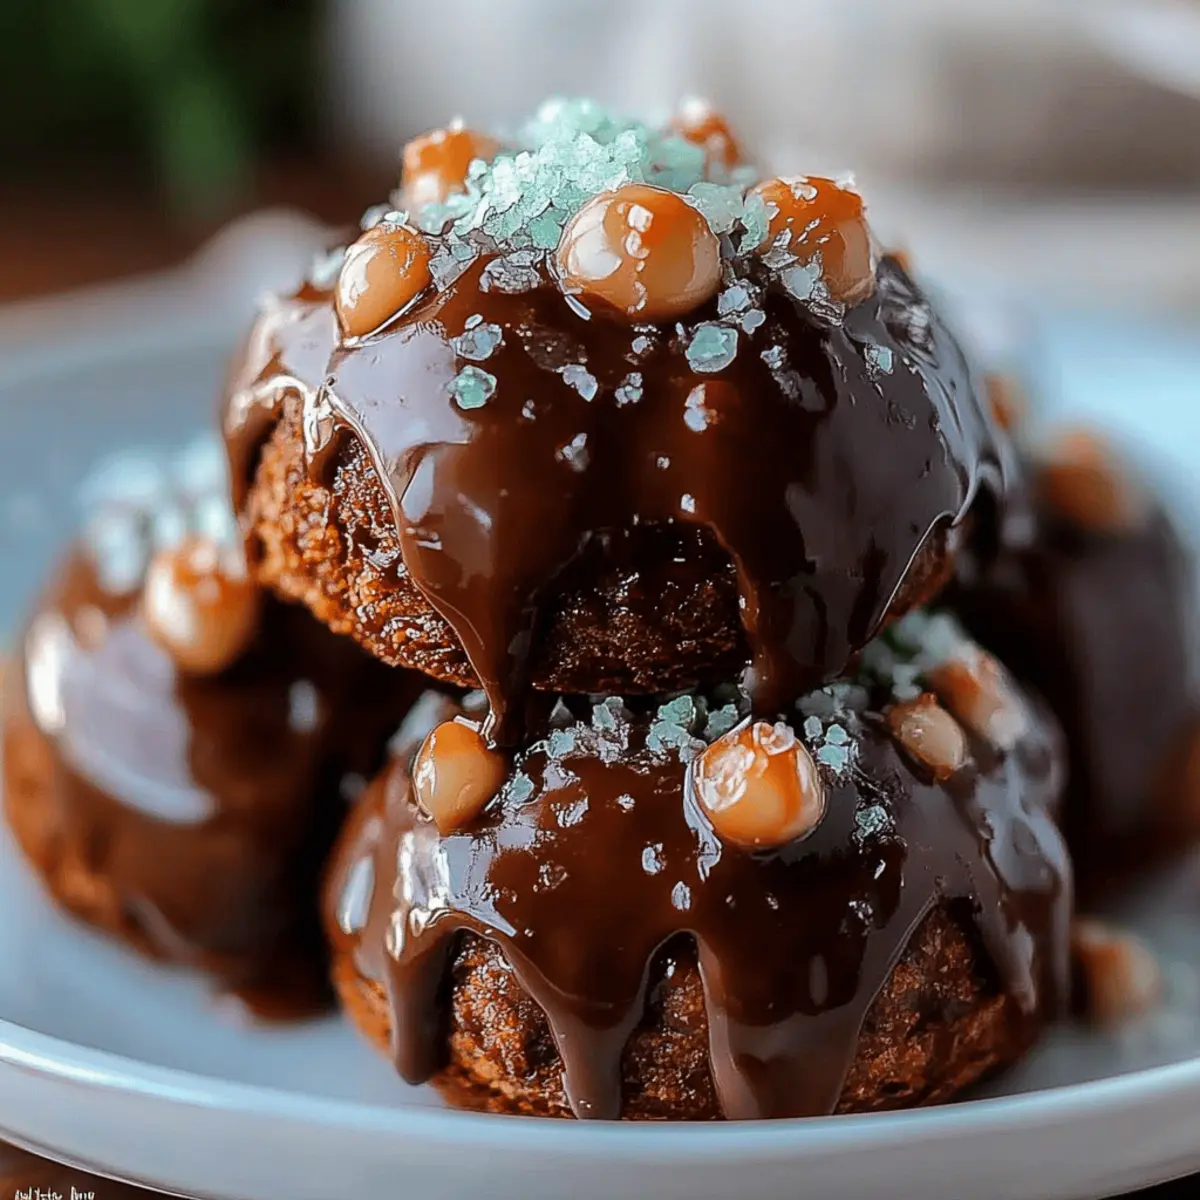
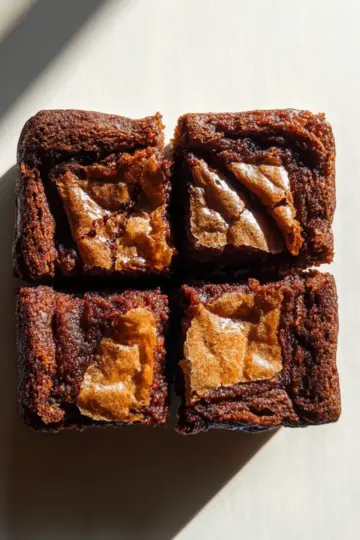
As I stood in my kitchen, the intoxicating aroma of chocolate filled the air, drawing me back to childhood moments of baking with my grandmother. Today, I’m excited to share my recipe for Glazed Chocolate Donut Holes, a delightful treat that’s as simple to make as it is delicious! With just 10 minutes of prep and a mere 12 minutes in the oven, you can whip up a batch of these soft, bite-sized wonders that are perfect for any occasion. Not only do they satisfy those chocolate cravings, but they’re a fantastic crowd-pleaser too! Whether you’re hosting a brunch or just treating yourself, these donut holes are sure to bring joy to your table. So, what will you top them with: sprinkles, crushed candy, or maybe a drizzle of extra glaze? Let’s dive in!
Why Are These Donut Holes So Special?
Simplicity: With just 10 minutes of prep, these Glazed Chocolate Donut Holes are incredibly easy to whip up, making them ideal for busy bakers.
Decadent Flavor: The rich cocoa combined with a silky chocolate glaze creates a treat that truly satisfies your sweet tooth.
Versatile Toppings: Elevate your donut holes with a splash of creativity! Choose from sprinkles or crushed candy to add that personal touch.
Crowd-Pleaser: Whether at a family gathering or casual get-together, these delightful bites are sure to impress your guests and leave them wanting more!
Freezer-Friendly: Prepare in advance—these donut holes freeze beautifully! Just glaze them after thawing for a quick, delicious dessert any time.
Glazed Chocolate Donut Holes Ingredients
Get ready for a delightful treat!
For the Batter
- all-purpose flour – This forms the base for our donut holes, providing a soft texture.
- Dutch-processed cocoa powder – Use this for a rich chocolate flavor that will deepen the taste of your donut holes.
- baking powder – A must for achieving that perfect rise and fluffy texture.
- salt – Just a pinch enhances the overall sweetness of the donuts.
- granulated sugar – Sweetens the batter and balances the cocoa's richness.
- large egg – Binds the ingredients together while adding moisture.
- milk – Choose whole milk for extra creaminess, contributing to a tender crumb.
- melted butter – Adds richness and a lovely buttery flavor to the batter.
- vanilla extract – A splash of vanilla elevates the overall taste with warmth.
For the Glaze
- semi-sweet chocolate chips – The star of our glaze, these melt beautifully for a shiny finish.
- heavy cream – Ensures a smooth, luxurious glaze that clings perfectly to each donut hole.
Optional Toppings
- sprinkles or crushed candy – Personalize your donut holes with a fun and colorful finish!
Indulge in these Glazed Chocolate Donut Holes and bring a touch of homemade sweetness to your day!
Step‑by‑Step Instructions for Glazed Chocolate Donut Holes
Step 1: Preheat and Prepare
Preheat your oven to 350°F (175°C) and grab a mini muffin or donut hole pan. Lightly grease the pan to ensure your Glazed Chocolate Donut Holes release easily once baked. This step sets the stage for those delicious, bite-sized treats!
Step 2: Combine Dry Ingredients
In a medium bowl, whisk together 0.75 cup of all-purpose flour, 0.25 cup of Dutch-processed cocoa powder, 1 teaspoon of baking powder, and 0.25 teaspoon of salt. This mixture will create the perfect dry foundation for your donut holes. Make sure to blend thoroughly so there are no lumps, resulting in a smooth batter.
Step 3: Mix Wet Ingredients
In a large bowl, whisk together 1 large egg, 0.5 cup of granulated sugar, 0.5 cup of milk, 2 tablespoons of melted butter, and 1 teaspoon of vanilla extract until the mixture is smooth. This combination adds richness and flavor to your batter, creating the sweet base for your Glazed Chocolate Donut Holes.
Step 4: Combine Mixtures
Gradually stir the dry ingredient mixture into the wet ingredients with a spatula or wooden spoon until just combined. Be careful not to overmix, as this can result in dense donut holes. The batter should be thick and slightly lumpy, ready to bring that chocolatey goodness to life!
Step 5: Fill the Pan
Spoon or pipe the batter into the prepared pan, filling each cavity about ¾ full. This allows space for the donut holes to rise perfectly while baking. As you fill the pan, savor the rich aroma of chocolate wafting through your kitchen.
Step 6: Bake to Perfection
Place the filled pan in the preheated oven and bake for 10–12 minutes. Check for doneness by inserting a toothpick into the center of a donut hole—if it comes out clean, they’re ready! The edges should appear set, while the tops will have a soft, dome-like shape.
Step 7: Chill Out
Once baked, let the donut holes cool in the pan for about 5 minutes before transferring them to a wire rack. This cooling step allows them to firm up slightly while keeping a soft center, ensuring a delightful texture for your Glazed Chocolate Donut Holes.
Step 8: Prepare the Glaze
In a small saucepan, heat 3 tablespoons of heavy cream until just simmering, then pour it over 0.5 cup of semi-sweet chocolate chips in a bowl. Allow it to sit for 1 minute. This gentle heating will help melt the chocolate, preparing it for a luscious glaze that will coat each donut hole.
Step 9: Make it Smooth
After the chocolate chips have softened, stir the mixture until it becomes smooth and glossy. This rich glaze will envelop your cooled donut holes, creating a decadent finish that’s irresistible.
Step 10: Dip and Decorate
Dip each cooled donut hole into the chocolate glaze, allowing the excess to drip off. If desired, sprinkle on colorful toppings like sprinkles or crushed candy, adding a joyful, personal touch to your Glazed Chocolate Donut Holes.
Step 11: Let it Set
Allow the glazed donut holes to sit for a few minutes until the glaze sets. This final step ensures your treats are ready to serve and enjoy, showcasing that beautiful, glossy finish that makes them so appealing.

Glazed Chocolate Donut Holes Variations
Customize your delicious donut holes with these tempting ideas that will jazz up your baking experience!
-
Dairy-Free: Use almond milk or coconut milk instead of regular milk, and substitute melted coconut oil for the butter. You’ll still enjoy that moist, chocolatey goodness!
-
Gluten-Free: Swap the all-purpose flour for a gluten-free all-purpose blend. These donut holes will still rise beautifully while catering to gluten-sensitive friends.
-
Nutty Delight: Add ¼ cup of finely chopped nuts, like walnuts or hazelnuts, to the batter for an extra crunch that complements the softness of the donuts.
-
Minty Fresh: Incorporate ½ teaspoon of peppermint extract into the batter for a refreshing twist. Top with crushed peppermint candies for an extra festive touch!
-
Spicy Chocolate: Mix in a pinch of cayenne pepper or chili powder to the batter for a surprising kick that pairs delightfully with the rich chocolate flavor.
-
Fruit-Filled: Before baking, place a small spoonful of fruit jam or pie filling in the center of each donut hole. This adds a burst of fruity sweetness with every bite.
-
Coffee-Infused: Stir in 1 tablespoon of instant coffee granules into the batter for a mocha flavor that will make your morning even more delightful.
-
Cocoa-Berry: Add ½ cup of fresh or frozen berries, like raspberries or blueberries, to the batter. Their tartness will balance the sweet chocolate perfectly, making each bite a delightful surprise!
Make Ahead Options
These Glazed Chocolate Donut Holes are a fantastic choice for meal prep, allowing you to enjoy homemade treats any day of the week! You can prepare the batter up to 24 hours in advance; simply store it in the fridge (this keeps the ingredients fresh and avoids any unnecessary browning). Additionally, these donut holes can be baked up to 3 days ahead. After they've cooled, store them in an airtight container, and they will remain just as delicious. When you're ready to enjoy, simply reheat them in the oven for a few minutes before glazing. This way, you'll have warm, decadent donut holes with minimal effort, perfect for busy mornings or surprise guests!
What to Serve with Glazed Chocolate Donut Holes
As you sink your teeth into these delectable donut holes, consider pairing them with delightful accompaniments that elevate your dessert experience.
- Fresh Berries: Strawberries, raspberries, or blueberries offer a tart contrast that balances the sweetness of the chocolate.
- Creamy Vanilla Ice Cream: A scoop adds a luscious creaminess, making every bite feel indulgent and dreamy.
- Rich Coffee: A warm, robust brew enhances the chocolate flavor and adds a comforting touch to your treat.
- Whipped Cream: Light and airy, it creates an irresistible charm against the chocolatey richness of the glaze.
- Mint Chocolate Chip Milkshake: Combining peppermint freshness with chocolate creates a fun twist that’s pure nostalgia.
- Chocolate Sauce Drizzle: For the ultimate chocoholic experience, a drizzle deepens the chocolate flavor and adds visual appeal.
- Caramel Dipping Sauce: Sweet and buttery, it introduces a sticky goodness that complements the donut holes beautifully.
- Homemade Hot Chocolate: Pairing with this warming drink creates a cozy feast perfect for chilly days and special moments.
How to Store and Freeze Glazed Chocolate Donut Holes
Room Temperature: Store glazes Glazed Chocolate Donut Holes in an airtight container at room temperature for up to 2 days, ensuring they stay soft and delicious.
Fridge: For longer freshness, keep them in the fridge in a tightly sealed container, where they will last for up to 5 days. Just pop them in the microwave for a few seconds to warm up.
Freezer: Freeze the donut holes without the glaze in an airtight container for up to 2 months. When you're ready to enjoy them, simply thaw at room temperature and glaze after thawing for maximum flavor.
Reheating: Reheat in the microwave for 10-15 seconds to restore softness before serving. These little treats are perfect for any time you crave something sweet!
Expert Tips for Glazed Chocolate Donut Holes
Perfect Mixing: Ensure your wet and dry ingredients are blended until just combined. Overmixing can lead to dense donut holes rather than the soft, airy texture you want.
Watch the Time: Keep a close eye on your baking time. Donut holes can go from perfectly baked to dry in just a minute or two. A toothpick test is key!
Easy Glazing: For a smoother glaze, let the chocolate chips sit in the warm cream longer before stirring. This step creates a beautiful, shiny coating for your Glazed Chocolate Donut Holes.
Creative Toppings: Have fun with toppings! Sprinkles and crushed candy not only add flavor but also make your donut holes more visually appealing.
Storage Smart: If you're not devouring them all at once, freeze your donut holes without glaze in an airtight container. Glaze them after thawing for a freshly made taste!
Glazed Chocolate Donut Holes Recipe FAQs
What type of cocoa powder should I use for the donut holes?
Absolutely! Dutch-processed cocoa powder is recommended for a richer and deeper chocolate flavor in your Glazed Chocolate Donut Holes. This type of cocoa is alkalized, making it perfect for baking due to its smooth texture and dark color.
How should I store leftover donut holes?
For the best results, store your Glazed Chocolate Donut Holes in an airtight container at room temperature for up to 2 days. If you want to keep them longer, they can be refrigerated for up to 5 days. Just warm them in the microwave for about 10 seconds to restore their delightful softness.
Can I freeze the donut holes?
Certainly! To freeze your Glazed Chocolate Donut Holes, place them in an airtight container without the glaze. They will keep well for up to 2 months. When you’re ready to enjoy, simply thaw them at room temperature and glaze them afterward for that fresh taste!
How can I prevent my donut holes from becoming dense?
Very! To prevent dense donut holes, be gentle when mixing your wet and dry ingredients—just combine them until you see no more flour streaks. Overmixed batter can produce denser dough, so keep it light for those fluffy, soft bites. Also, trust that toothpick test: don’t overbake!
Are these donut holes safe for people with nut allergies?
Absolutely! The ingredients in the Glazed Chocolate Donut Holes recipe do not include any nuts, making them generally safe for those with nut allergies. However, always double-check your ingredient labels to ensure no cross-contamination occurs, especially with baked goods bought from stores.
Can I use a different type of topping for the glaze?
Yes, indeed! While chocolate glaze is a classic choice, you can also experiment with caramel sauce, white chocolate, or even a fruity glaze made from pureed berries mixed with powdered sugar. The more the merrier when it comes to topping your delicious Glazed Chocolate Donut Holes!
Indulge in Irresistible Glazed Chocolate Donut Holes
Ingredients
Equipment
Method
- Preheat your oven to 350°F (175°C) and prepare a mini muffin or donut hole pan.
- In a medium bowl, whisk together the dry ingredients: all-purpose flour, cocoa powder, baking powder, and salt.
- In a large bowl, whisk together the wet ingredients: egg, sugar, milk, melted butter, and vanilla extract.
- Gradually stir the dry mixture into the wet mixture until just combined.
- Spoon the batter into the greased pan, filling each cavity about ¾ full.
- Bake for 10-12 minutes, checking for doneness with a toothpick.
- Let the donut holes cool in the pan for 5 minutes before transferring to a wire rack.
- In a small saucepan, heat the heavy cream and pour it over the chocolate chips to melt.
- Stir the melted chocolate until smooth and glossy.
- Dip each cooled donut hole into the glaze, allowing excess to drip off, and add toppings if desired.
- Let the glazed donut holes sit for a few minutes to set the glaze before serving.
Leave a Reply