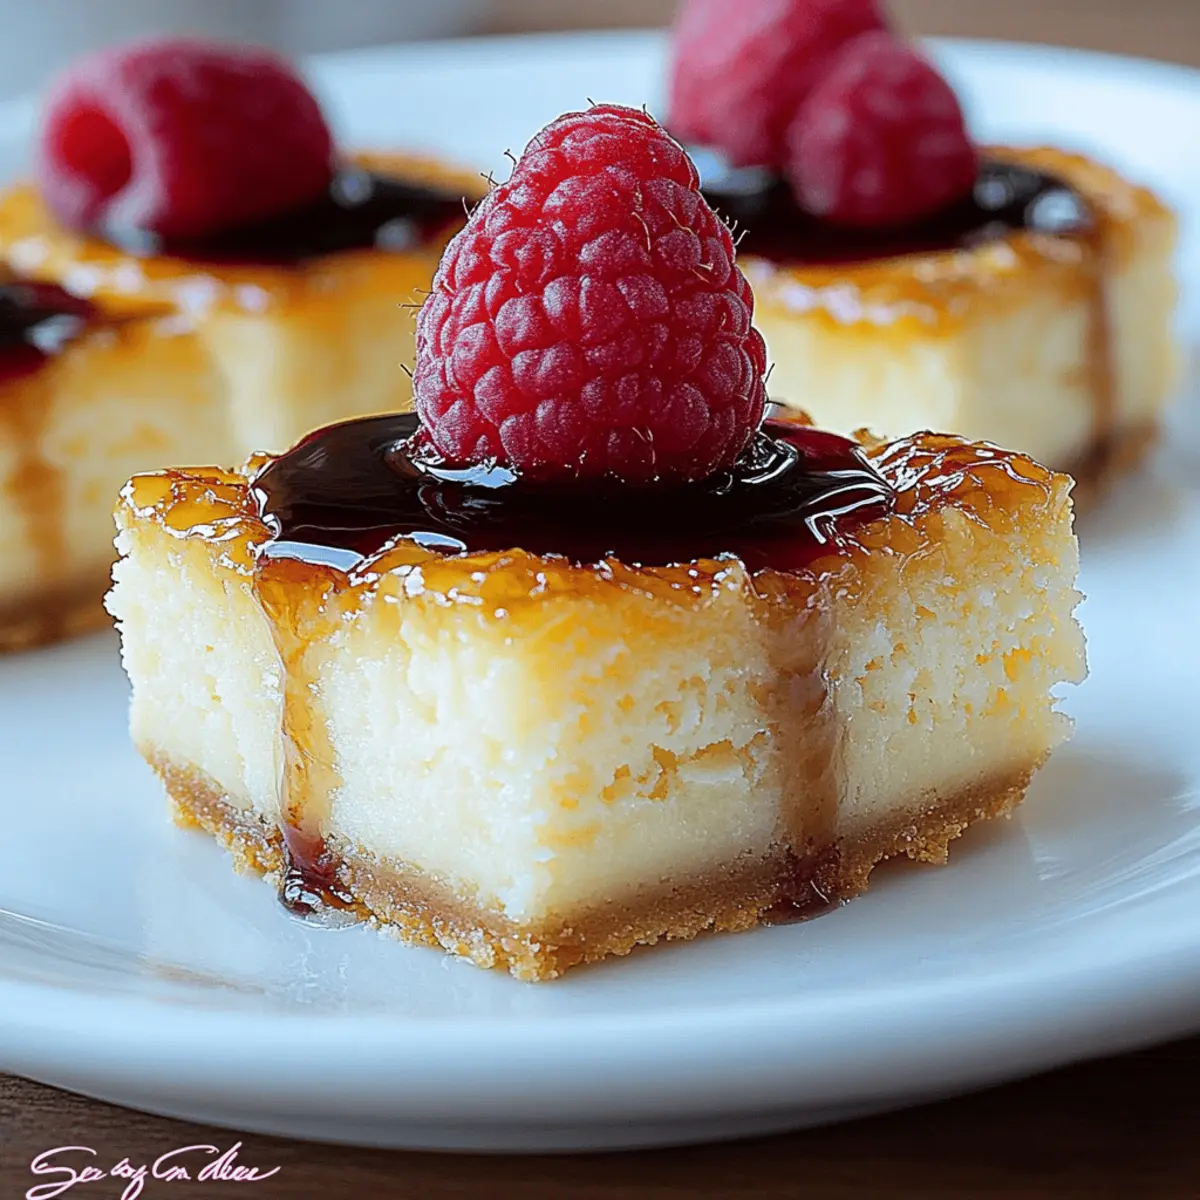
As I stood in the kitchen, a few sweet crumbs lingered on the counter, reminding me of my recent dessert escapade. The anticipation of an evening filled with laughter and good company sent me searching for a dessert that balances ease with elegance. Enter the Easy Mini Cheesecake Bites! These rich and creamy treats are just what you need for any occasion—not only do they look fancy, but they're also a breeze to prepare. With the perfect buttery graham cracker crust and endless opportunities for customizable toppings, they're ideal for both entertaining guests and satisfying late-night cravings. Plus, you can make them ahead of time, freeing you up to enjoy good conversation instead of being stuck in the kitchen. Are you ready to discover how to make these delightful mini indulgences? Let’s dive in!
Why Are These Mini Cheesecake Bites Amazing?
Simplicity at Its Best: These mini cheesecake bites require minimal prep and baking skills, making them perfect for anyone wanting to impress without the stress.
Rich, Creamy Texture: The velvety filling, paired with a buttery crust, creates a dessert experience that feels indulgent yet delightful.
Customizable Toppings: From fresh berries to chocolate curls, personalize each bite to suit your taste or the occasion, ensuring there's something for everyone.
Make-Ahead Magic: Prepare them in advance and chill; they're ready whenever you are, leaving more time for entertaining and less time worrying about dessert.
Crowd-Pleasing Treat: Serve these at parties, and watch guests rave about them; they're sure to become a favorite at any gathering!
Mini Cheesecake Bites Ingredients
• Get ready to whip up these delightful treats!
For the Crust
- Graham Cracker Crumbs – The sturdy base for your mini cheesecake bites; swap with Nilla wafers, Biscoff cookies, or crushed Oreos for a fun twist.
- Melted Butter – Helps bind the crumbs together; unsalted butter works best for better flavor control.
- Granulated Sugar – Adds sweetness to the crust; feel free to adjust the amount based on your preference.
For the Filling
- Cream Cheese – The key to a rich, smooth filling; opt for full-fat, block-style cream cheese for the best texture.
- Sour Cream – Adds a touch of tang and creaminess; Greek yogurt can be used as a lighter alternative.
- Granulated Sugar – Sweetens the filling; consider reducing the quantity for a less sweet bite.
- Vanilla Extract – Elevates the flavor; it’s optional but highly recommended for that complex taste.
- Large Egg – Provides stability and richness; mix gently to avoid incorporating too much air.
Optional Toppings
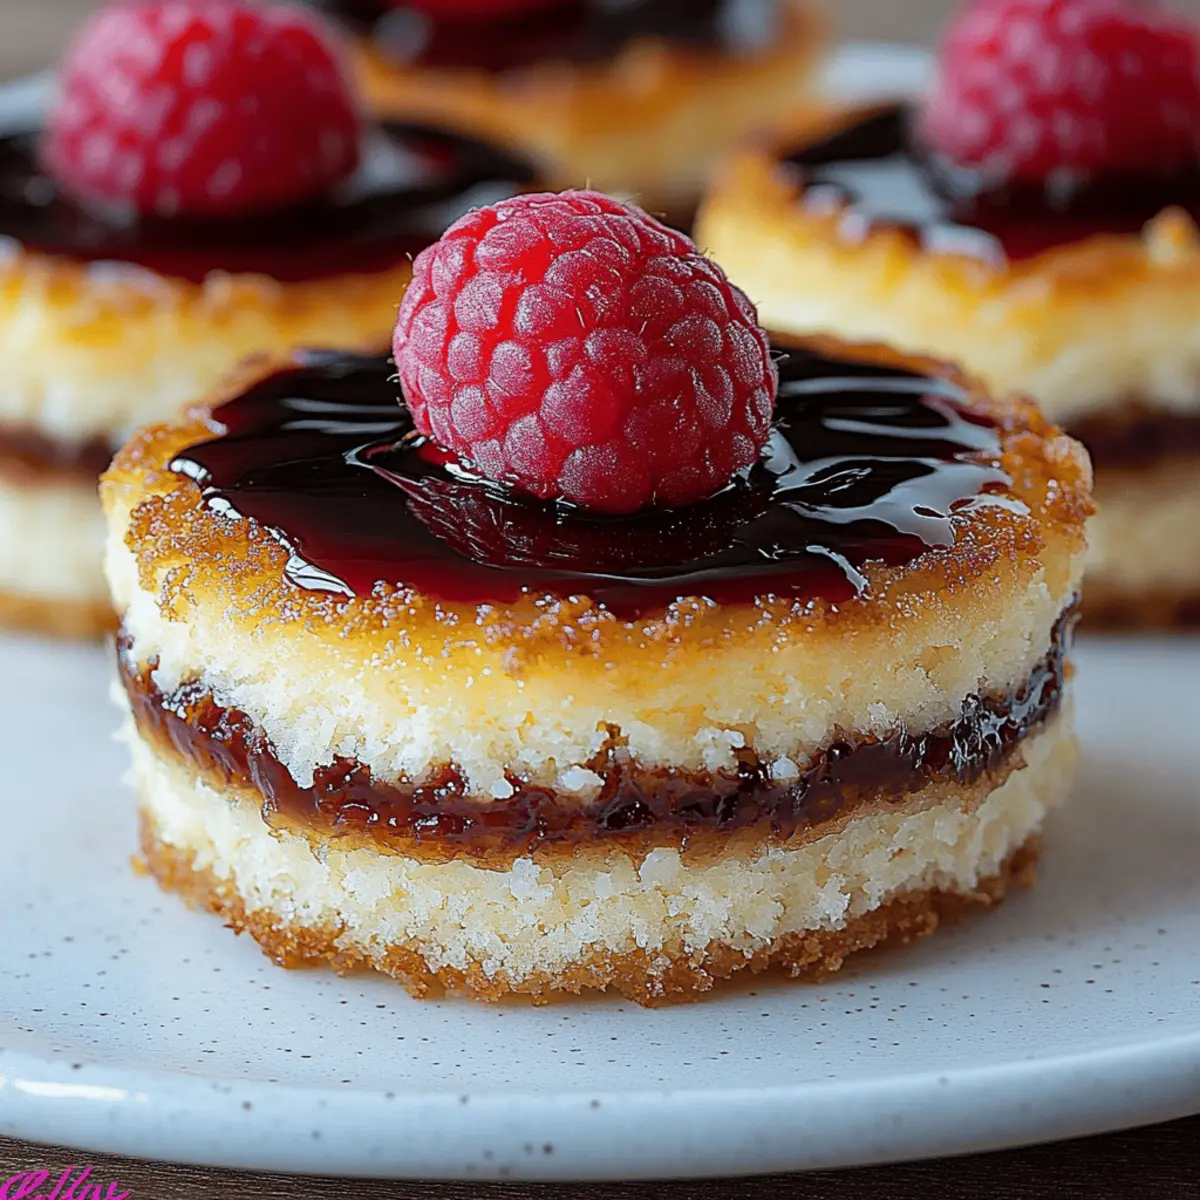
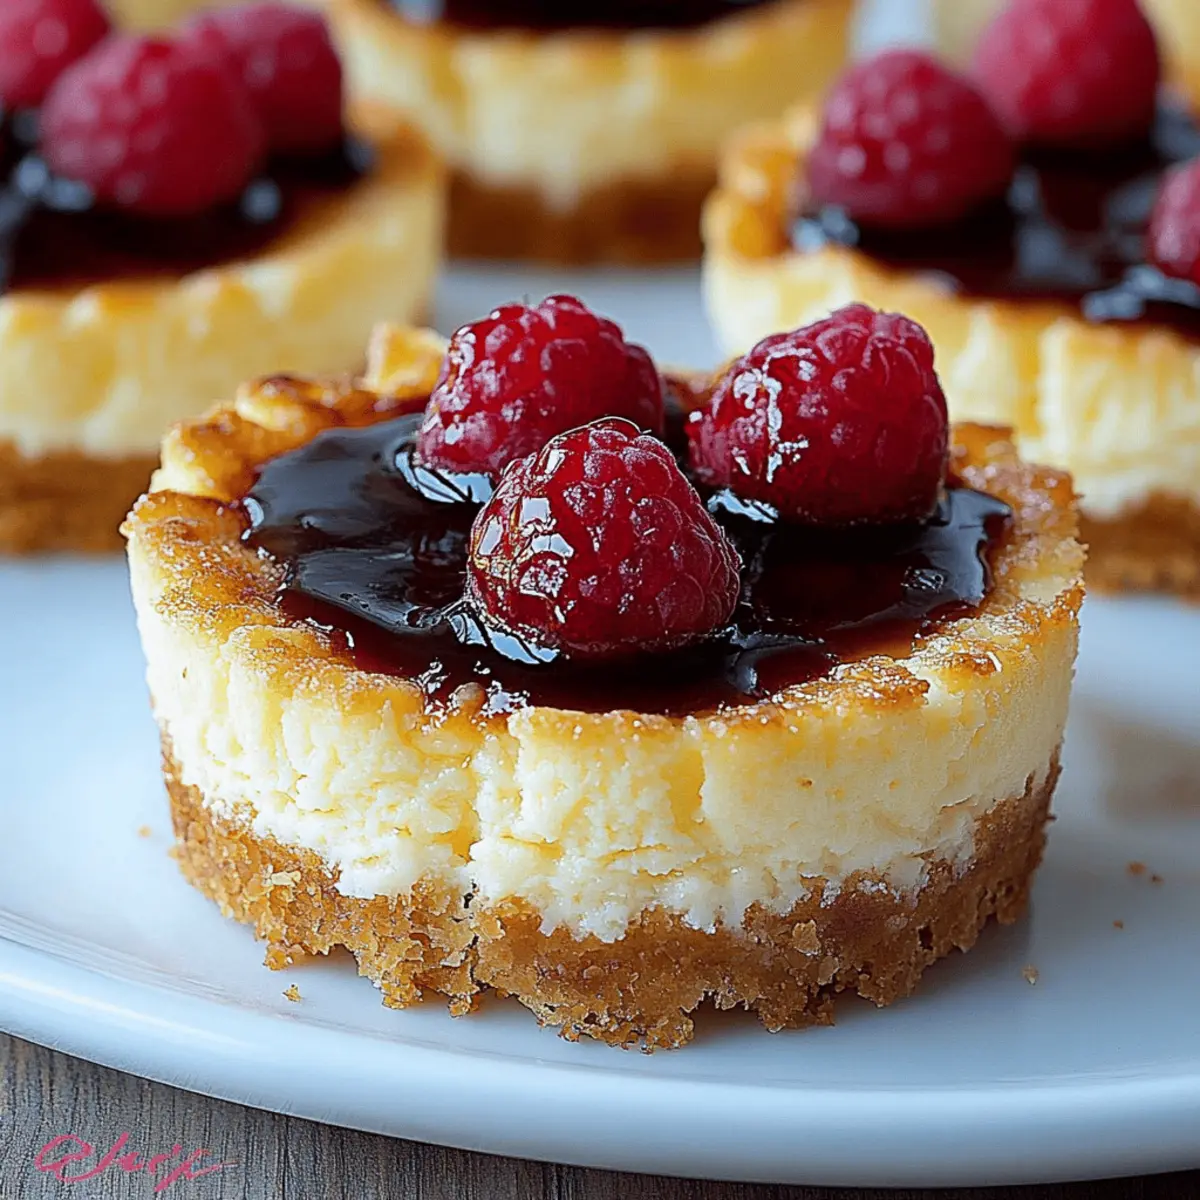
- Fresh Raspberries – Beautiful and tasty; substitute with seasonal fruits for a fresh finishing touch.
- Powdered Sugar – A light dusting offers sweetness and elevates the presentation; it's the final touch for elegance!
Step‑by‑Step Instructions for Easy Mini Cheesecake Bites
Step 1: Preheat the Oven
Begin by preheating your oven to 325°F (163°C). While it warms up, gather your muffin tin and line it with paper liners for easy removal later. This preparation sets the stage for your Easy Mini Cheesecake Bites, ensuring they bake evenly and are easy to serve when finished.
Step 2: Prepare the Crust Mixture
In a mixing bowl, combine the graham cracker crumbs, melted butter, and 1 tablespoon of granulated sugar. Stir until the mixture resembles wet sand, indicating that it is well combined. This crust will provide a solid base for your mini cheesecakes, so make sure everything is evenly mixed.
Step 3: Fill the Muffin Liners
Spoon the crust mixture into the prepared muffin liners, using your fingers or the bottom of a small glass to press it firmly down. Aim for an even layer that’s about ¼ inch thick. This step is crucial for creating a sturdy base for the filling, enhancing the texture and flavor of each Mini Cheesecake Bite.
Step 4: Bake the Crusts
Place the muffin tin in the preheated oven and bake the crusts for 5 minutes. Keep an eye on them; they should begin to set but not brown significantly. Once baked, remove the tin from the oven and allow it to cool slightly. This brief baking time will give your crust a delicious crunch.
Step 5: Beat the Cream Cheese
While the crusts are cooling, add the cream cheese to a mixing bowl and beat it with an electric mixer on medium speed until smooth and creamy. This step is vital for achieving the rich texture of the filling for your Easy Mini Cheesecake Bites, so be sure to break up any lumps completely.
Step 6: Incorporate the Sugar
Gradually add in ¼ cup of granulated sugar and mix well until fully incorporated. You should have a smooth and silky texture. This sweetness balances beautifully with the richness of the cream cheese, ensuring that your cheesecake filling is perfectly delectable.
Step 7: Add Sour Cream and Vanilla
Next, mix in the sour cream and vanilla extract, continuing to beat until completely smooth. The sour cream gives your filling a tangy flavor, while the vanilla enhances its overall richness. This combination will create that creamy filling that makes Mini Cheesecake Bites so appealing.
Step 8: Incorporate the Egg
Add one large egg into the mixture and beat gently until just combined. Be cautious not to overmix, as this can lead to cracks in your mini cheesecakes. The egg acts as a binder, providing structure and richness to your Easy Mini Cheesecake Bites, so ensure it's evenly blended without incorporating too much air.
Step 9: Fill the Muffin Liners
Carefully spoon the cheesecake filling over the cooled crusts, filling each cup nearly to the top. This step ensures you maximize the delicious creamy bites while maintaining enough space for any gentle rising during baking. Aim for a uniform fill to create consistently delightful treats.
Step 10: Bake the Cheesecakes
Slide the muffin tin back into the oven and bake for 16–18 minutes. You want the centers to be just set, so they shouldn't jiggle when slightly shaken. If perfectly done, your Mini Cheesecake Bites will have a slight dome and a pleasing golden hue around the edges.
Step 11: Cool in the Pan
Once baked, remove the muffin tin from the oven and let the mini cheesecakes cool completely in the pan. This gradual cooling helps prevent cracks in the tops of your Easy Mini Cheesecake Bites, ensuring they look as delightful as they taste before refrigeration.
Step 12: Chill and Serve
Transfer the cooled cheesecake bites to the refrigerator and chill for at least 2 hours, or overnight for best results. Just before serving, top with fresh raspberries and a light dusting of powdered sugar for an elegant finishing touch. Enjoy your delicious homemade Mini Cheesecake Bites!

Mini Cheesecake Bites Variations
Feel free to let your creativity run wild with these customizable ideas to elevate your mini cheesecake bites!
-
Dairy-Free: Swap cream cheese and sour cream for dairy-free alternatives like cashew cream or coconut yogurt for a delicious vegan treat.
-
Fruit-Infused: Blend in pureed fruits like mango or strawberries into the cheesecake filling for a fresh and fruity flavor burst. Your guests will adore the sweet twist!
-
Chocolate Lovers: Incorporate melted chocolate into the filling or top with chocolate ganache for an indulgent flair. These bites will become an instant favorite for any chocolate enthusiast.
-
Nut Crust: Use crushed almonds or pecans mixed with melted butter as a crust alternative for a nuttier flavor. Pair it with a dark chocolate filling for a refined dessert experience!
-
Flavored Extracts: Experiment with different extracts like almond, hazelnut, or even peppermint to give your mini cheesecakes a unique taste. These subtle changes create an entirely new flavor profile!
-
Spicy Kick: Add a pinch of cayenne pepper or ginger to the filling for a warming aroma and unexpected flavor. It'll surprise and delight taste buds seeking adventure!
-
Berry Toppings: Besides fresh raspberries, top with blueberries or blackberries for a colorful and seasonal presentation. The vibrant hues add to their appeal.
-
Coconut Flakes: Sprinkle toasted coconut over the top before serving for added crunch and a tropical twist. It’s a delightful finishing touch that makes these bites feel extra special!
Feel free to explore these variations, substituting based on what you love most, and don’t hesitate to share your creations with family and friends!
What to Serve with Easy Mini Cheesecake Bites
Elevate your dessert experience with delightful accompaniments that enhance the flavors and textures of these creamy gems!
- Fresh Berry Medley: A colorful assortment of strawberries, blueberries, and raspberries adds a refreshing burst of flavor, balancing the cheesecake's richness.
- Chocolate Sauce Drizzle: A warm drizzle of chocolate sauce creates an irresistible contrast with the creamy cheesecake, making each bite decadently indulgent.
- Whipped Cream Clouds: Light and fluffy, a dollop of homemade whipped cream complements the mini cheesecakes perfectly, adding an airy contrast to their dense texture.
- Nutty Crumble Topping: Crushed nuts or granola sprinkled on top gives a delightful crunch, enhancing the creaminess of the cheesecake while introducing new flavors.
- Caramel Sauce: A sweet drizzle of caramel adds a rich depth, heightening the dessert experience and inviting the palate to explore a symphony of tastes.
- Coffee Pairing: Serve with a freshly brewed cup of coffee for a delightful balance of flavors; the caffeine perfectly complements the sweetness of the cheesecakes.
- Coconut Flakes: Toasted coconut flakes sprinkled on top can add a tropical twist that pairs wonderfully with the rich filling.
- Mint Leaves: A garnish of fresh mint not only adds a pop of color but also a refreshing note to contrast the rich cheesecakes, heightening the experience.
Make Ahead Options
These Easy Mini Cheesecake Bites are perfect for meal prep, saving you valuable time on busy days! You can prepare the crust mixture and fill the cups with the cheesecake batter up to 24 hours in advance; simply refrigerate the assembled muffin tin. This allows the flavors to meld together beautifully. Once you’re ready to bake, just pop them in the oven for a quick 16–18 minutes. After cooling completely, chill them in the fridge for at least 2 hours (or overnight) before serving. To maintain their rich, creamy texture, avoid overmixing and refrigerate them in an airtight container if you need to store them longer—up to 5 days. Enjoy the convenience and elegance of these delightful mini treats prepared in advance!
Expert Tips for Mini Cheesecake Bites
-
Room Temperature Ingredients: Ensure all ingredients are at room temperature before mixing for a smooth and velvety filling, avoiding lumps.
-
Gentle Mixing: Incorporate the egg gently to prevent excess air, which can lead to cracks in the filling during baking.
-
Cooling Technique: Allow mini cheesecakes to cool gradually in the pan to maintain their shape and texture. Rapid cooling can cause cracks.
-
Use Liners: Opt for cupcake liners for easy removal and a polished presentation. Lightly grease if using a non-stick muffin tin without liners.
-
Chill Thoroughly: Chill your Mini Cheesecake Bites for at least 2 hours or overnight to achieve the perfect firmness and flavor before serving.
How to Store and Freeze Mini Cheesecake Bites
Fridge: Store your Mini Cheesecake Bites in an airtight container in the refrigerator for up to 5 days. This keeps them fresh and ready for indulgent snacking anytime!
Freezer: For longer storage, freeze the cheesecake bites for up to 2 months. Place them on a baking sheet until firm, then transfer to a zip-top bag, ensuring they're well-wrapped to prevent freezer burn.
Thawing: When you're ready to enjoy them, simply thaw the frozen Mini Cheesecake Bites overnight in the refrigerator. This gentle thawing method helps retain their delightful texture.
Reheating: Although generally best served chilled, if you prefer them slightly warm, reheat in the microwave for about 10-15 seconds; be cautious not to overheat!
Mini Cheesecake Bites Recipe FAQs
How do I know if my cream cheese is the right consistency?
Absolutely! For the best results, your cream cheese should be softened to room temperature before use. This allows it to whip up smoothly without lumps, giving your mini cheesecake bites that creamy texture everyone loves. If you find it too firm, you can microwave it for about 10-15 seconds, checking frequently to avoid melting.
What’s the best way to store Mini Cheesecake Bites?
I recommend storing your Mini Cheesecake Bites in an airtight container in the refrigerator for up to 5 days. This keeps them fresh and ready for snacking anytime! Just ensure they are well-covered to prevent any absorption of odors from other foods.
Can I freeze Mini Cheesecake Bites for later?
Yes, you can freeze them for up to 2 months! To do this, place the mini cheesecakes on a baking sheet, ensuring they are not touching, and freeze until firm. Then, transfer them to a zip-top bag, removing as much air as possible to prevent freezer burn. For the best texture, thaw them overnight in the fridge before serving.
Why did my mini cheesecakes crack on top?
Very often, cracks can happen due to overmixing the filling or baking at too high of a temperature. When incorporating the egg, mix gently to avoid incorporating too much air. Also, ensure your oven temperature is accurate by using an oven thermometer; this can make a big difference!
Are these Mini Cheesecake Bites suitable for vegetarians?
Yes, these mini cheesecakes are vegetarian-friendly! However, if you have specific dietary restrictions, be mindful of using gelatin in any toppings or sauces. Enjoy customizing them with your favorite fruits or toppings to keep them deliciously vegetarian!
Can I substitute ingredients for my Mini Cheesecake Bites?
Absolutely! You can swap graham cracker crumbs with Nilla wafers or crushed Oreos for different flavors. If you want a lighter option for the filling, consider using Greek yogurt instead of sour cream. Feel free to get creative with flavors and toppings; that's the beauty of these bites!
Indulgent Mini Cheesecake Bites That Everyone Will Love
Ingredients
Equipment
Method
- Preheat your oven to 325°F (163°C) and prepare muffin tin with paper liners.
- In a mixing bowl, combine graham cracker crumbs, melted butter, and 1 tablespoon of sugar until it resembles wet sand.
- Spoon the mixture into muffin liners, pressing down to form a sturdy crust about ¼ inch thick.
- Bake crusts for 5 minutes, then let cool slightly.
- Beat cream cheese in a bowl until smooth and creamy, breaking up any lumps.
- Gradually add ¼ cup of sugar and mix until silky.
- Mix in sour cream and vanilla extract until completely smooth.
- Add the egg, beating gently until just combined, careful not to overmix.
- Fill muffin liners nearly to the top with cheesecake filling.
- Bake for 16–18 minutes until centers are just set, then let cool completely in the pan.
- Transfer to refrigerator to chill for at least 2 hours or overnight before serving.
- Top with fresh raspberries and a dusting of powdered sugar before serving.
Leave a Reply