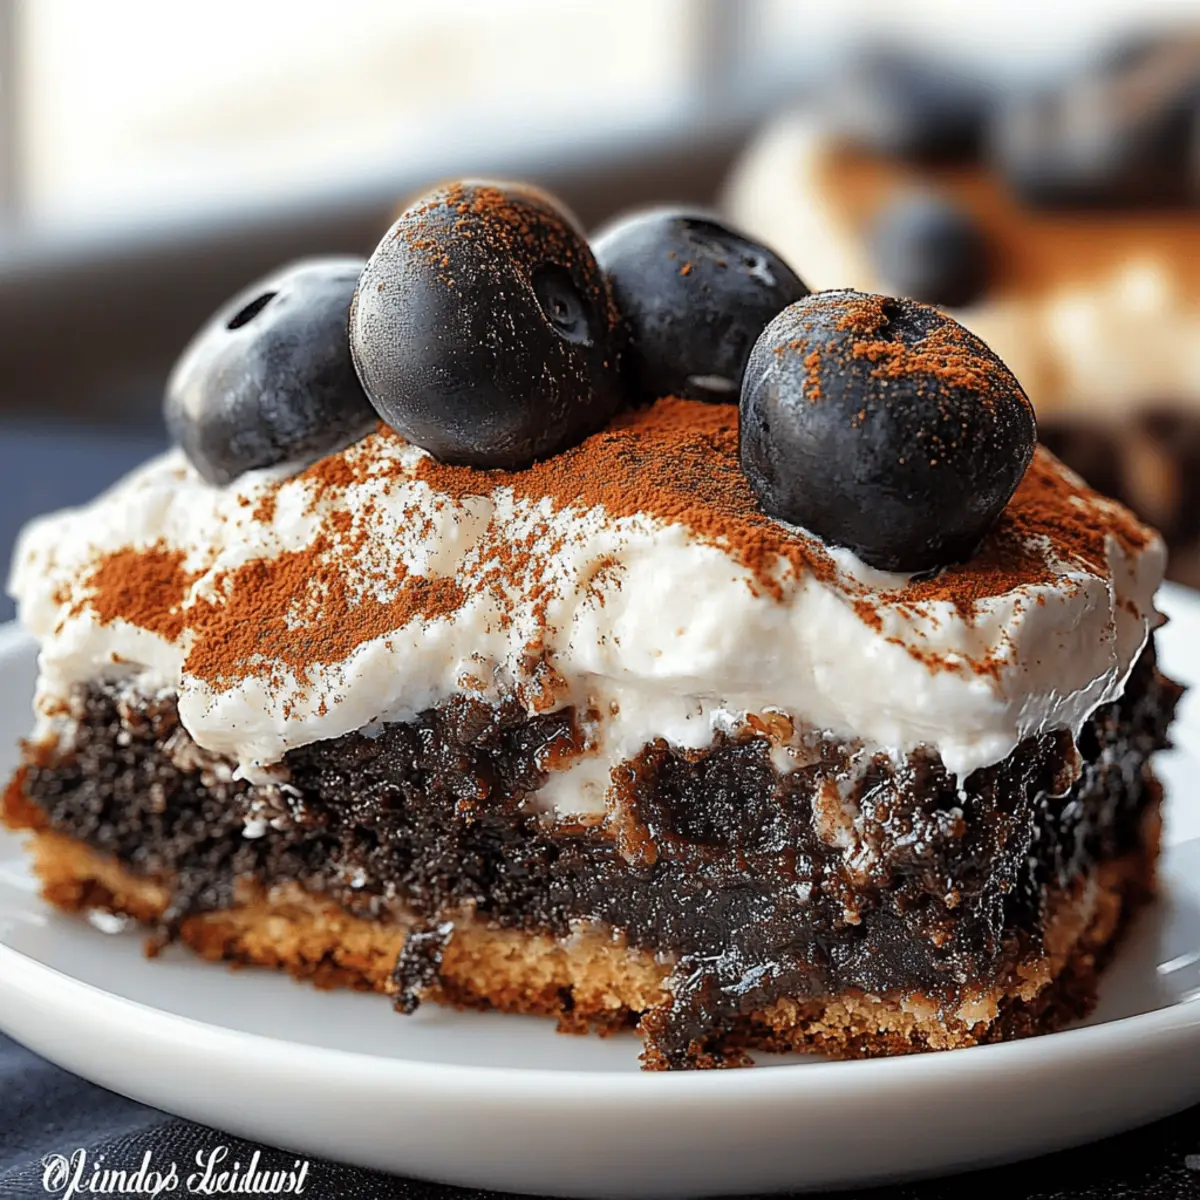
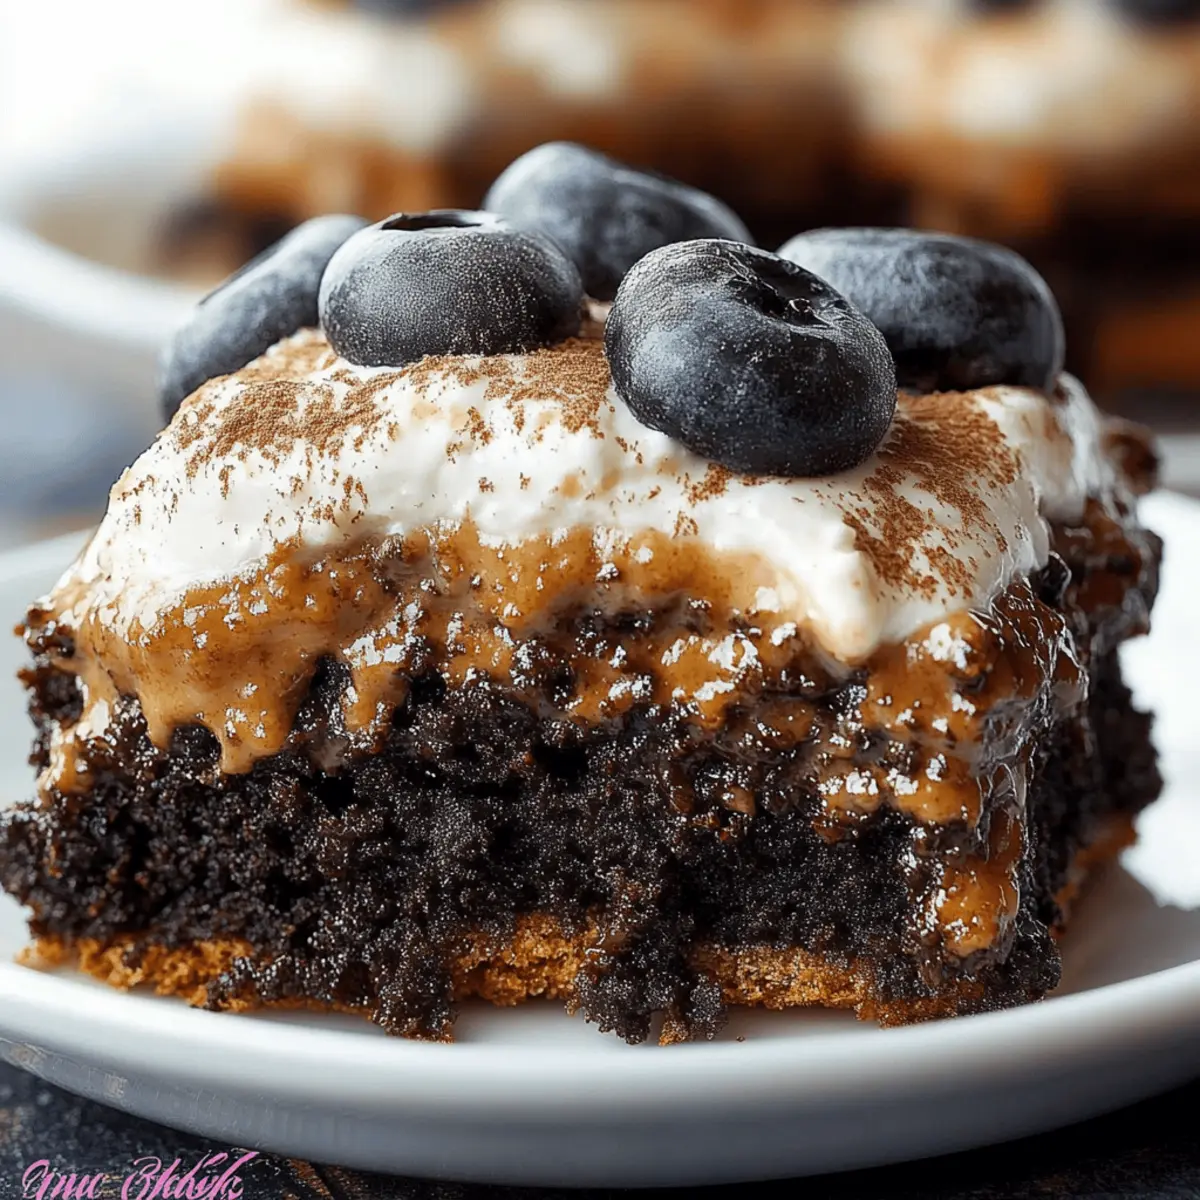
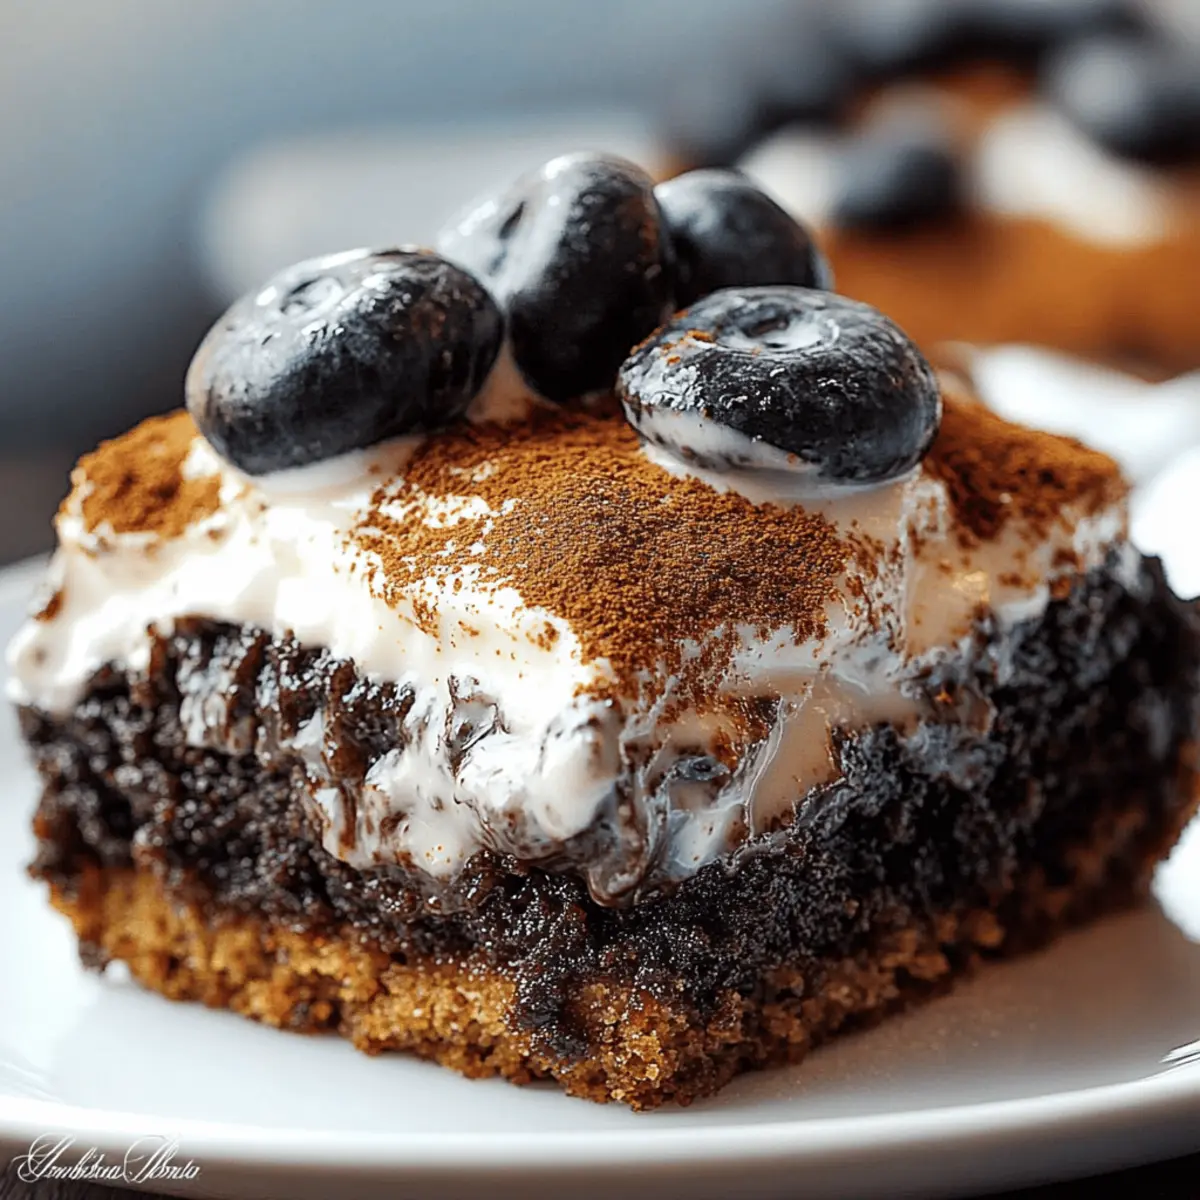
As I scooped the last piece of my Oreo Dump Cake, I felt a wave of delight wash over me—what a brilliant way to indulge! This easy dessert is a game changer, bringing together the crunchy goodness of crushed Oreos with moist, chocolate cake and a rich layer of gooey sweetened condensed milk. With minimal prep and maximum yum, it’s perfect for those nights when you need a quick fix for your sweet tooth or when entertaining friends without the fuss. Plus, you can easily switch up the flavors by experimenting with different Oreo varieties! Ready to discover how simple it is to elevate dessert time? Let's dive into this mouthwatering recipe together!
Why Is Oreo Dump Cake So Irresistible?
Simplicity: This dessert is as easy as it gets! Just layer ingredients, bake, and enjoy—a perfect solution for busy days or spontaneous gatherings.
Decadent Flavor: The combination of crunchy Oreos and gooey chocolate cake delivers a heavenly fusion of textures and tastes, satisfying any sweet craving.
Versatility: Feel free to experiment by swapping the chocolate cake mix for red velvet or vanilla, or try different Oreo flavors for a unique twist that keeps dessert exciting!
Crowd-Pleaser: Whether it's a casual family dinner or a festive get-together, this dump cake is bound to impress guests and leave them coming back for seconds.
Make-Ahead Marvel: Prepare it ahead of time and refrigerate—just reheat lightly for an effortless dessert that’s always ready to serve. Enjoy this no-fuss delight and consider checking out our Expert Tips for the best results with your Oreo Dump Cake!
Oreo Dump Cake Ingredients
• Ready to whip up a delicious Oreo Dump Cake? Here’s what you’ll need!
For the Base Layer
- Crushed Oreos – This essential ingredient provides the dessert's signature crust and a burst of cookie flavor. You can experiment with different flavored Oreos like mint or peanut butter!
For the Gooey Filling
- Sweetened Condensed Milk – Imparts moisture and sweetness, creating that irresistible gooey center; don’t substitute it with evaporated milk!
For the Cake Layer
- Chocolate Cake Mix – Necessary for structure and to infuse rich chocolate flavor into your dump cake; if you're feeling adventurous, red velvet or vanilla cake mix can add a fun twist!
For Richness
- Unsalted Butter (melted) – Adds richness and helps achieve a delightful crispy topping; drizzle it evenly across the cake mix for the best results.
For Topping
- Whole or Mini Oreos (for topping) – These add extra flavor and a delightful crunch; they're optional but highly recommended for that fun presentation.
Now that you have the ingredients ready, let’s move on to crafting this unforgettable Oreo Dump Cake!
Step‑by‑Step Instructions for Oreo Dump Cake
Step 1: Preheat and Prepare
Begin by preheating your oven to 350°F (175°C). As the oven warms, take a 9×13-inch baking dish and grease it with non-stick spray or a light coat of butter. This will help prevent the Oreo Dump Cake from sticking, allowing for easy serving later. Set the dish aside and get ready for those delightful layers.
Step 2: Create the Base Layer
Evenly spread the crushed Oreos across the bottom of the prepared baking dish. Use a spatula to flatten them gently, ensuring a solid base for your Oreo Dump Cake. The rich chocolate and cream flavor from the Oreos will form the foundation of this decadent dessert, setting the stage for its gooey goodness.
Step 3: Add the Sweetened Condensed Milk
Pour the sweetened condensed milk over the layer of crushed Oreos. It's important not to mix the layers at this stage—just let the milk flow evenly, soaking into the cookies without disturbing the base. This creamy layer is what gives the Oreo Dump Cake its irresistible, gooey center.
Step 4: Sprinkle the Cake Mix
Next, sprinkle the dry chocolate cake mix evenly over the sweetened condensed milk. Avoid mixing it in; you'll want to keep those distinct layers. This dry cake mix will eventually bake into a rich, chocolaty layer, complementing the oreo crust underneath beautifully.
Step 5: Drizzle the Melted Butter
Drizzle the melted unsalted butter evenly over the top of the cake mix. Aim to cover as much surface area as possible for that perfect crispy topping. The melted butter helps to create a delightful texture as it bakes, adding richness and facilitating that melt-in-your-mouth experience you'll love.
Step 6: Top with Extra Oreos
Optional but delicious, sprinkle additional crushed Oreos or whole Mini Oreos on top of the cake mix. This step adds a delightful crunch and enhances the presentation of your Oreo Dump Cake, making it even more tempting for anyone facing this indulgent treat.
Step 7: Bake to Perfection
Place your loaded baking dish in the preheated oven and bake uncovered for 35-40 minutes. Look for the edges to become bubbly and the top to be set and lightly golden. The aroma of chocolate and cookies will fill your kitchen, enticing everyone nearby.
Step 8: Cool Before Serving
Once baked, remove the Oreo Dump Cake from the oven and let it rest for 10-15 minutes. This resting period is crucial as it allows the layers to settle, making it easier to scoop and serve. The center should be soft and gooey, offering a perfect balance to the crispy top layer. Enjoy!
What to Serve with Easy Oreo Dump Cake
Dive into a delightful dessert experience that pairs beautifully with this crowd-pleasing indulgence!
-
Vanilla Ice Cream: Creamy and cool, it perfectly contrasts the warm, gooey cake while enhancing its rich chocolate flavor.
-
Whipped Cream: Light and fluffy, it adds an airy touch that balances the dense, indulgent qualities of the Oreo Dump Cake.
-
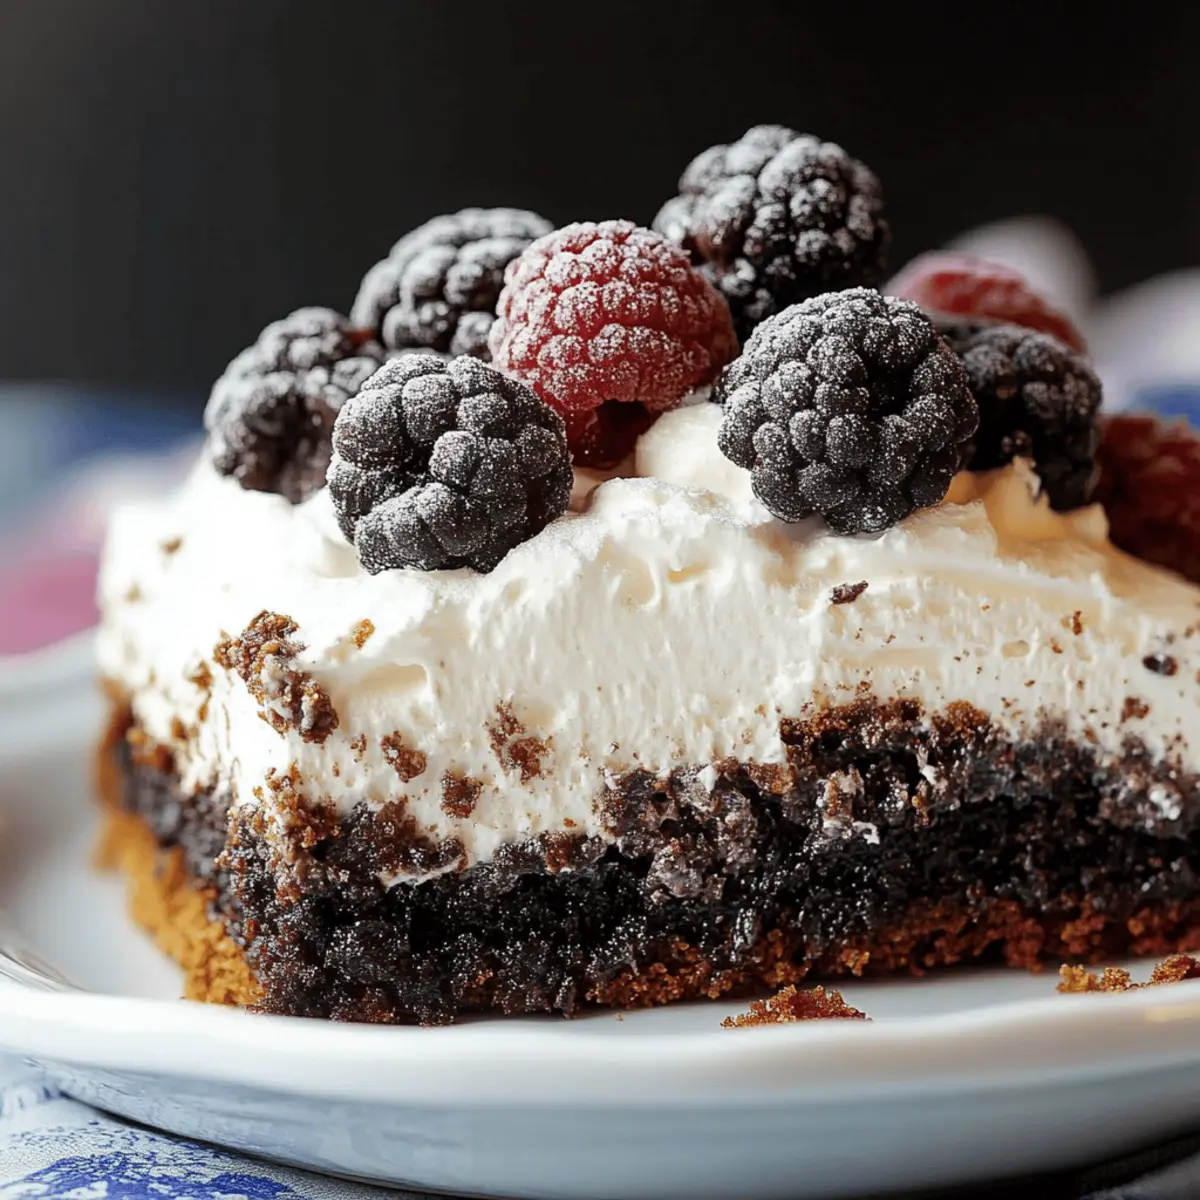
Fresh Berries: A handful of juicy strawberries or raspberries provides a refreshing burst of tartness, cutting through the sweetness harmoniously.
-
Chocolate Syrup: Drizzling this silky sauce over each slice accentuates the chocolatey goodness, elevating the dessert's overall presentation.
-
Caramel Sauce: Its buttery richness complements the chocolate and Oreos wonderfully, introducing another layer of decadent flavor.
-
Drinks: Serve with a glass of cold milk or your favorite dessert wine for a sophisticated pairing that enhances the experience.
These pairings create a symphony of flavors and textures, transforming your simple Oreo Dump Cake into a delightful feast!
How to Store and Freeze Oreo Dump Cake
Fridge: Keep the Oreo Dump Cake tightly covered with plastic wrap or in an airtight container. It will stay fresh for up to 3 days, making it perfect for leftovers!
Freezer: For longer storage, cut the cake into portions and wrap each piece individually in plastic wrap before placing them in a freezer-safe bag. This way, they’ll last for up to 3 months.
Reheating: To enjoy your frozen Oreo Dump Cake, simply thaw it in the fridge overnight and reheat in the microwave for about 15-20 seconds before serving. This will restore its gooey goodness.
Make-Ahead Tip: Feel free to prepare the Oreo Dump Cake a day in advance! Just keep it stored in the fridge until you’re ready to serve, ensuring maximum freshness and flavor.
Oreo Dump Cake Variations to Explore
Want to make your Oreo Dump Cake even more exciting? Here are some delightful twists that will elevate your dessert game and tantalize your taste buds!
-
Minty Fresh: Swap regular Oreos for mint-flavored ones to create a refreshing and cool twist on this classic dessert. The mint will give your cake a delightful new festive feel!
-
Peanut Butter Bliss: Use peanut butter Oreos and add a layer of crushed peanuts for a nutty flavor explosion. The combination of chocolate and peanut butter is always a winner!
-
Caramel Drizzle: Drizzle caramel sauce over the sweetened condensed milk for a sweet and salty layer. It adds a delightful richness that contrasts beautifully with the chocolate and cookies.
-
Red Velvet Surprise: Replace chocolate cake mix with red velvet mix for a visually stunning cake. The rich red contrasts wonderfully with the Oreo layers, making it almost too pretty to eat!
-
Chocolate Chip Addition: Add semi-sweet or dark chocolate chips between the layers for an extra chocolatey experience. Each bite will be filled with gooey pockets of chocolate!
-
Nutty Crunch: For added texture, sprinkle chopped walnuts or pecans over the cake mix before drizzling with butter. The nuts will provide a delightful crunch!
-
Spiced Up: Mix in a teaspoon of cinnamon or nutmeg to the chocolate cake mix for a warm, spiced flavor. Perfect for fall gatherings or cozy nights in!
-
Berry Goodness: Serve with fresh berries or layer crushed strawberries on top for a fruity twist. The tartness of the berries complements the sweetness of the cake beautifully.
These variations showcase just how versatile your Oreo Dump Cake can be! Feel free to combine ideas and let your imagination run wild. For more delicious recipes that keep your dessert game strong, check out our Expert Tips for additional baking inspiration!
Expert Tips for Oreo Dump Cake
-
Layer Wisely: Ensure not to mix the layers, as this maintains the cake's structure. Each layer contributes unique flavors and textures!
-
Use Real Milk: Opt for sweetened condensed milk, not evaporated milk. The texture of your Oreo Dump Cake relies heavily on this ingredient’s rich creaminess.
-
Don’t Rush Cooling: Allow the cake to rest for at least 10-15 minutes after baking. This step is crucial for achieving that ideal gooey texture in the center.
-
Experiment with Flavors: Feel free to switch up your Oreo flavors or cake mixes for a delightful twist on this classic dessert.
-
Check for Doneness: Keep an eye on the baking time; you want bubbly edges and a set top, which means your Oreo Dump Cake is ready to enjoy!
Make Ahead Options
These Oreo Dump Cake is perfect for meal prep, allowing you to enjoy a decadent dessert without the last-minute rush! You can prepare the layers (crushed Oreos, sweetened condensed milk, and cake mix) up to 24 hours in advance—just layer the ingredients in your baking dish as directed, cover tightly with plastic wrap, and refrigerate. To maintain that delicious gooey texture, avoid adding the melted butter and additional Oreos until you're ready to bake. When it’s time to serve, simply drizzle the melted butter on top, add the extra Oreos, and bake as instructed. This way, you’ll have a show-stopping treat with minimal effort on your busy days!
Oreo Dump Cake Recipe FAQs
What type of Oreos should I use for the best flavor?
Absolutely! The classic crushed Oreos are perfect for the base layer, but feel free to experiment with flavored Oreos such as mint or peanut butter. These variations can add a fun twist to your Oreo Dump Cake, making it a delightful surprise for anyone taking a bite!
How do I store leftover Oreo Dump Cake?
To keep your Oreo Dump Cake fresh, cover it tightly with plastic wrap or place it in an airtight container. It will stay delicious for up to 3 days in the refrigerator. Just pop it in the fridge after it cools down, and enjoy a sweet treat at your convenience!
Can I freeze Oreo Dump Cake, and how?
Yes! For longer storage, it's best to cut the cake into portions first. Wrap each piece individually in plastic wrap, then store them in a freezer-safe bag. This method ensures your Oreo Dump Cake will be good for up to 3 months. When you're ready to enjoy a piece, simply thaw it overnight in the fridge and microwave it for about 15-20 seconds for that gooey goodness!
What should I do if my dump cake turns out too dry?
If you find your Oreo Dump Cake is a bit too dry, it may be due to overbaking or insufficient moisture. To prevent this next time, always keep an eye on it while baking—look for bubbly edges and a lightly set top. The resting period is also essential, so don’t skip that; it helps keep the center soft and gooey.
Is this recipe pet-friendly?
While Oreos might make humans smile, they contain ingredients that aren’t safe for pets, including chocolate and sugar. So, it's best to keep this indulgent Oreo Dump Cake away from furry friends. Always check with your vet if you're unsure about any human foods before sharing.
Can I make this dessert in advance?
Very! The Oreo Dump Cake is a fantastic make-ahead dessert. Just prepare it a day in advance, cover it, and refrigerate. When it's time to serve, you can reheat it lightly to bring back that happy, gooey center, making it an effortless treat for any occasion. Enjoy your baking!
Indulgent Oreo Dump Cake: Effortless Chocolate Bliss
Ingredients
Equipment
Method
- Preheat your oven to 350°F (175°C) and grease a 9x13-inch baking dish.
- Evenly spread the crushed Oreos across the bottom of the prepared baking dish.
- Pour the sweetened condensed milk over the layer of crushed Oreos without mixing.
- Sprinkle the dry chocolate cake mix evenly over the sweetened condensed milk.
- Drizzle the melted unsalted butter evenly over the top of the cake mix.
- Sprinkle additional crushed Oreos or whole Mini Oreos on top of the cake mix.
- Bake uncovered for 35-40 minutes until the edges are bubbly and the top is set.
- Let the Oreo Dump Cake rest for 10-15 minutes before serving.


Leave a Reply