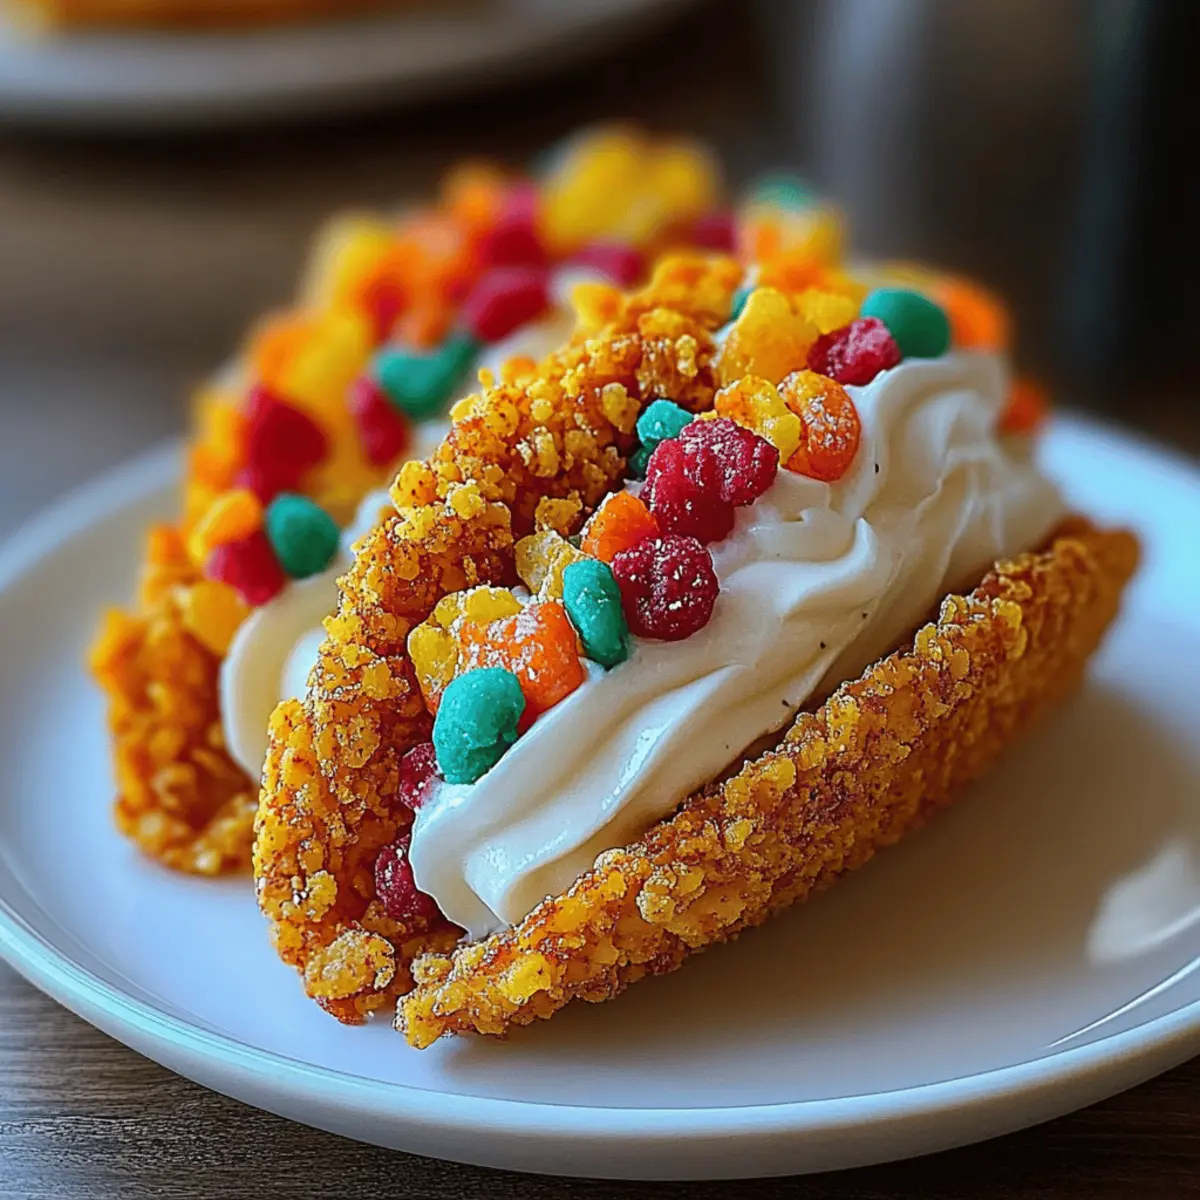
As I walked through the local market, a rainbow of colors caught my eye, and my mind immediately raced back to childhood memories of Saturday morning cartoons and sweet breakfast treats. That vibrant nostalgia inspired me to create Fruity Pebbles Cheesecake Tacos—a playful dessert that combines the whimsy of cereal with the creamy indulgence of cheesecake. This recipe is a perfect option for those craving a quick, crowd-pleasing dessert that’s sure to sparkle on any table. Not only is it a delightful twist on traditional tacos, but it’s also a fun way to engage the whole family in creating something delicious together. Imagine the looks on your loved ones’ faces as they take that first bite! So, are you ready to channel your inner child and dive into this sweet sensation? Let’s make dessert memorable!
Why Are These Tacos So Special?
Nostalgia in Every Bite: These Fruity Pebbles Cheesecake Tacos bring back cherished childhood memories, making dessert a joyful experience for all ages.
Colorful and Fun: Their vibrant appearance is sure to dazzle at any gathering—perfect for parties or family celebrations!
Simple Prep: With just a few easy steps, this uncomplicated recipe lets you whip up a drool-worthy dessert in no time.
Versatile Treat: Whether paired with a milkshake or fresh fruits, these tacos are adaptable to suit any occasion, satisfying your sweet tooth perfectly.
Crowd-Pleaser: Their unique presentation and delightful flavors make these tacos a surefire hit, sparking smiles and delicious conversation at your table.
Fruity Pebbles Cheesecake Tacos Ingredients
For the Taco Shells
- Fruity Pebbles cereal – This colorful cereal gives the shells a crunchy texture and nostalgic flavor.
- Mini marshmallows – Provides sweetness and binds the cereal together for easy shaping.
- Unsalted butter – Adds richness and helps with the melting process to create a perfect mixture.
For the Cheesecake Filling
- Cream cheese – The base for the filling that gives it its creamy, tangy flavor.
- Powdered sugar – Sweetens the filling smoothly without the graininess of granulated sugar.
- Vanilla extract – Enhances the flavor, adding a warm note that complements the cheesecake.
- Heavy whipping cream – Whipped to stiff peaks, this ingredient adds lightness and fluffiness to the filling.
Optional Garnishes
- Extra Fruity Pebbles – A playful topping that boosts presentation and adds crunch.
- Sprinkles – For an eye-catching finish that makes these tacos even more festive.
These Fruity Pebbles Cheesecake Tacos are not just a treat; they're a delightful adventure in every bite!
Step‑by‑Step Instructions for Fruity Pebbles Cheesecake Tacos
Step 1: Melt the Marshmallows
In a medium saucepan over low heat, melt 2 tablespoons of unsalted butter. Once the butter is fully melted, add 2 cups of mini marshmallows, stirring continuously for about 3-5 minutes until the mixture is smooth and fully melted. This creates the perfect gooey binding for your Fruity Pebbles.
Step 2: Combine with Cereal
Remove the saucepan from heat and immediately fold in 3 cups of Fruity Pebbles cereal using a spatula. Ensure that the cereal is evenly coated with the melted marshmallow mixture. This colorful and crunchy blend is essential for forming the taco shells, so mix well until you see a vibrant, sticky mass.
Step 3: Form the Taco Shells
Grab a greased muffin tin or taco mold, and scoop spoonfuls of the warm cereal mixture. Firmly press it over the backside of the tin or mold to create shell shapes, ensuring they are thick enough to hold the cheesecakey goodness. Work quickly, as the mixture will start to set as it cools.
Step 4: Cool the Shells
Allow the formed taco shells to cool at room temperature for 20-30 minutes, or until they are firm and hold their shape. They should feel sturdy and slightly crisp to the touch, making them the perfect vessel for your Fruity Pebbles Cheesecake filling.
Step 5: Make the Cream Cheese Filling
In a mixing bowl, beat 8 ounces of softened cream cheese until smooth and creamy, which should take about 2 minutes. Gradually add 1 cup of powdered sugar and 1 teaspoon of vanilla extract, mixing until fully combined and free of lumps. This luscious filling will be a delightful contrast to your crunchy taco shells.
Step 6: Whip the Heavy Cream
In a separate bowl, whip 1 cup of heavy whipping cream to stiff peaks, which will take around 3-5 minutes with an electric mixer on high speed. The whipped cream should stand tall and form peaks without drooping, creating a light and airy texture for your cheesecake filling.
Step 7: Combine Fillings
Gently fold the whipped cream into the cream cheese mixture using a spatula. Be careful to maintain the volume of the whipped cream, as this lightens the filling and makes it fluffy. Continue to fold until the mixture is smooth and fully combined, creating a rich and creamy filling for your taco shells.
Step 8: Pipe the Filling
Transfer the cream cheese filling into a piping bag for easy application. Carefully pipe the filling directly into the cooled taco shells, filling them generously but leaving a little space at the top for garnishes. The combination of the fruity shells and creamy filling is going to be irresistibly delicious!
Step 9: Add Final Touches
Sprinkle extra Fruity Pebbles or colorful sprinkles on top of the filled tacos for an eye-catching and festive look. This adds a fun crunch and a burst of color, perfect for making your Fruity Pebbles Cheesecake Tacos even more appealing to your family and friends.
Step 10: Chill Before Serving
Finally, pop the assembled tacos into the refrigerator and let them chill for at least 30 minutes. This step allows the filling to set up nicely, making each bite a dreamy blend of flavors and textures. Once chilled, your Fruity Pebbles Cheesecake Tacos are ready to delight everyone at the table!
Expert Tips for Fruity Pebbles Cheesecake Tacos
Perfectly Crisp Shells: Ensure your taco shells are thick enough when pressing the mixture into molds. Thin shells may break when filled.
Avoid Sticky Mixture: Allow the marshmallow and butter mixture to cool slightly before mixing in the Fruity Pebbles. This prevents a gooey mess!
Whip with Care: When whipping the cream, make sure to reach stiff peaks, which will result in a light and fluffy filling that gives your Fruity Pebbles Cheesecake Tacos a delightful texture.
Piping Bag Pro: Use a piping bag for the filling to achieve a neat and beautiful presentation. If you don't have one, a ziplock bag with a corner snipped works too!
Chill to Set: Remember, chilling the tacos for at least 30 minutes is key. This helps the filling firm up, making your tacos easier to eat and more cohesive in flavor.
Storage Tips for Fruity Pebbles Cheesecake Tacos
Fridge: Store leftover Fruity Pebbles Cheesecake Tacos in an airtight container for up to 2 days to maintain freshness and prevent sogginess.
Room Temperature: If you've made the taco shells ahead of time, keep them at room temperature in an airtight container for up to 1 day to avoid moisture.
Freezer: For longer storage, freeze the taco shells without filling for up to 3 months. Just ensure they're tightly wrapped to prevent freezer burn.
Reheating: If desired, re-crisp the shells in a warm oven (350°F) for about 5 minutes before filling them again.
Make Ahead Options
These Fruity Pebbles Cheesecake Tacos are perfect for meal prep, allowing you to save time and reduce stress on busy nights! You can prepare the taco shells up to 24 hours in advance; simply store them at room temperature in an airtight container to maintain their crunch. Additionally, you can make the cheesecake filling a day ahead as well; just refrigerate it until you're ready to assemble. When it's time to serve, simply pipe the filling into the cooled taco shells, garnish with extra Fruity Pebbles or sprinkles, and chill for an additional 30 minutes before serving for that fresh taste. With these make-ahead tips, you'll enjoy a fun, tasty dessert without any last-minute rush!
Fruity Pebbles Cheesecake Tacos Variations
Feel free to get creative and customize your Fruity Pebbles Cheesecake Tacos with these fun and flavorful twists!
- Gluten-Free: Use a gluten-free version of Fruity Pebbles or substitute with crispy rice cereal for the same crunch.
- Dairy-Free: Opt for vegan cream cheese and coconut cream for a flavorful non-dairy filling that satisfies.
- Add a Zing: Mix in a teaspoon of lemon zest into the filling for a refreshing citrus burst that brightens every bite.
- Chocolate Lovers: Drizzle melted chocolate or sprinkle cocoa powder over the filling before adding the Fruity Pebbles garnish for a decadent twist.
- Nutty Crunch: Incorporate finely chopped almonds or peanuts into your cereal mixture for added texture and a nutty flavor.
- Spicy Kick: Add a pinch of cayenne or chili powder to the cheesecake filling for a surprising heat that balances the sweetness.
- Fruit-Infused: Fold in mashed bananas or crushed strawberries into the cream cheese mixture for a delicious fruity blend.
- Rainbow Layering: Alternate layers of filling with colorful fruit or jam inside the taco shells for a visually stunning creation that tastes as good as it looks.
Have fun experimenting with these variations, and let your taste buds guide you to the ultimate dessert delight!
What to Serve with Fruity Pebbles Cheesecake Tacos
Elevate your dessert experience with complementary flavors and textures that make every bite of these delightful tacos a celebration.
- Strawberry Milkshakes: Creamy and fruity, they add a nostalgic touch while balancing the sweetness of the tacos.
- Vanilla Milkshakes: A classic pairing, these shakes bring a creamy smoothness that pairs beautifully with the crunchy shells.
- Chilled Berries: Fresh strawberries, blueberries, or raspberries contrast the sweetness and add a refreshing element to each bite.
- Tropical Fruit Salad: Pineapple, kiwi, and mango offer bright, juicy flavors that complement the sweetness of the cheesecake filling perfectly.
- Rainbow Spritzers: A fun, fizzy drink with colorful fruit slices invigorates the palate and enhances the festive spirit of the dessert.
- Chocolate Dipping Sauce: Rich and indulgent, drizzling this over the tacos takes your sweet treat to the next level.
- Candy Coated Nuts: The crunchiness and subtle saltiness of these nuts provide a delightful contrast to the sweet, creamy filling.
- Ice Cream Sundaes: Go all out by serving a scoop of vanilla or fruity ice cream, topped with chocolate or caramel sauce, for a rich, creamy addition.
- Homemade Whipped Cream: Light and airy, a dollop on top allows for a customizable touch that enhances the dessert experience.
These pairings are sure to turn your Fruity Pebbles Cheesecake Tacos into a sensational feast for the senses!
Fruity Pebbles Cheesecake Tacos Recipe FAQs
How do I choose the right Fruity Pebbles cereal for this recipe?
Absolutely! When selecting Fruity Pebbles, look for a fresh box without any discoloration or stale smell. The cereal should be vibrant in color and free from clumps. Check the expiration date to ensure you're getting the best flavor and crunch!
How should I store leftover Fruity Pebbles Cheesecake Tacos?
For best results, store any leftover Fruity Pebbles Cheesecake Tacos in an airtight container in the refrigerator for up to 2 days. Assembling the tacos right before serving will maintain the tacos' crunchy texture—so if you need to save some, keep the shells and filling separate until you're ready to enjoy!
Can I freeze the taco shells?
Yes, you can! To freeze the taco shells, ensure they are completely cool, then wrap them individually in plastic wrap and place them in a freezer-safe bag or container. They can be stored for up to 3 months. When ready to use, allow them to thaw at room temperature, and you can even re-crisp them in a preheated oven at 350°F for about 5 minutes before filling.
What should I do if my taco shells are too soft or break easily?
Very! If your taco shells seem soft, it could be due to not pressing the cereal mixture firmly enough into the molds or not allowing them to cool completely. To troubleshoot, ensure you press down hard enough while forming the shells. If they’re already made, you can try re-crisping them in the oven at a low temperature (around 250°F) for about 10 minutes, just until they're firm enough to hold filling.
Are these Cheesecake Tacos suitable for people with allergies?
Definitely! To make these Fruity Pebbles Cheesecake Tacos more allergy-friendly, you can substitute the cream cheese with a dairy-free alternative and use gluten-free Fruity Pebbles for those with gluten sensitivities. Always check the labels for allergens and consider excluding mini marshmallows if there's an allergy to gelatin. Adjusting the recipe ensures everyone can enjoy this sweet treat!
Fruity Pebbles Cheesecake Tacos
Ingredients
Equipment
Method
- Melt the marshmallows by heating butter and mini marshmallows until smooth.
- Combine with cereal by folding in Fruity Pebbles until evenly coated.
- Form the taco shells by pressing the mixture into a greased muffin tin.
- Cool the shells at room temperature for 20-30 minutes until firm.
- Make the cream cheese filling by beating cream cheese, sugar, and vanilla until smooth.
- Whip the heavy cream to stiff peaks in a separate bowl.
- Combine fillings by gently folding whipped cream into the cream cheese mixture.
- Pipe the filling into the cooled taco shells using a piping bag.
- Add final touches by sprinkling extra Fruity Pebbles or sprinkles on top.
- Chill the tacos in the refrigerator for at least 30 minutes before serving.
Leave a Reply